How to Create and Manage Tasks
With StackWrap's tasking feature, you have the ability to create and publish tasks to your agents directly from within the platform. Whether you want to create tasks for a 90-day challenge, a listing to-do list, or any other type of tasks for your agents, this is an excellent tool to take advantage of.
There are two primary ways that you can create tasks. You can either create a task template, or you can publish one-off tasks to your users. Both options are explained below 😀
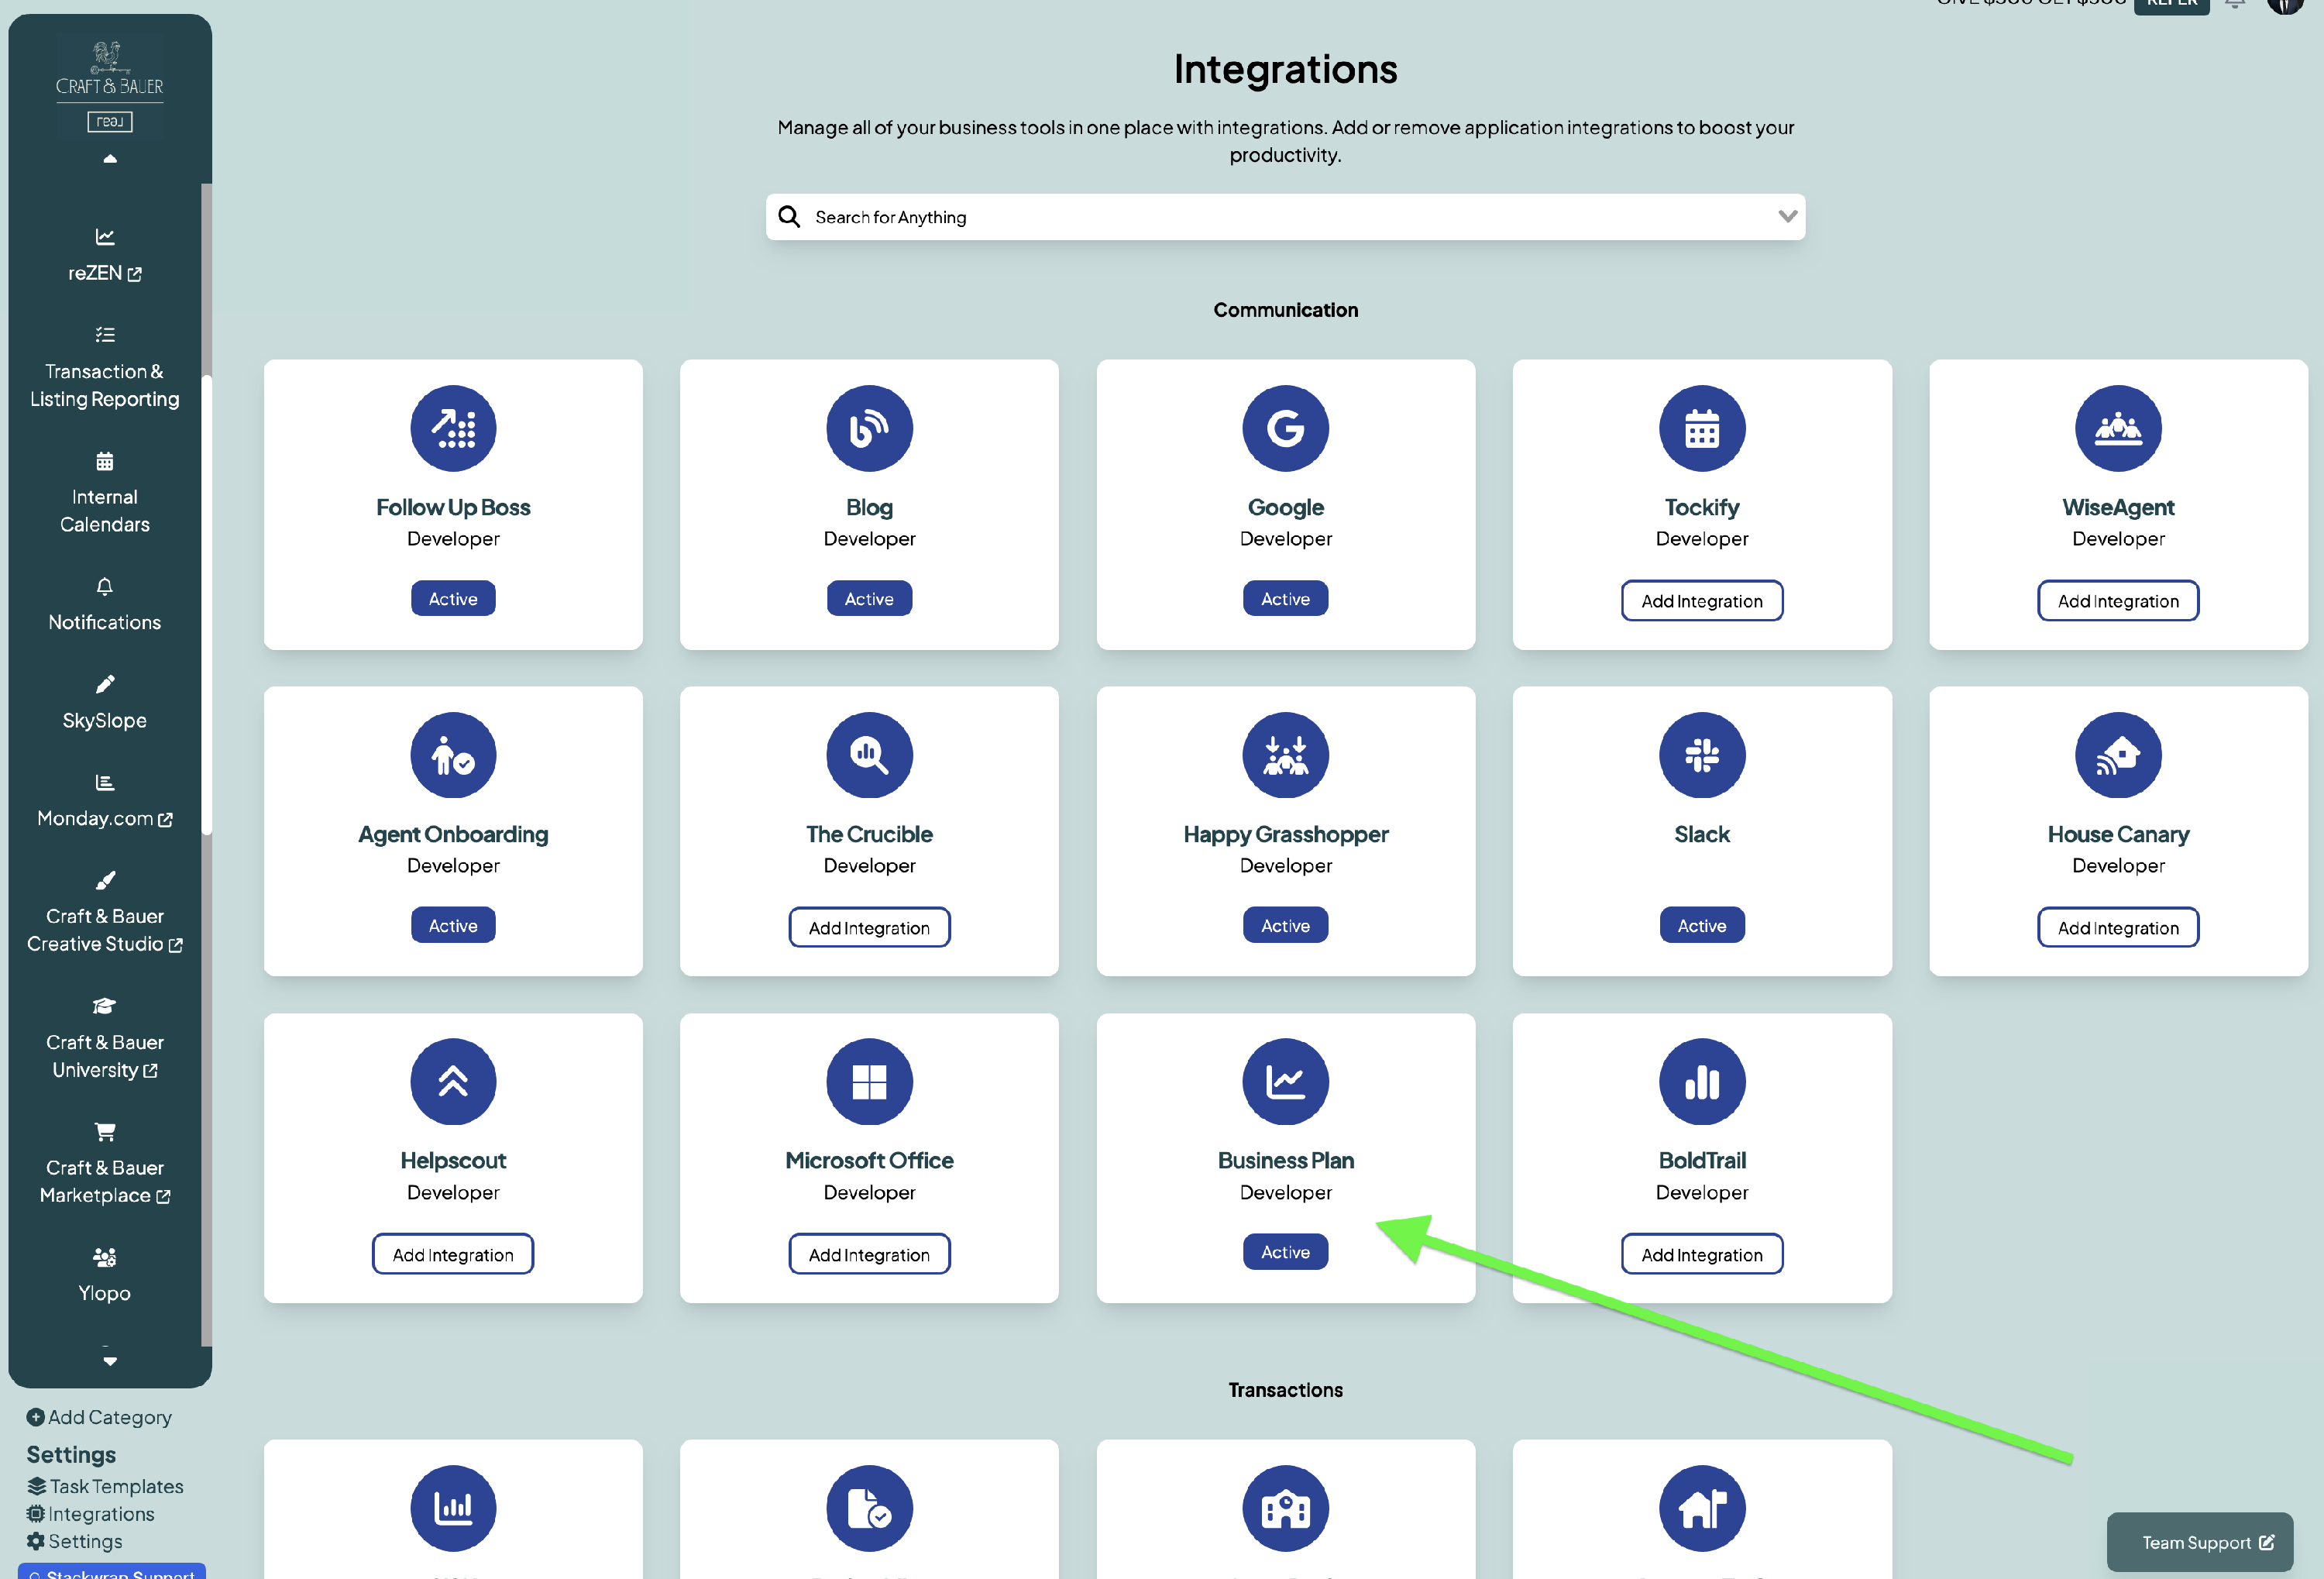
1) Enable the "Business Plan" Integration
Before you start creating task templates, make sure the Business Plan integration is toggled on. To do this, click on "Integrations" on the bottom left of your screen:
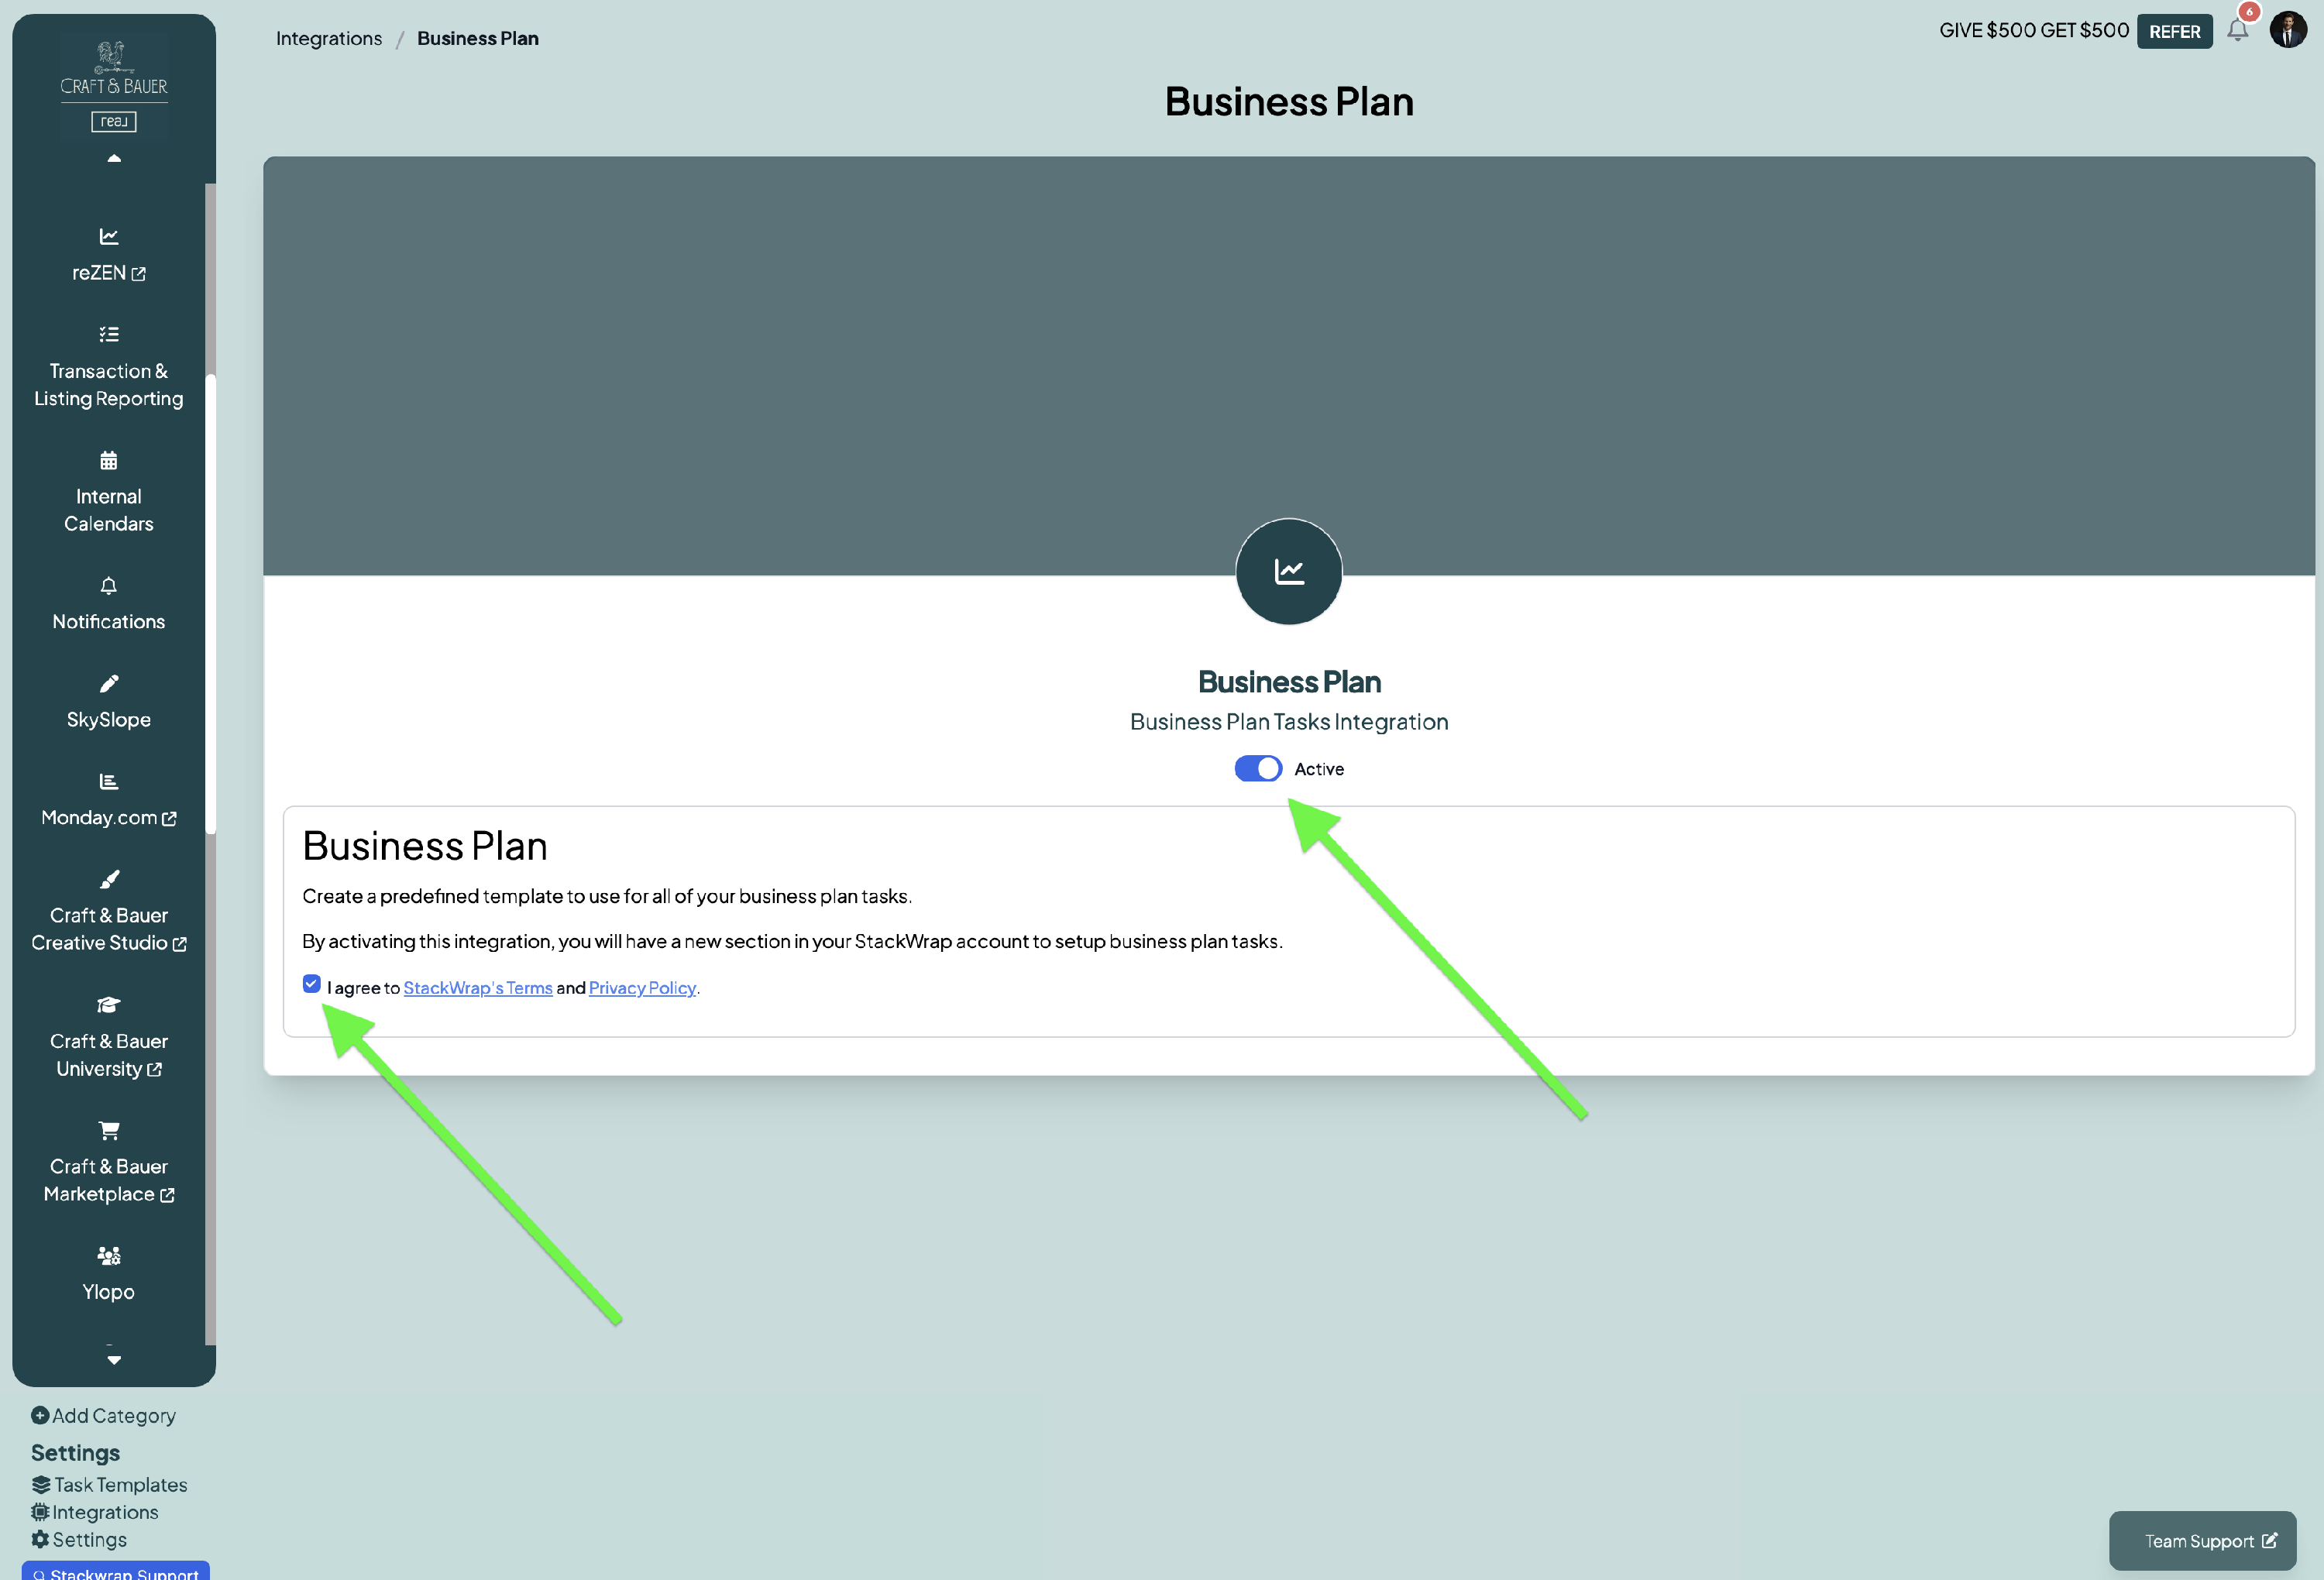
Then, click on "Business Plan" from the Integrations page:
Lastly, select the checkbox to agree to the terms and conditions. Then, toggle "Active":
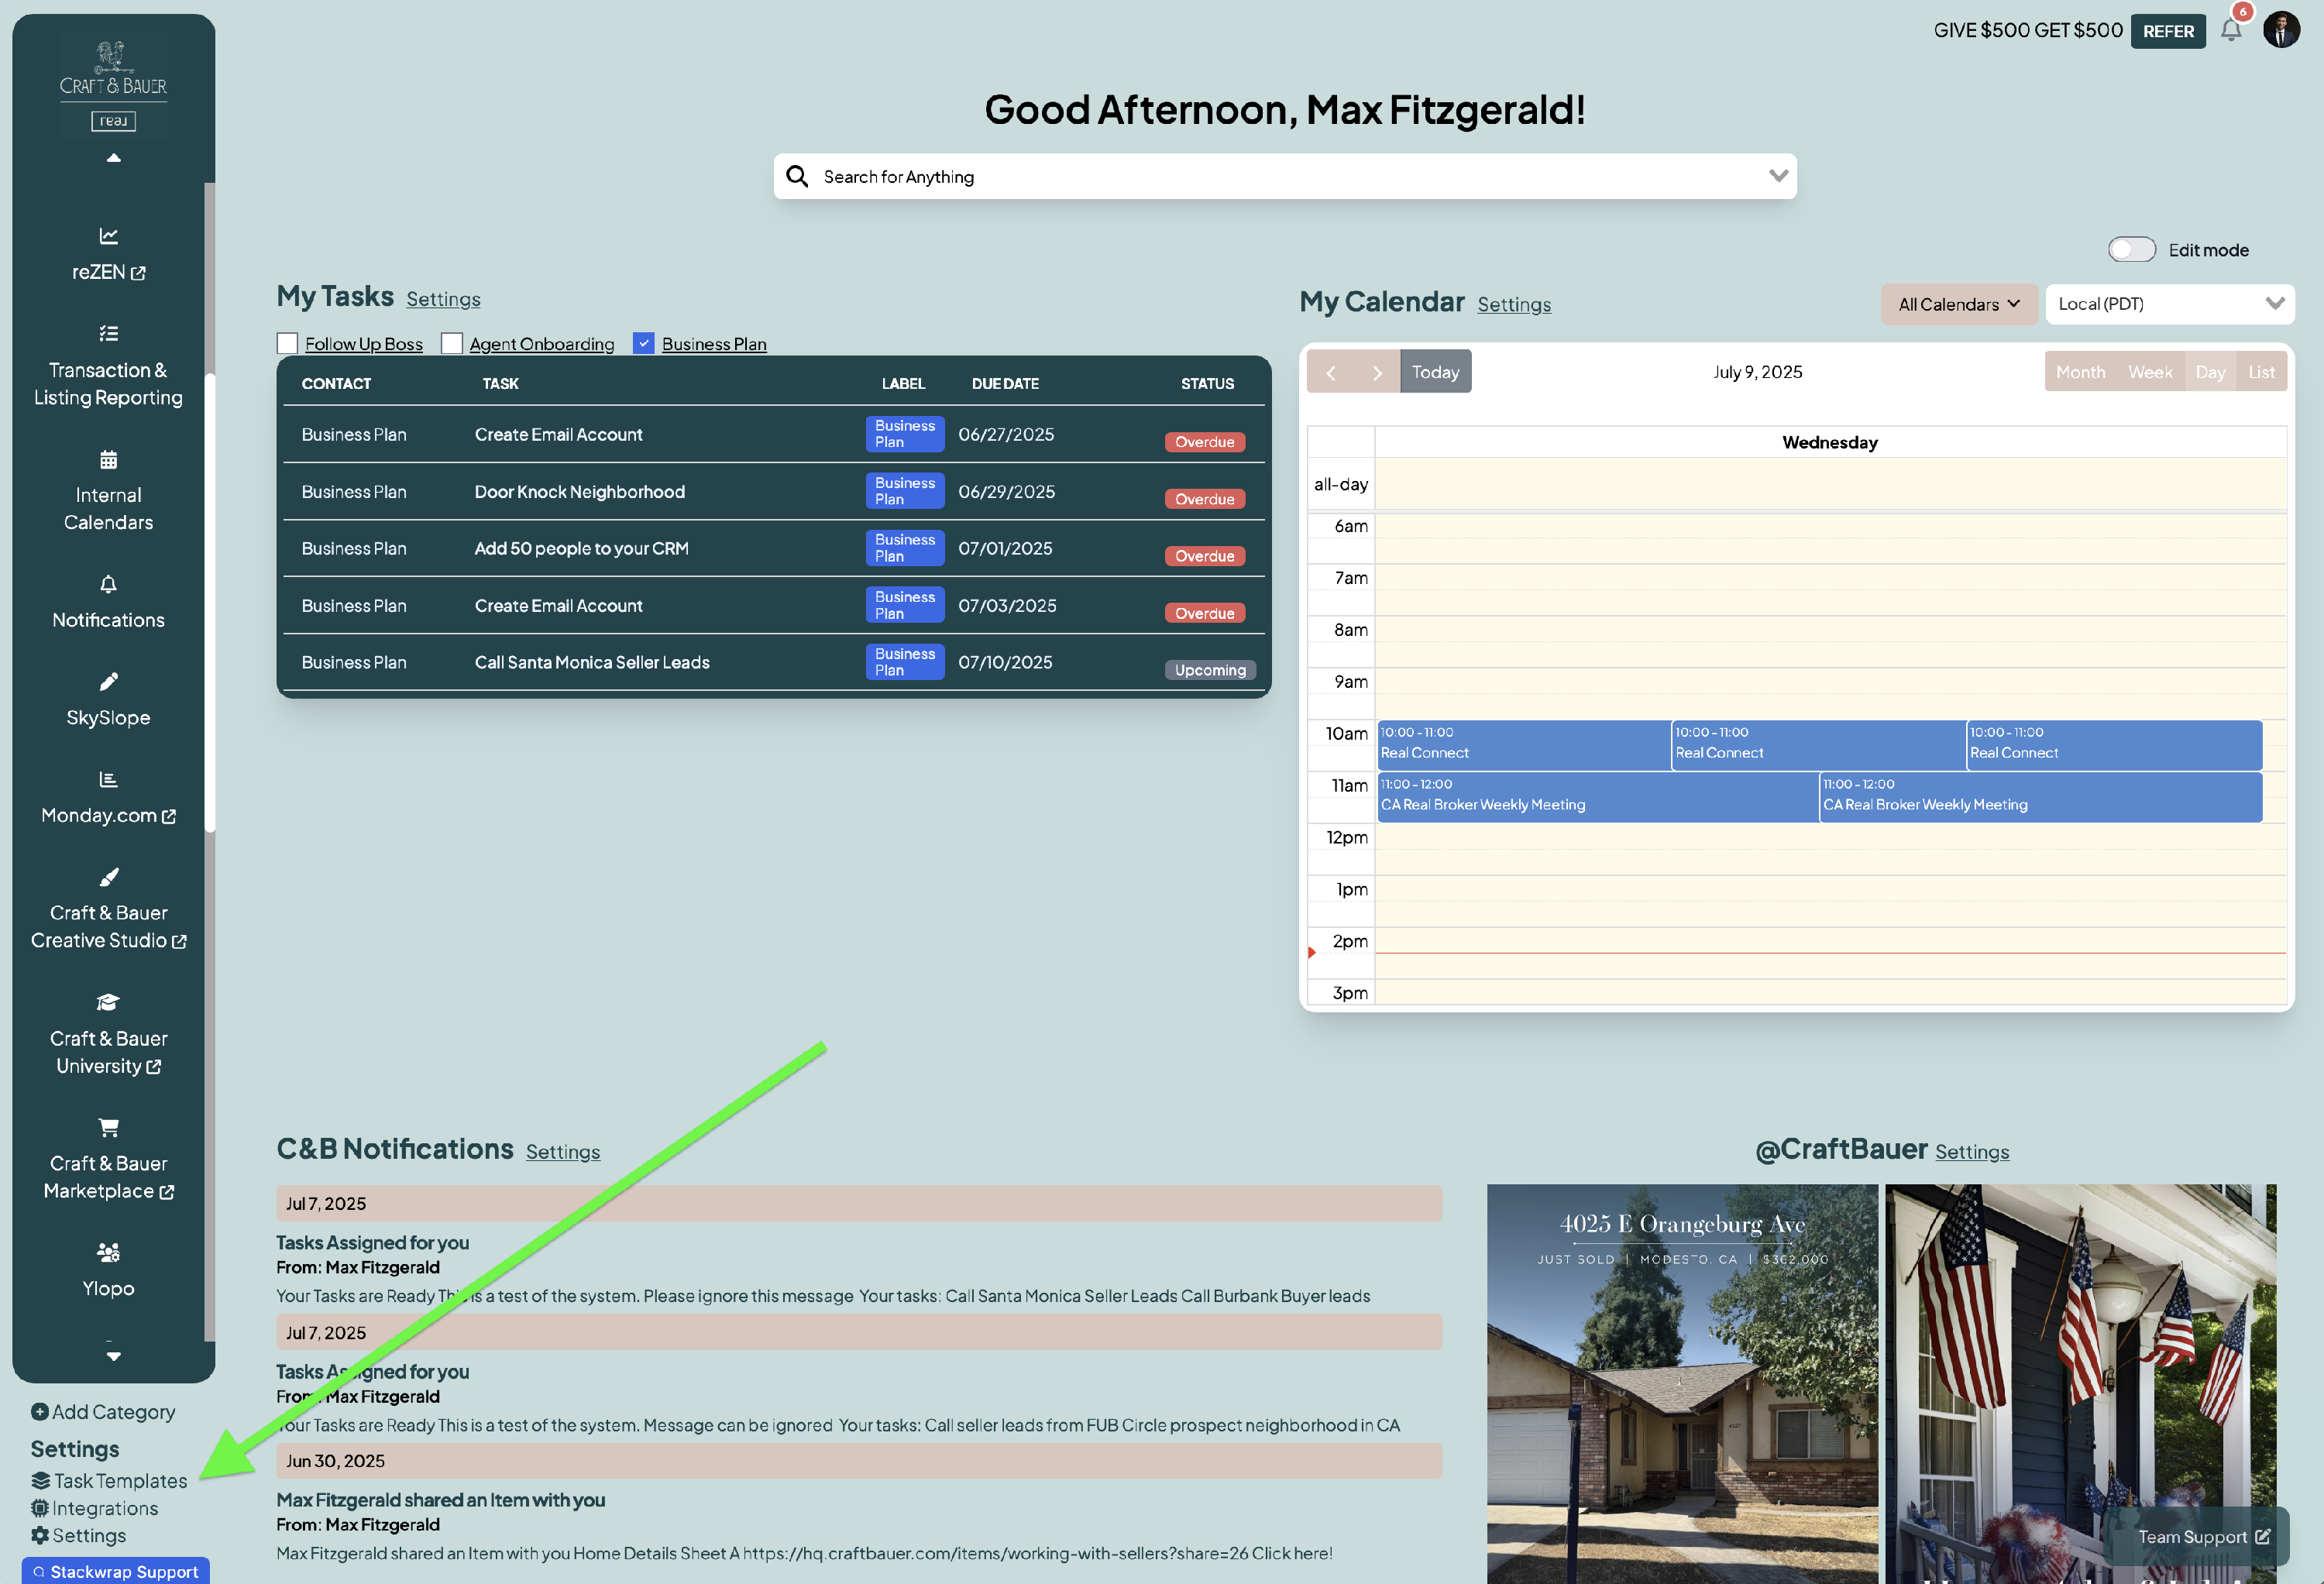
2) Once this is complete, then click on Task Template at the bottom left of your screen
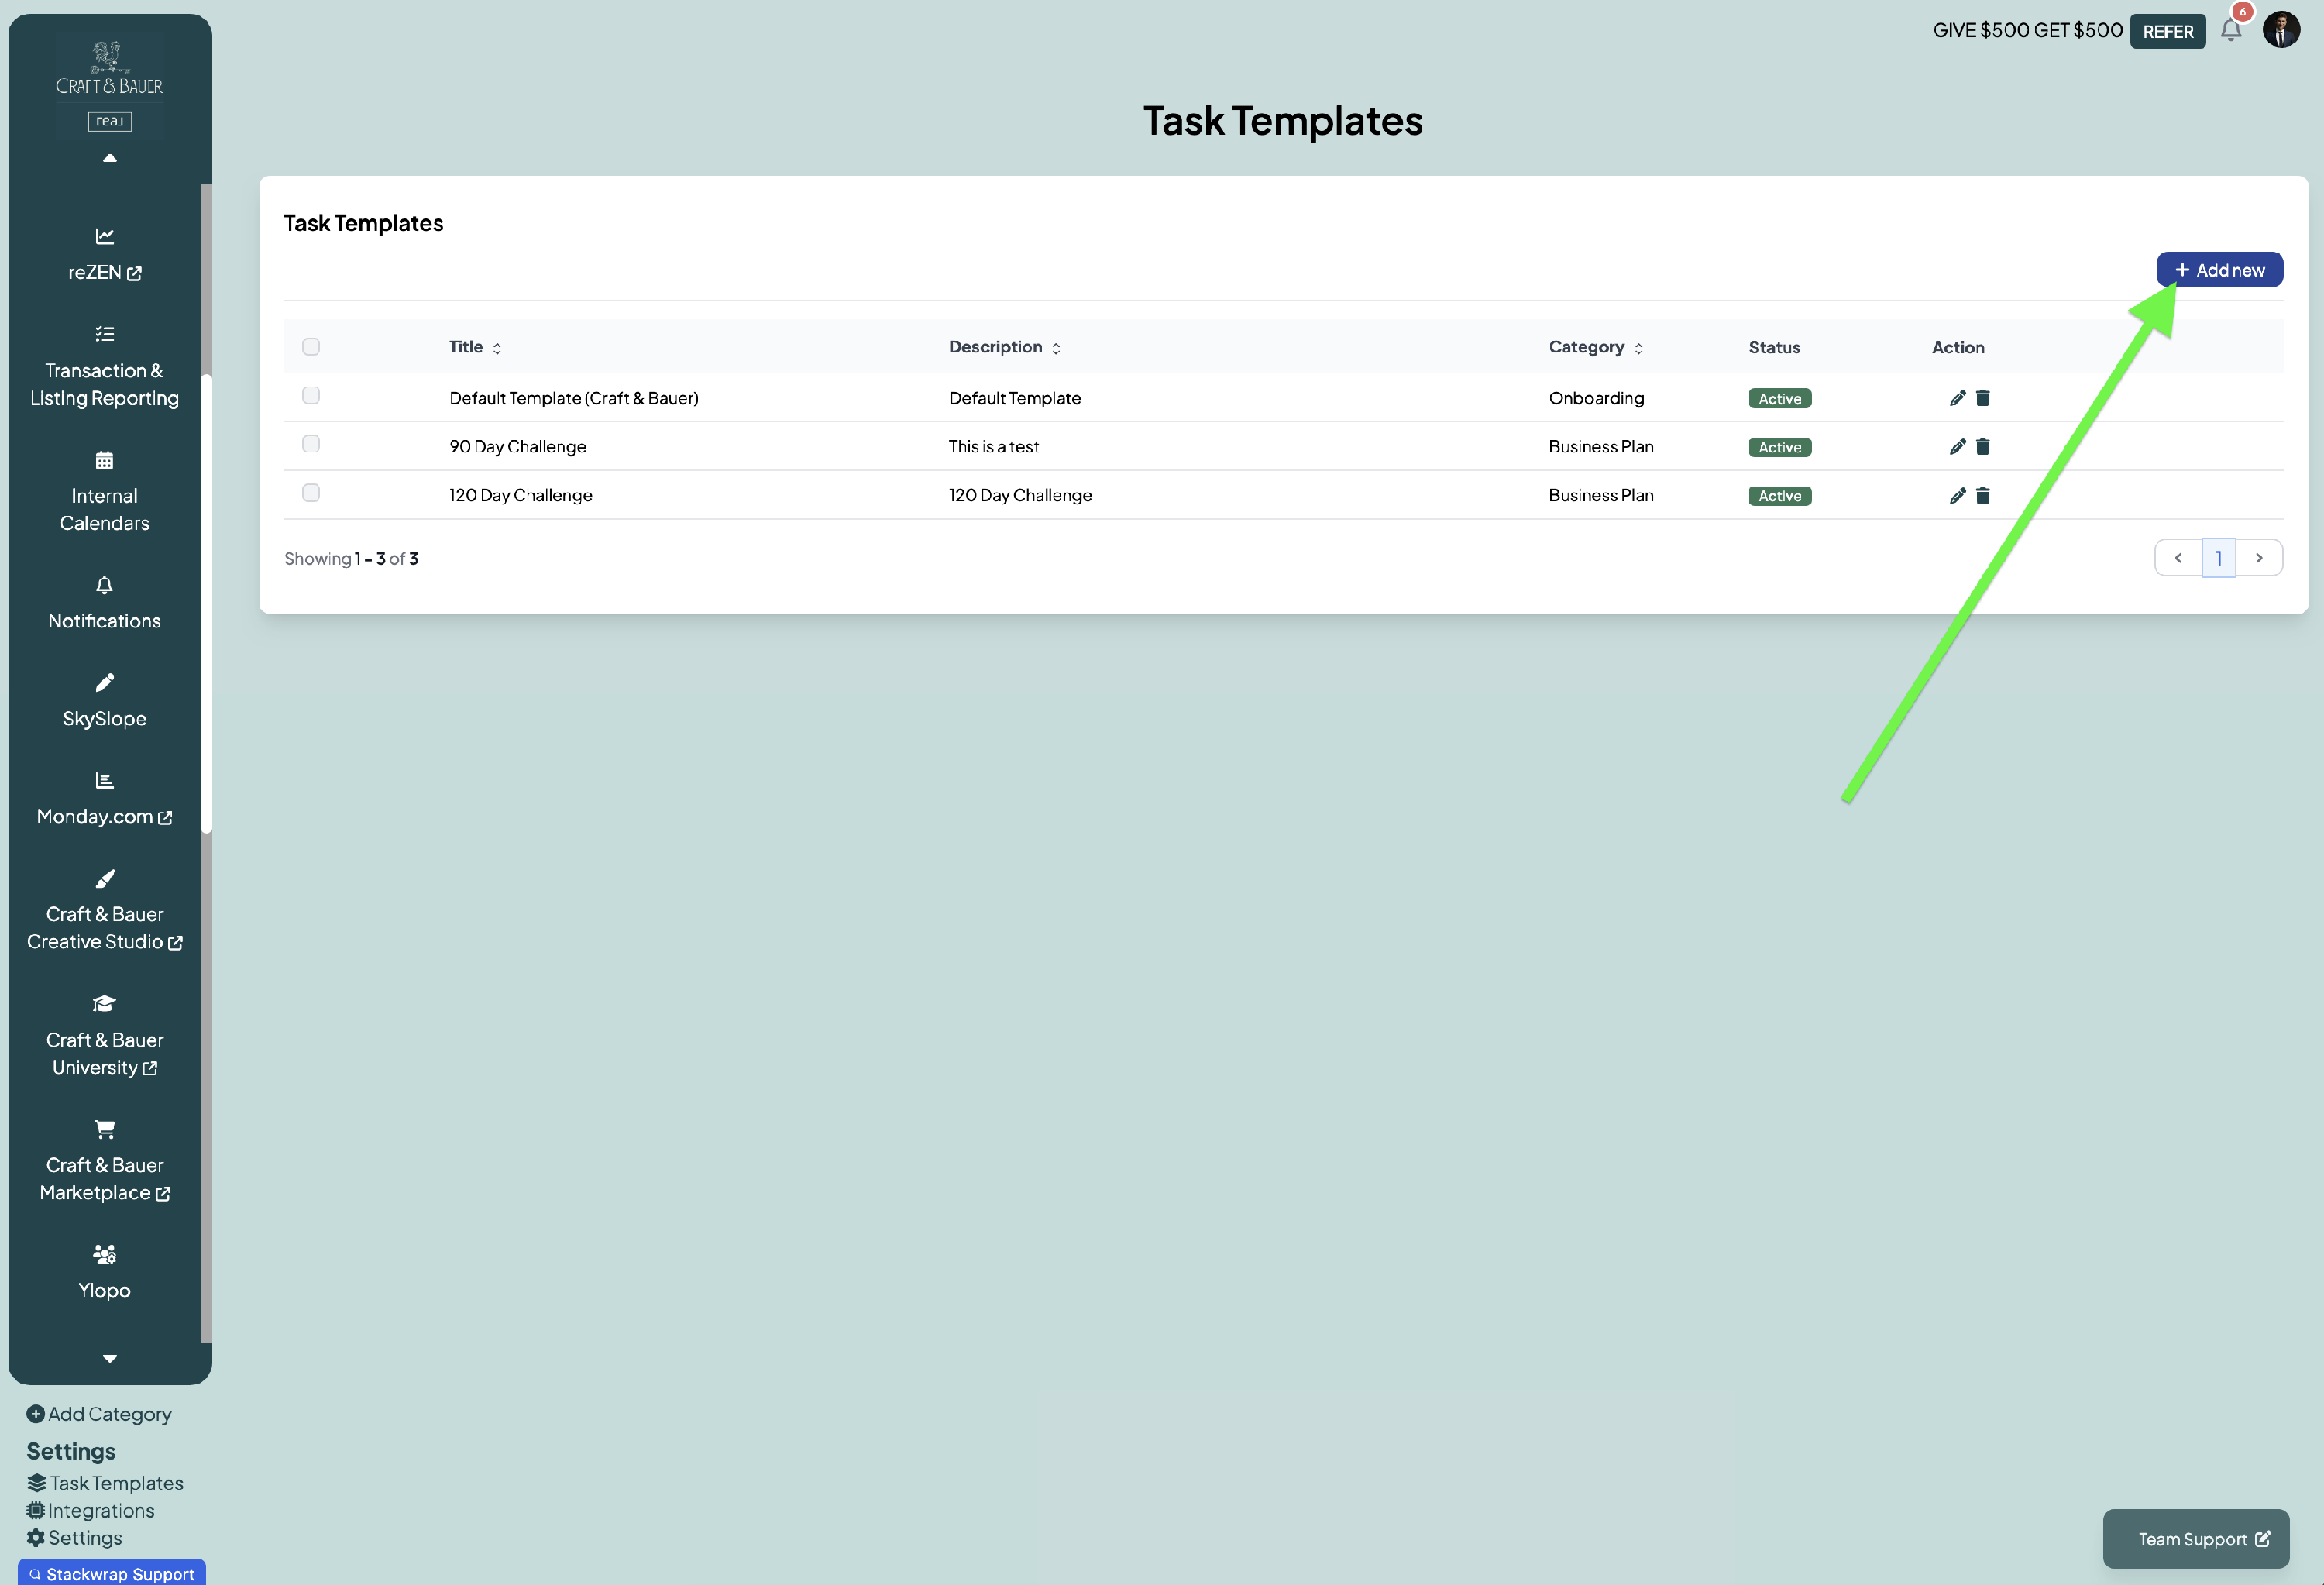
3) Create a Template
On this screen, you can see all of the task templates that have previously been created from within your account. To create a new template, select "Add New"
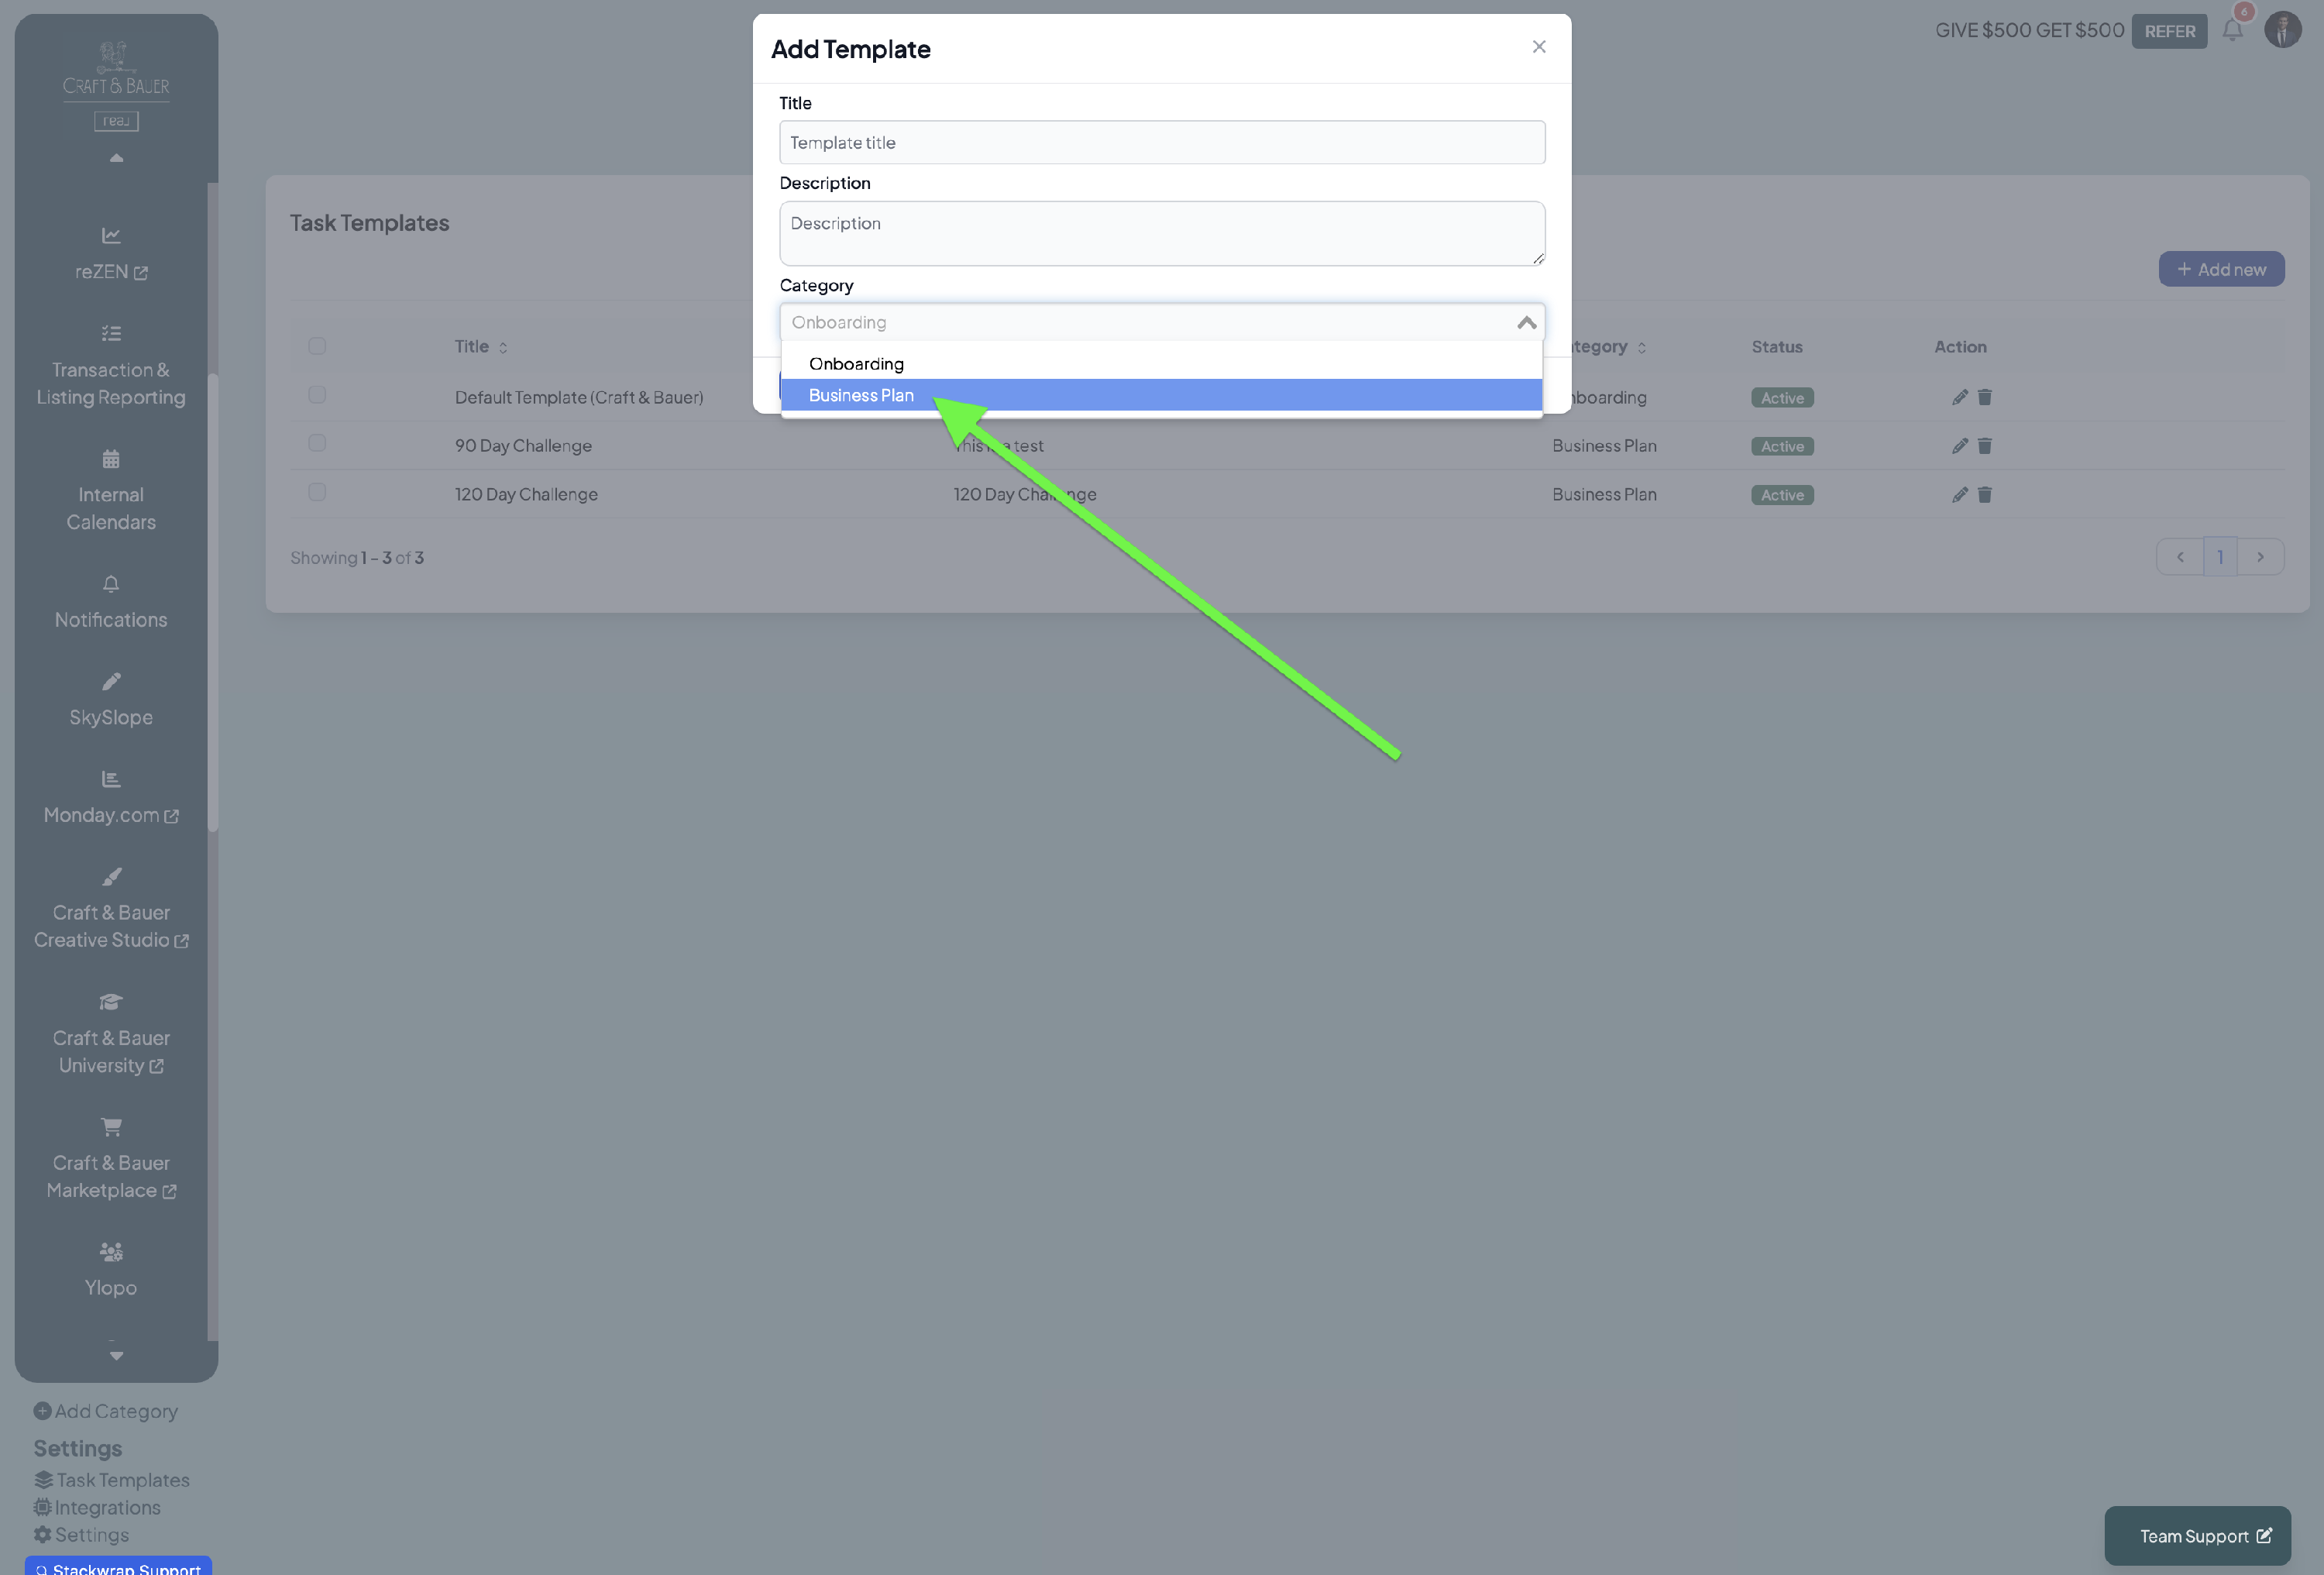
4) Add Template
Add the title and description of your template. Under "Category", make sure to select "Business Plan"
Once the template has been created, press the pencil icon (Edit) to create the tasks associated with this template:

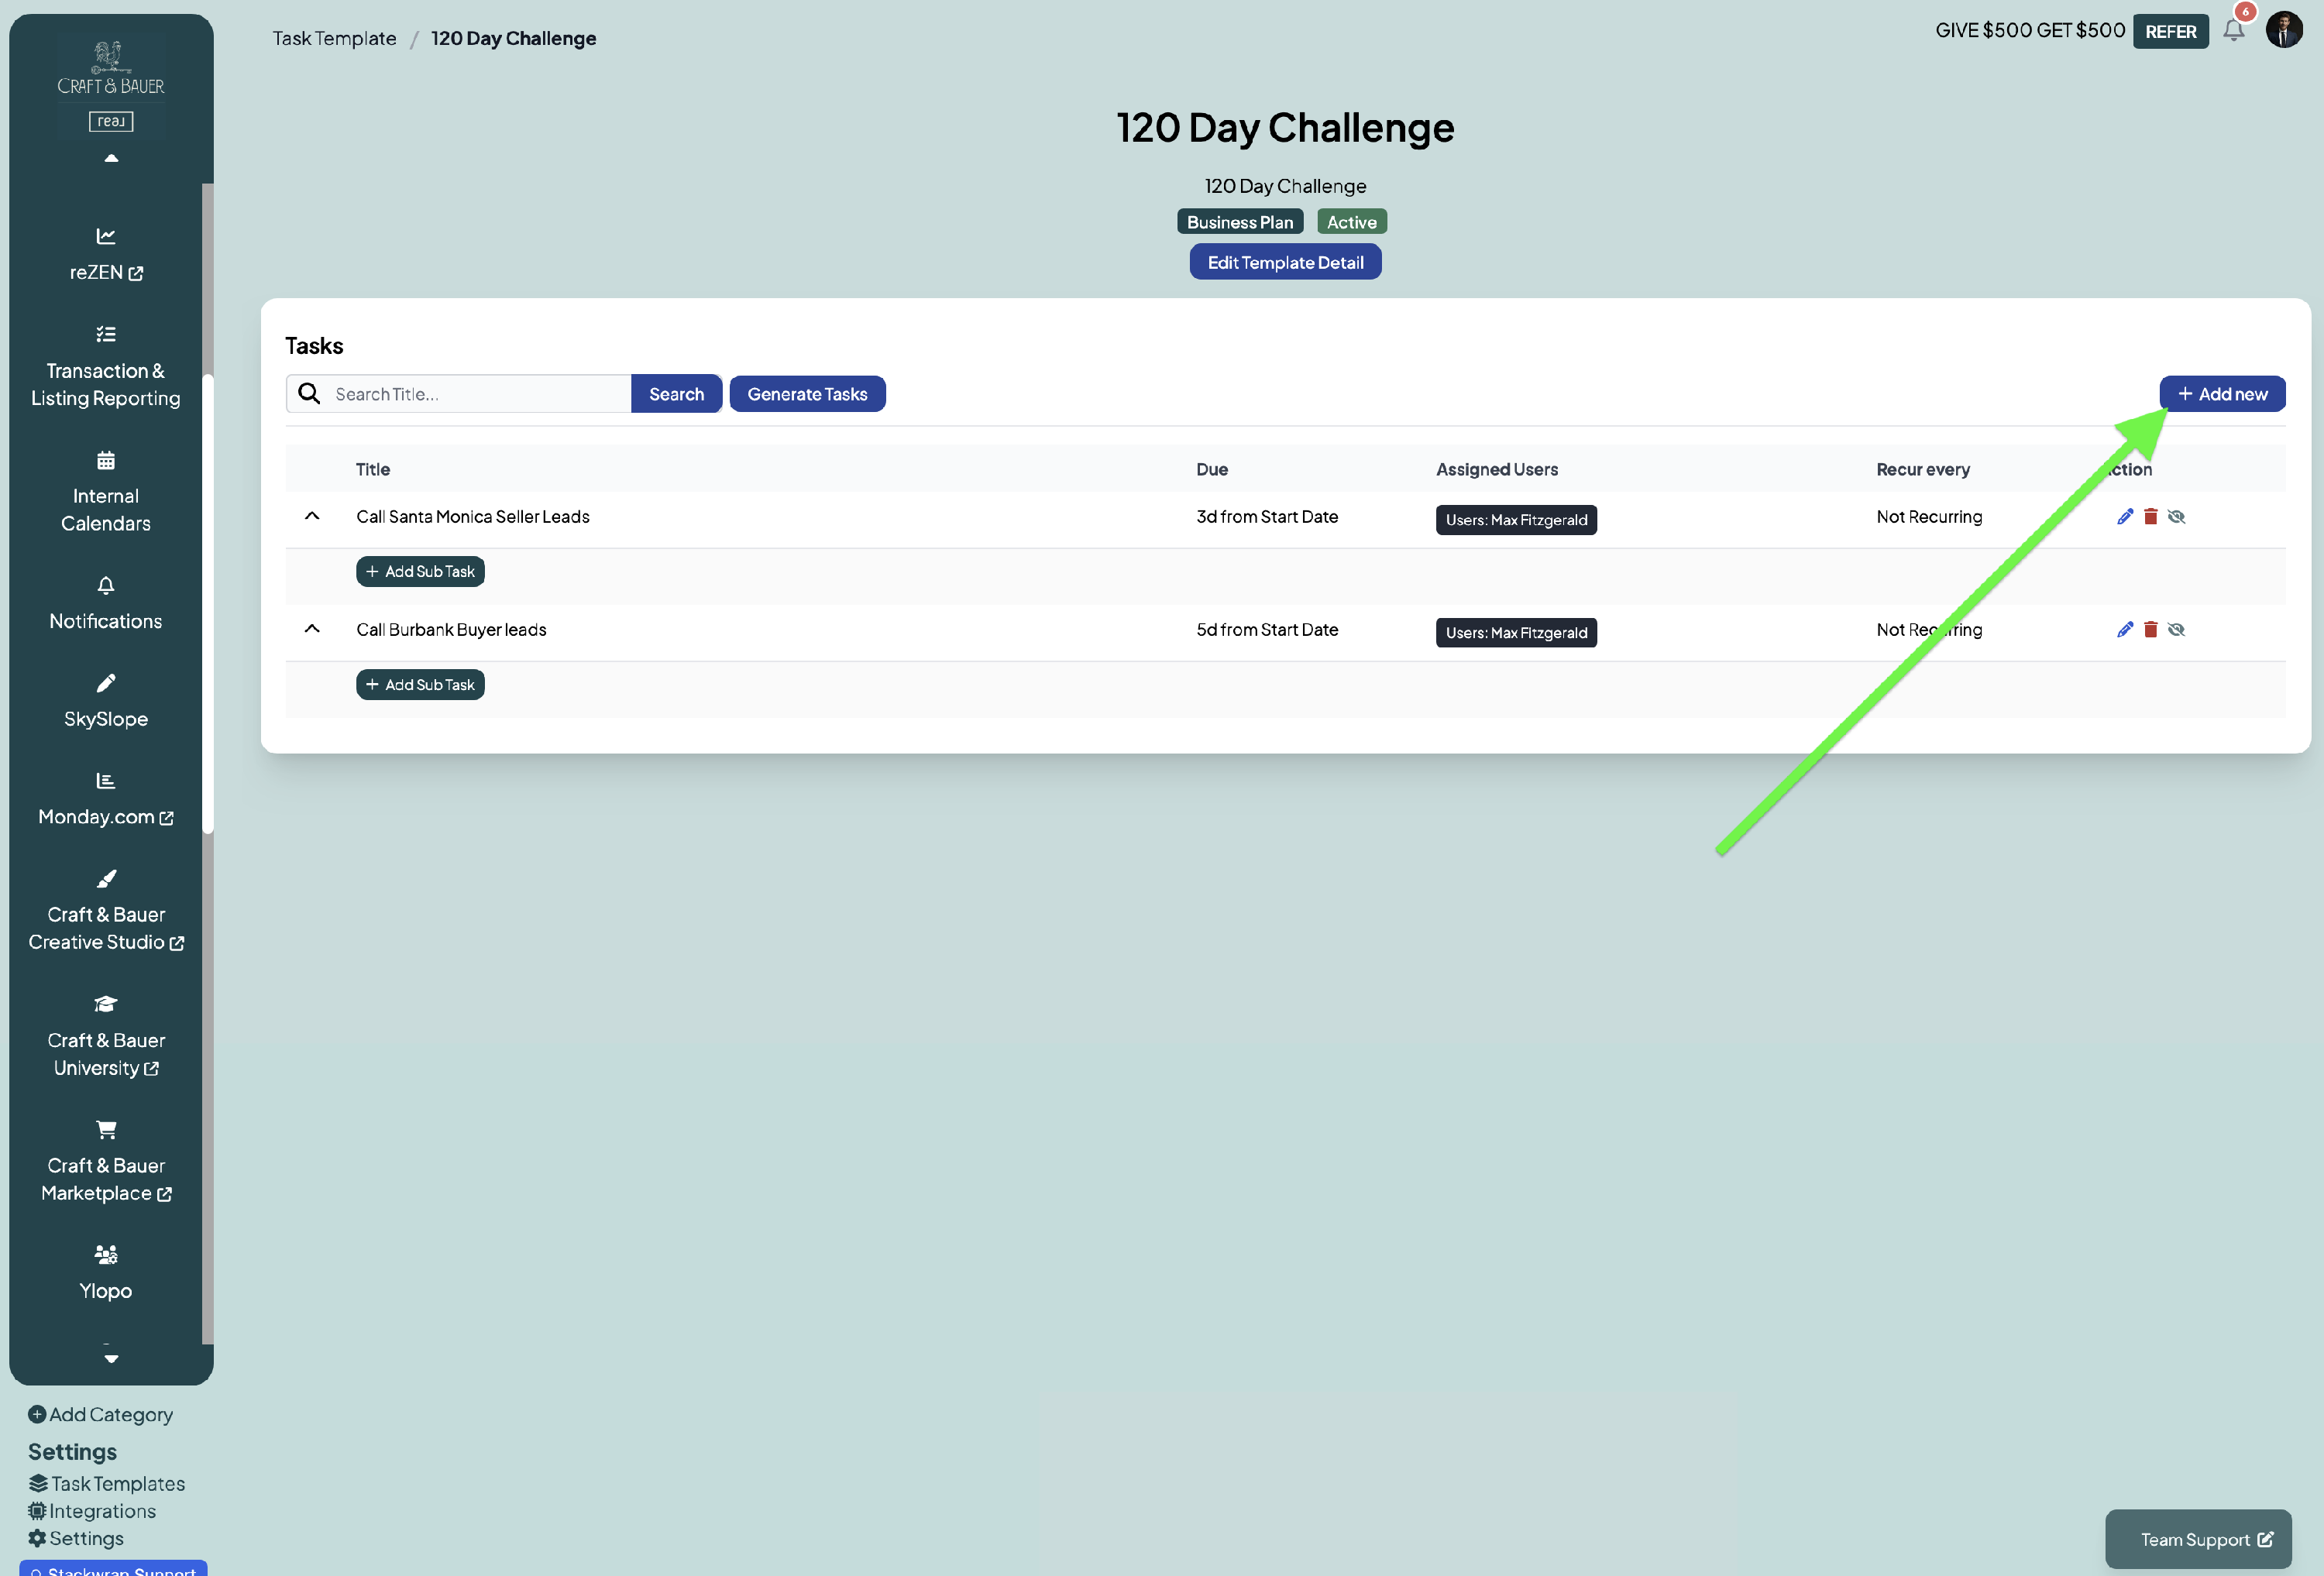
5) Create Tasks
Press the "Add New" button to create a task:
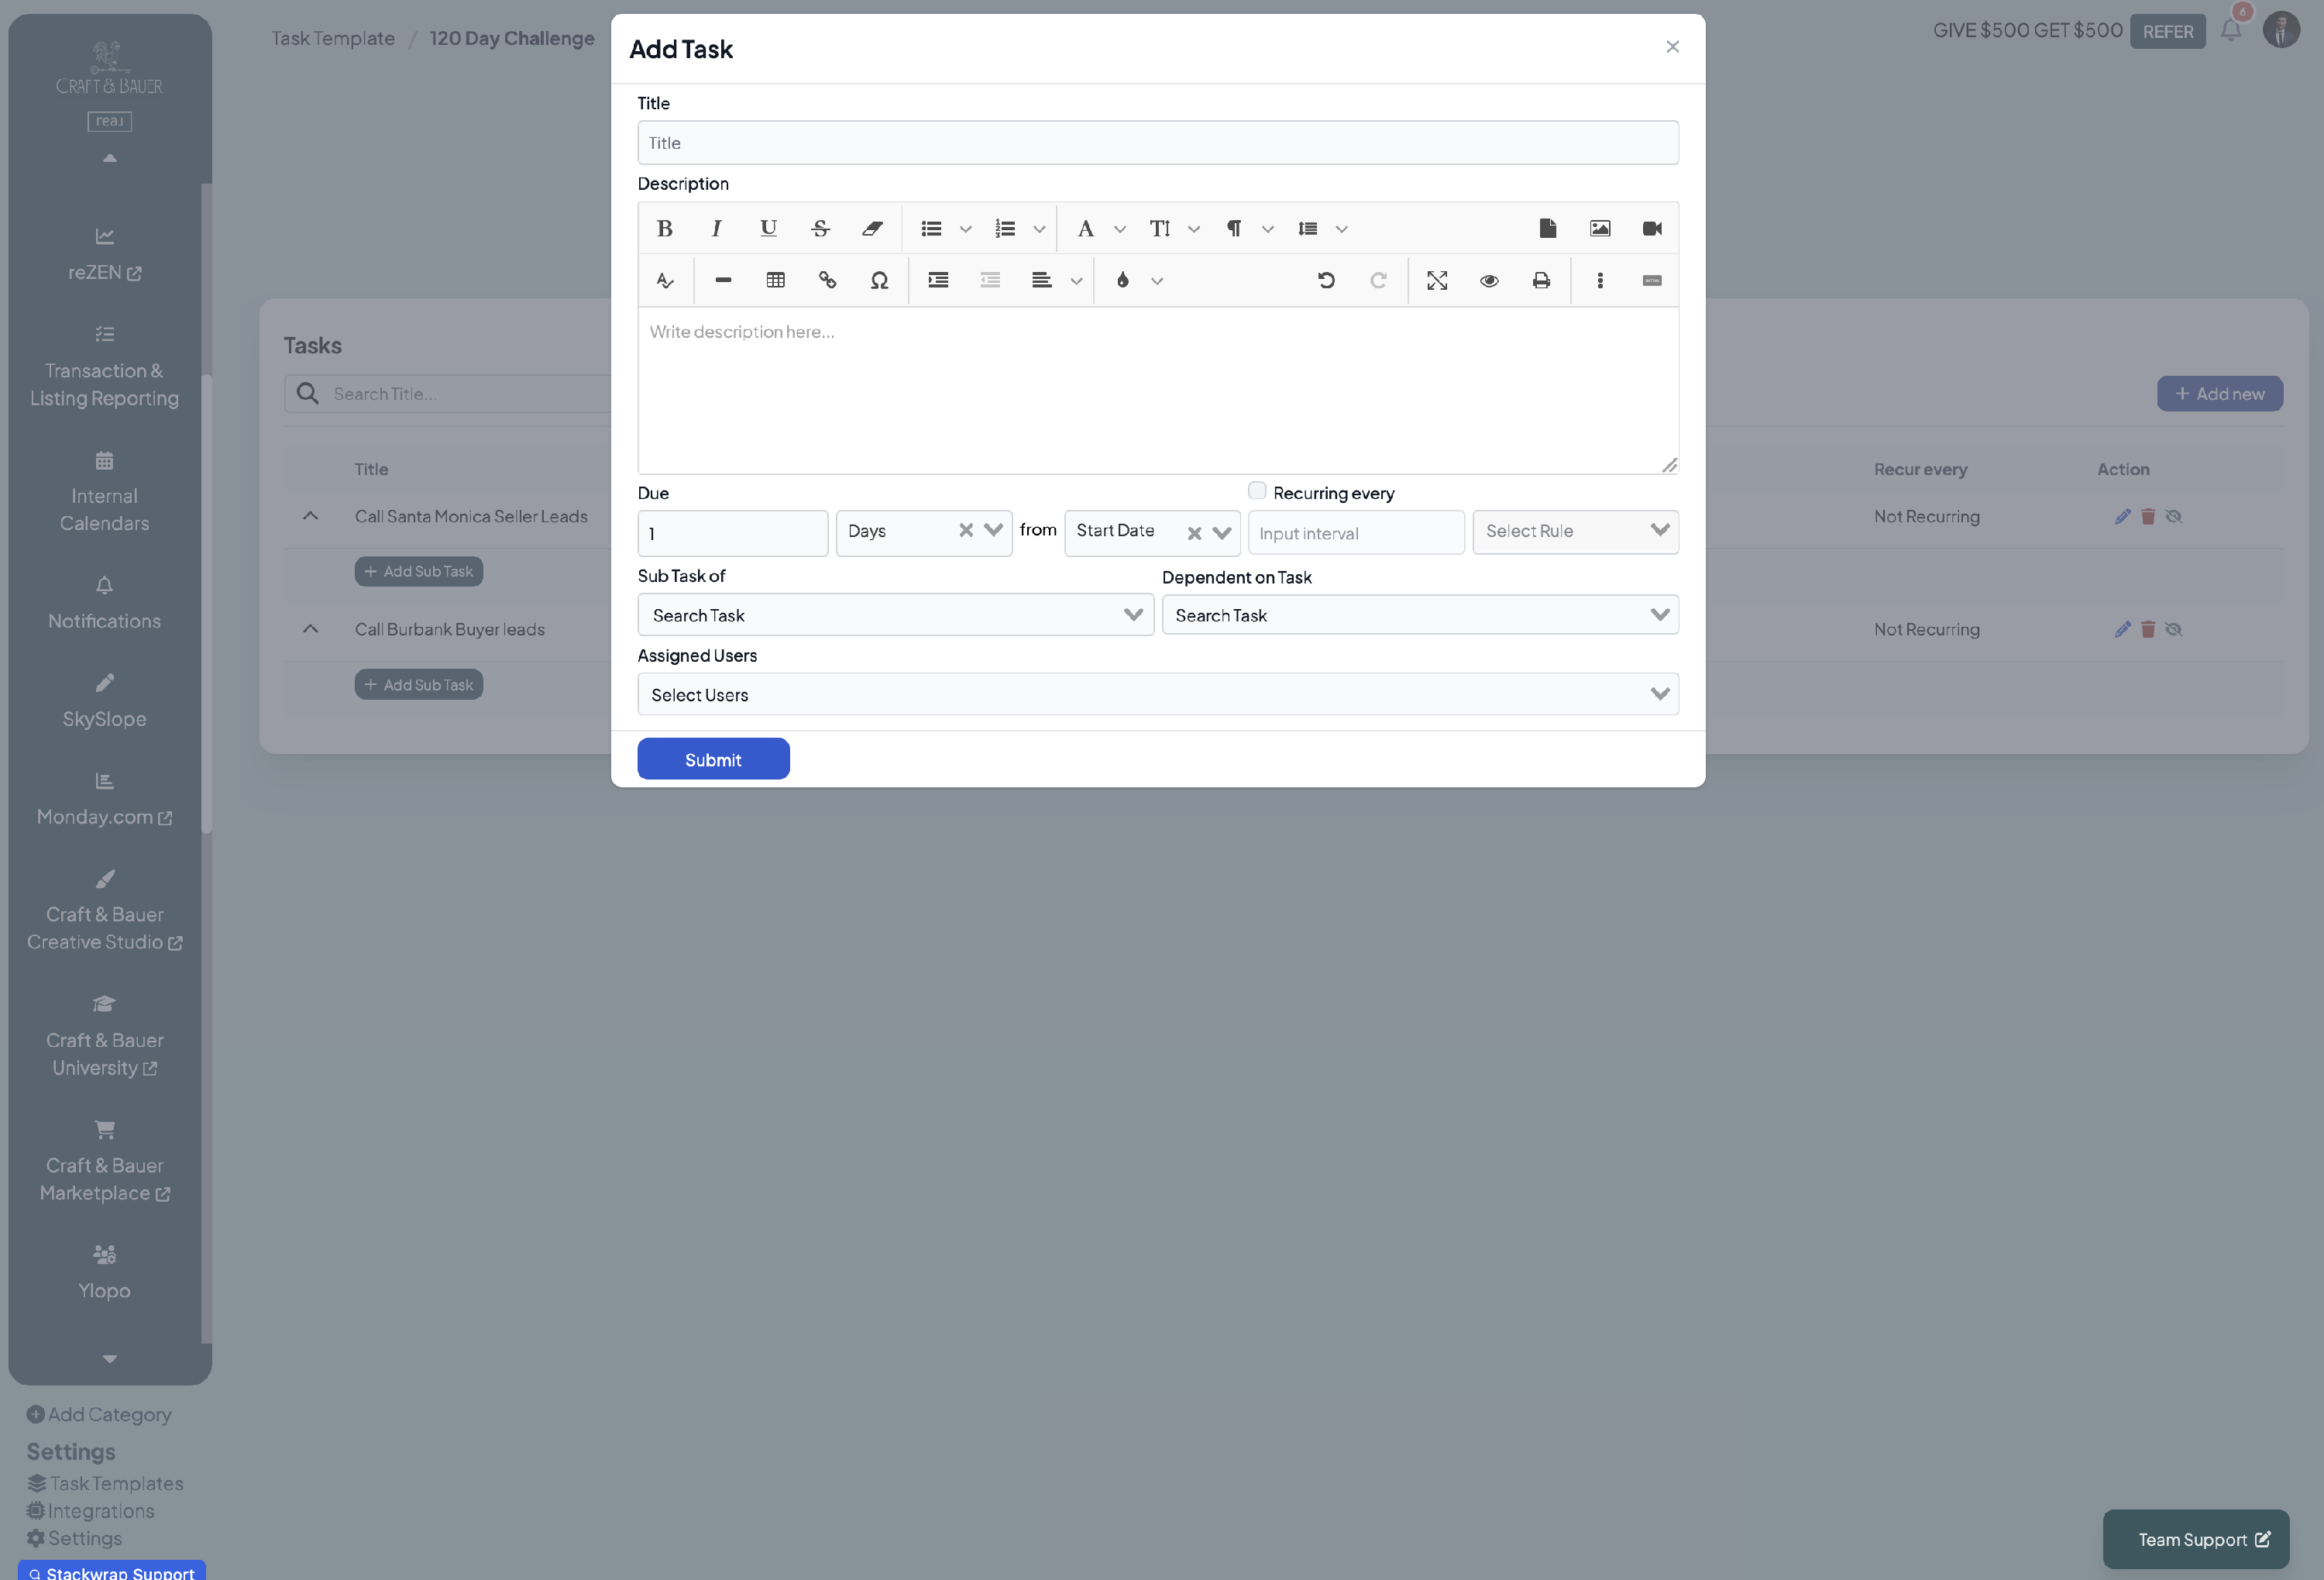
On the pop up, you can add the task's title, description, and due date. You can also choose to have this be a recurring task, a subtask of an existing task, and/or a task that is dependent on another task being completed.
Lastly, you can select the Assigned Users of this task by typing in a Group, a Role, or individual user(s).
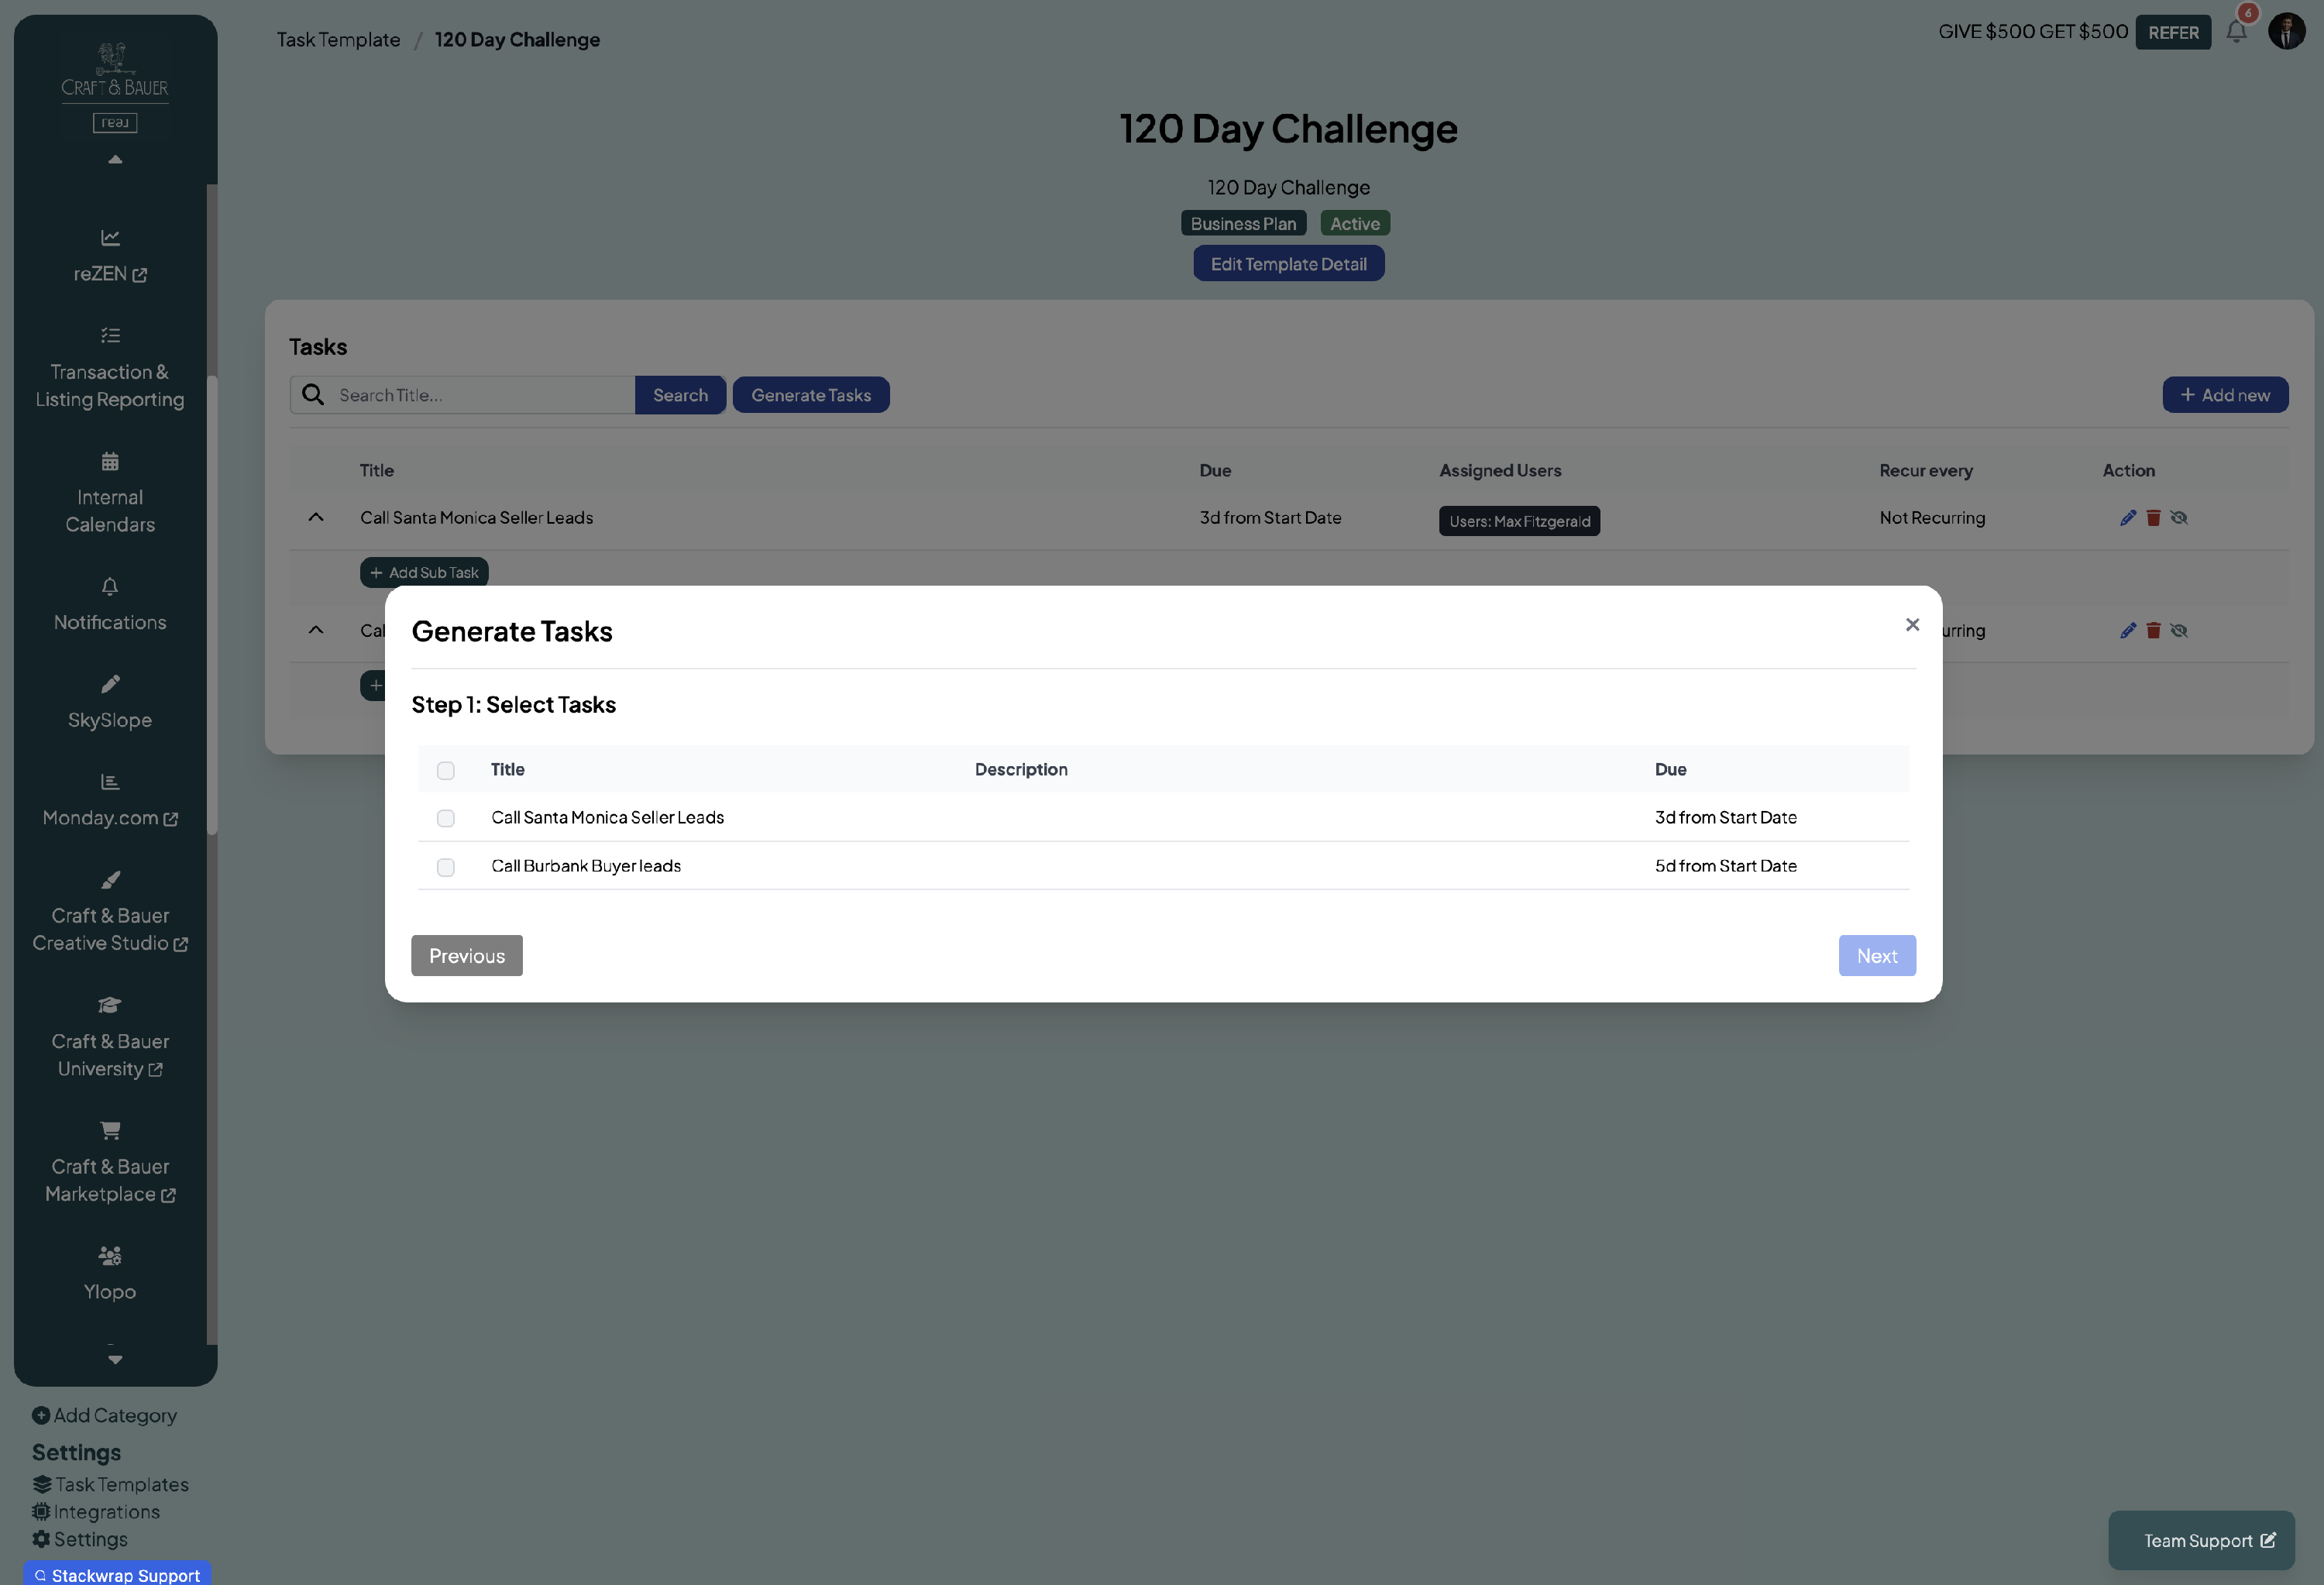
6) Generate and Publish Tasks
Once you've created all of the tasks for the template, click the "Generate Tasks" button

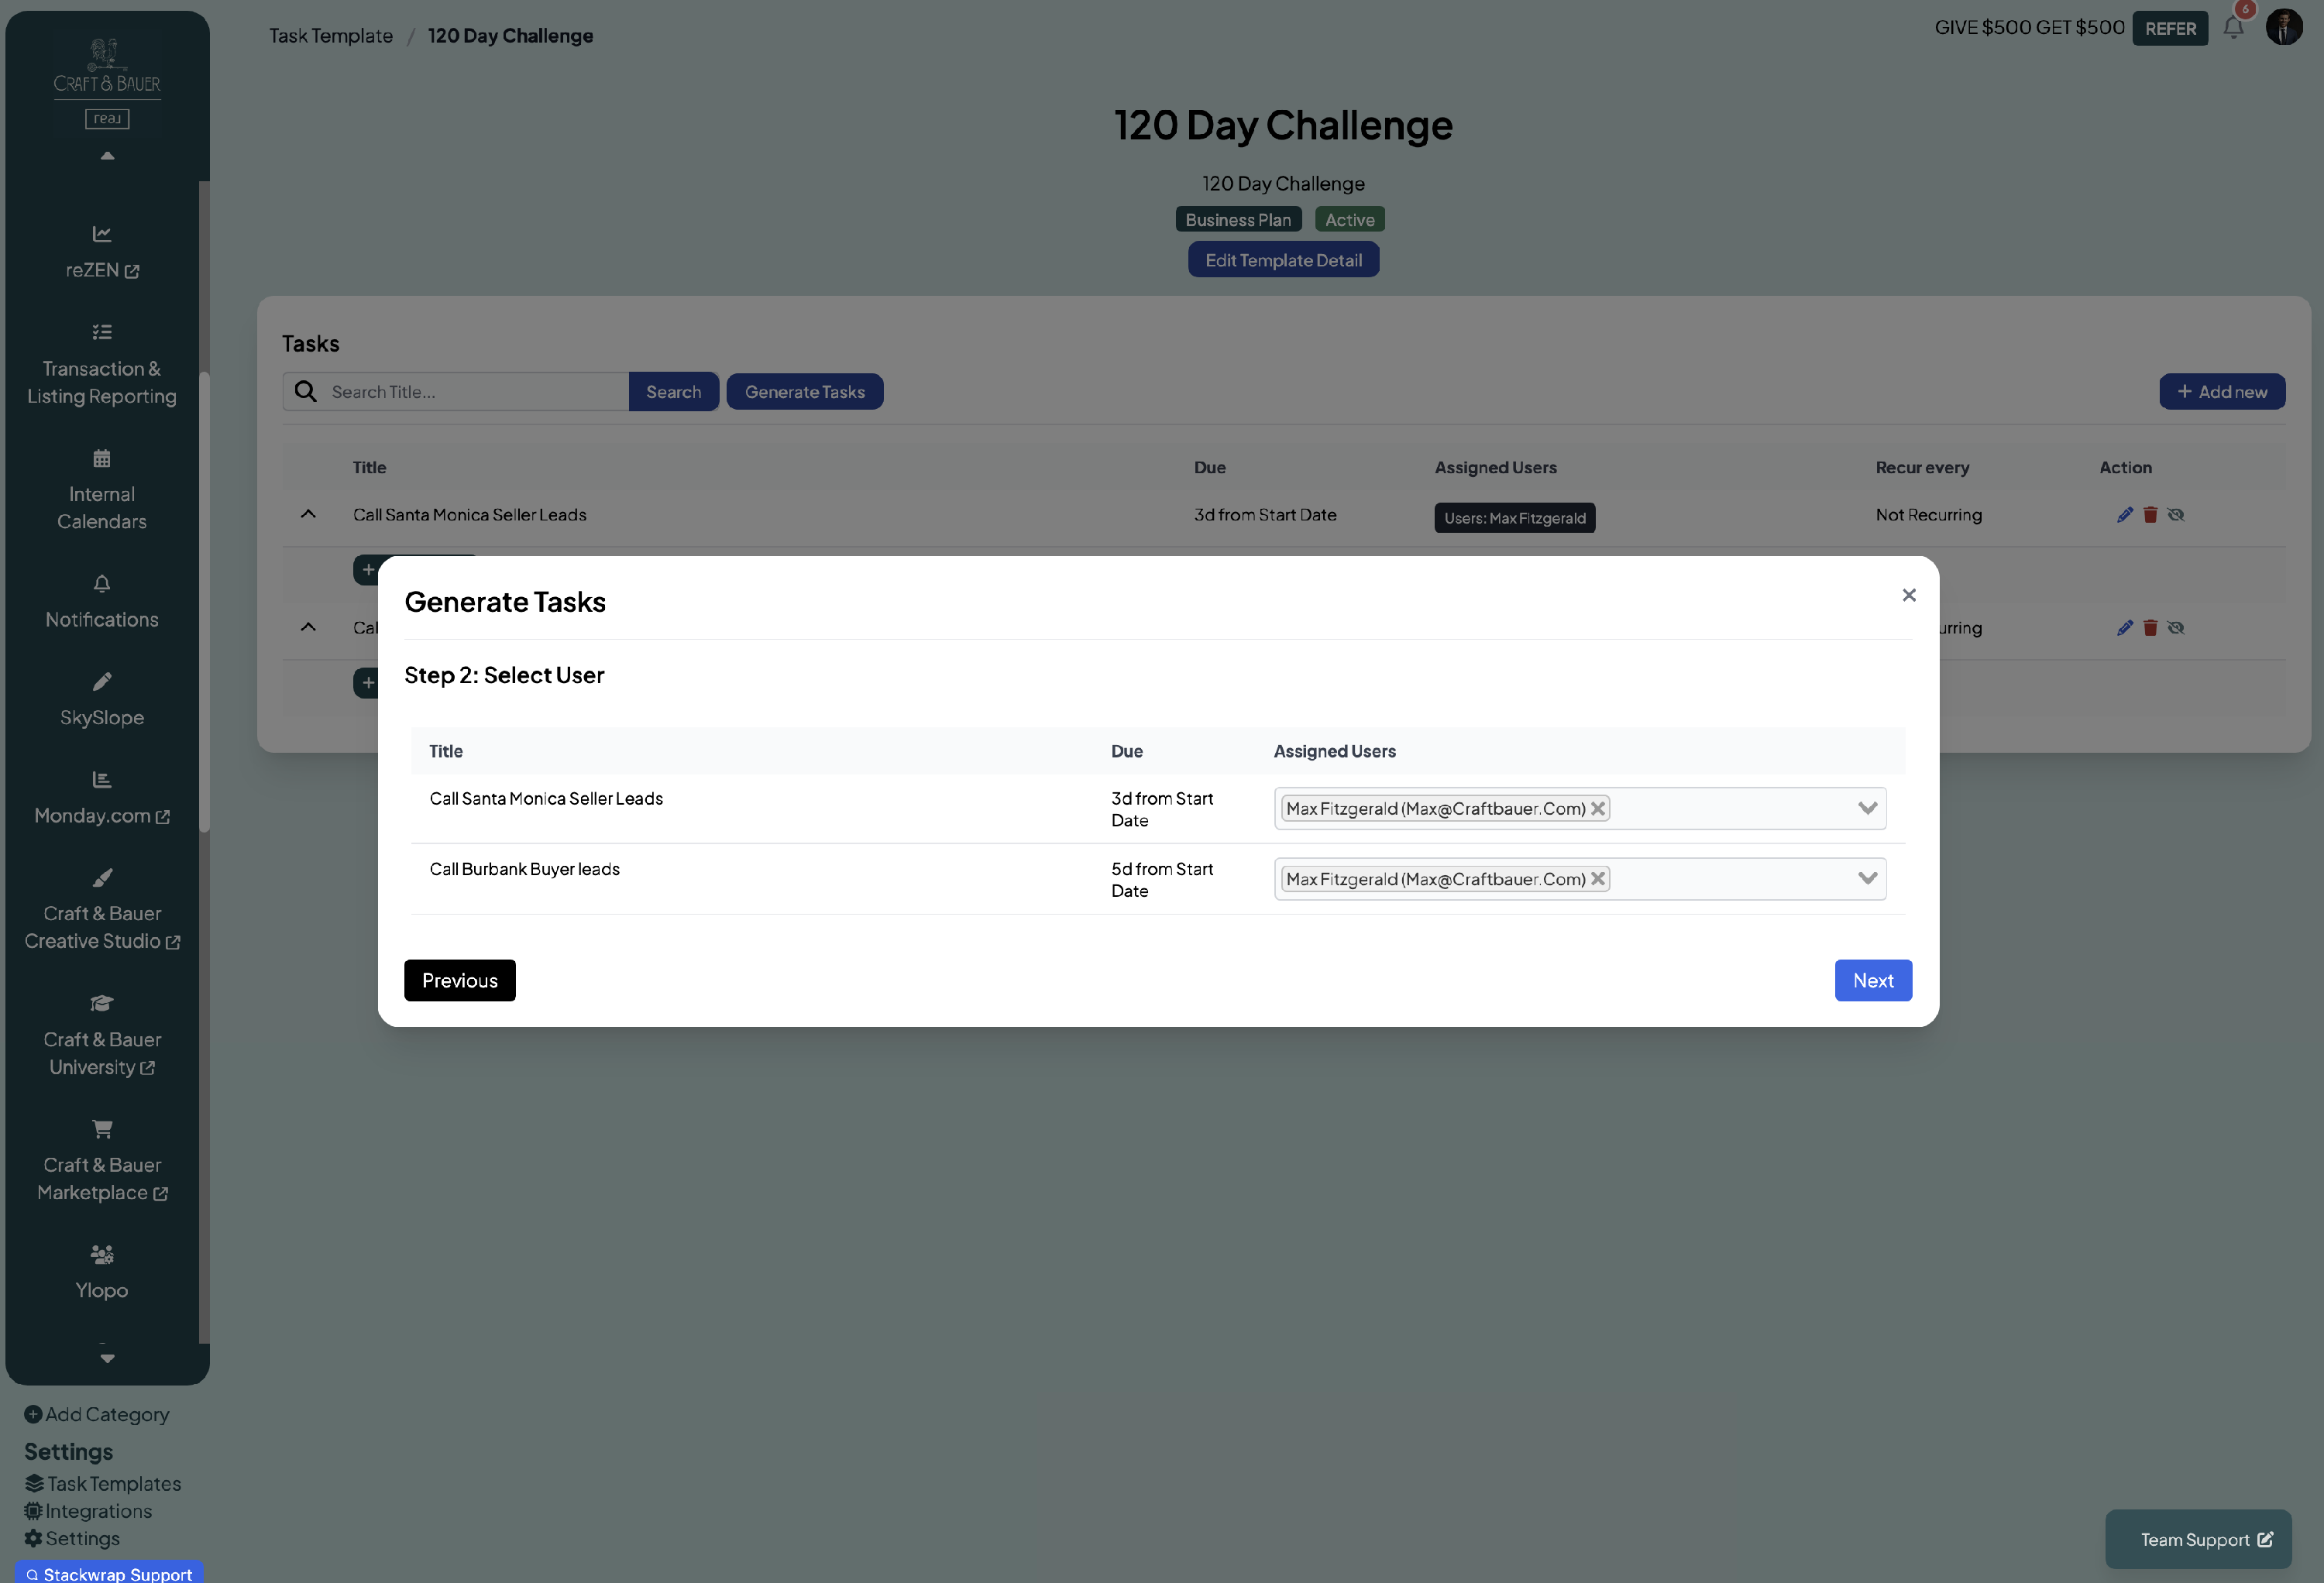
Next, select the tasks that you want to publish (more than likely, you're going to select all of the tasks associated with the template):
Next, confirm the assigned users of those tasks. You can make revisions to the users under "Assigned Users" if you'd like, but more than likely, you're just going to select "Next":
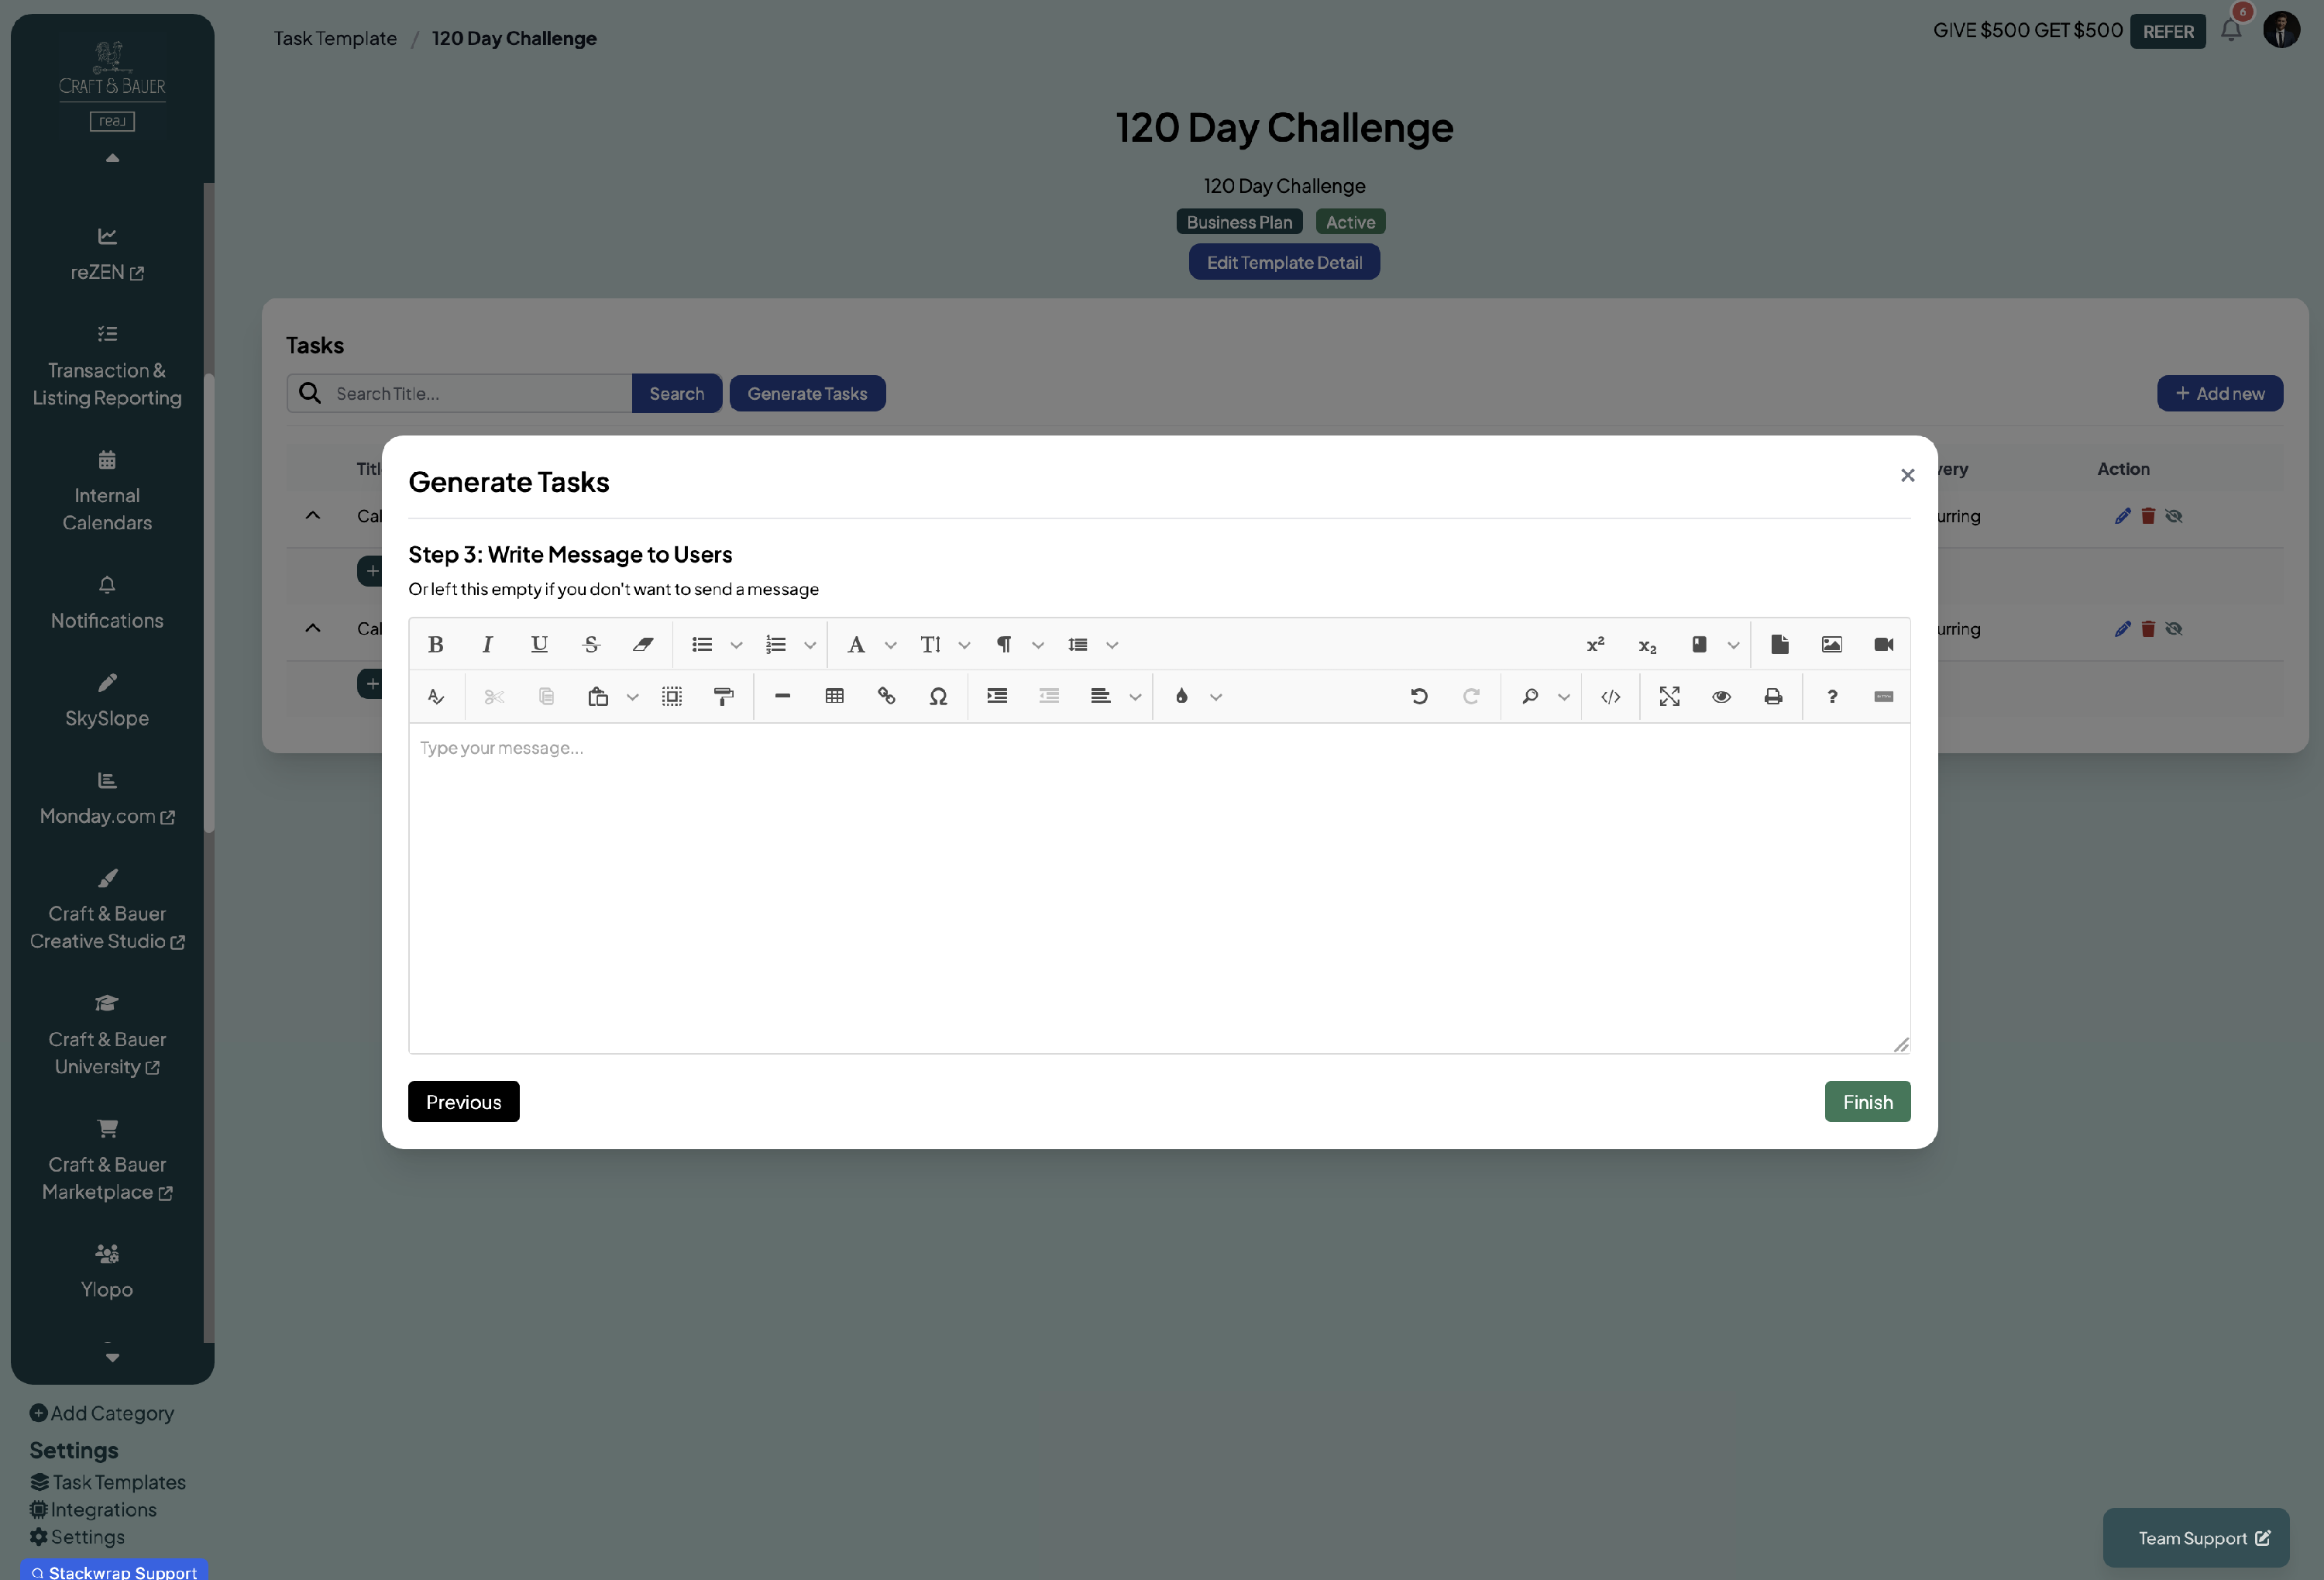
Lastly, you can write a message to your selected users to give them the heads up about their assigned tasks. If you write a message, those users will receive an email (pictured below).
If you do not want to send a message to your users and ONLY want to publish tasks to your users, then leave the message box blank:
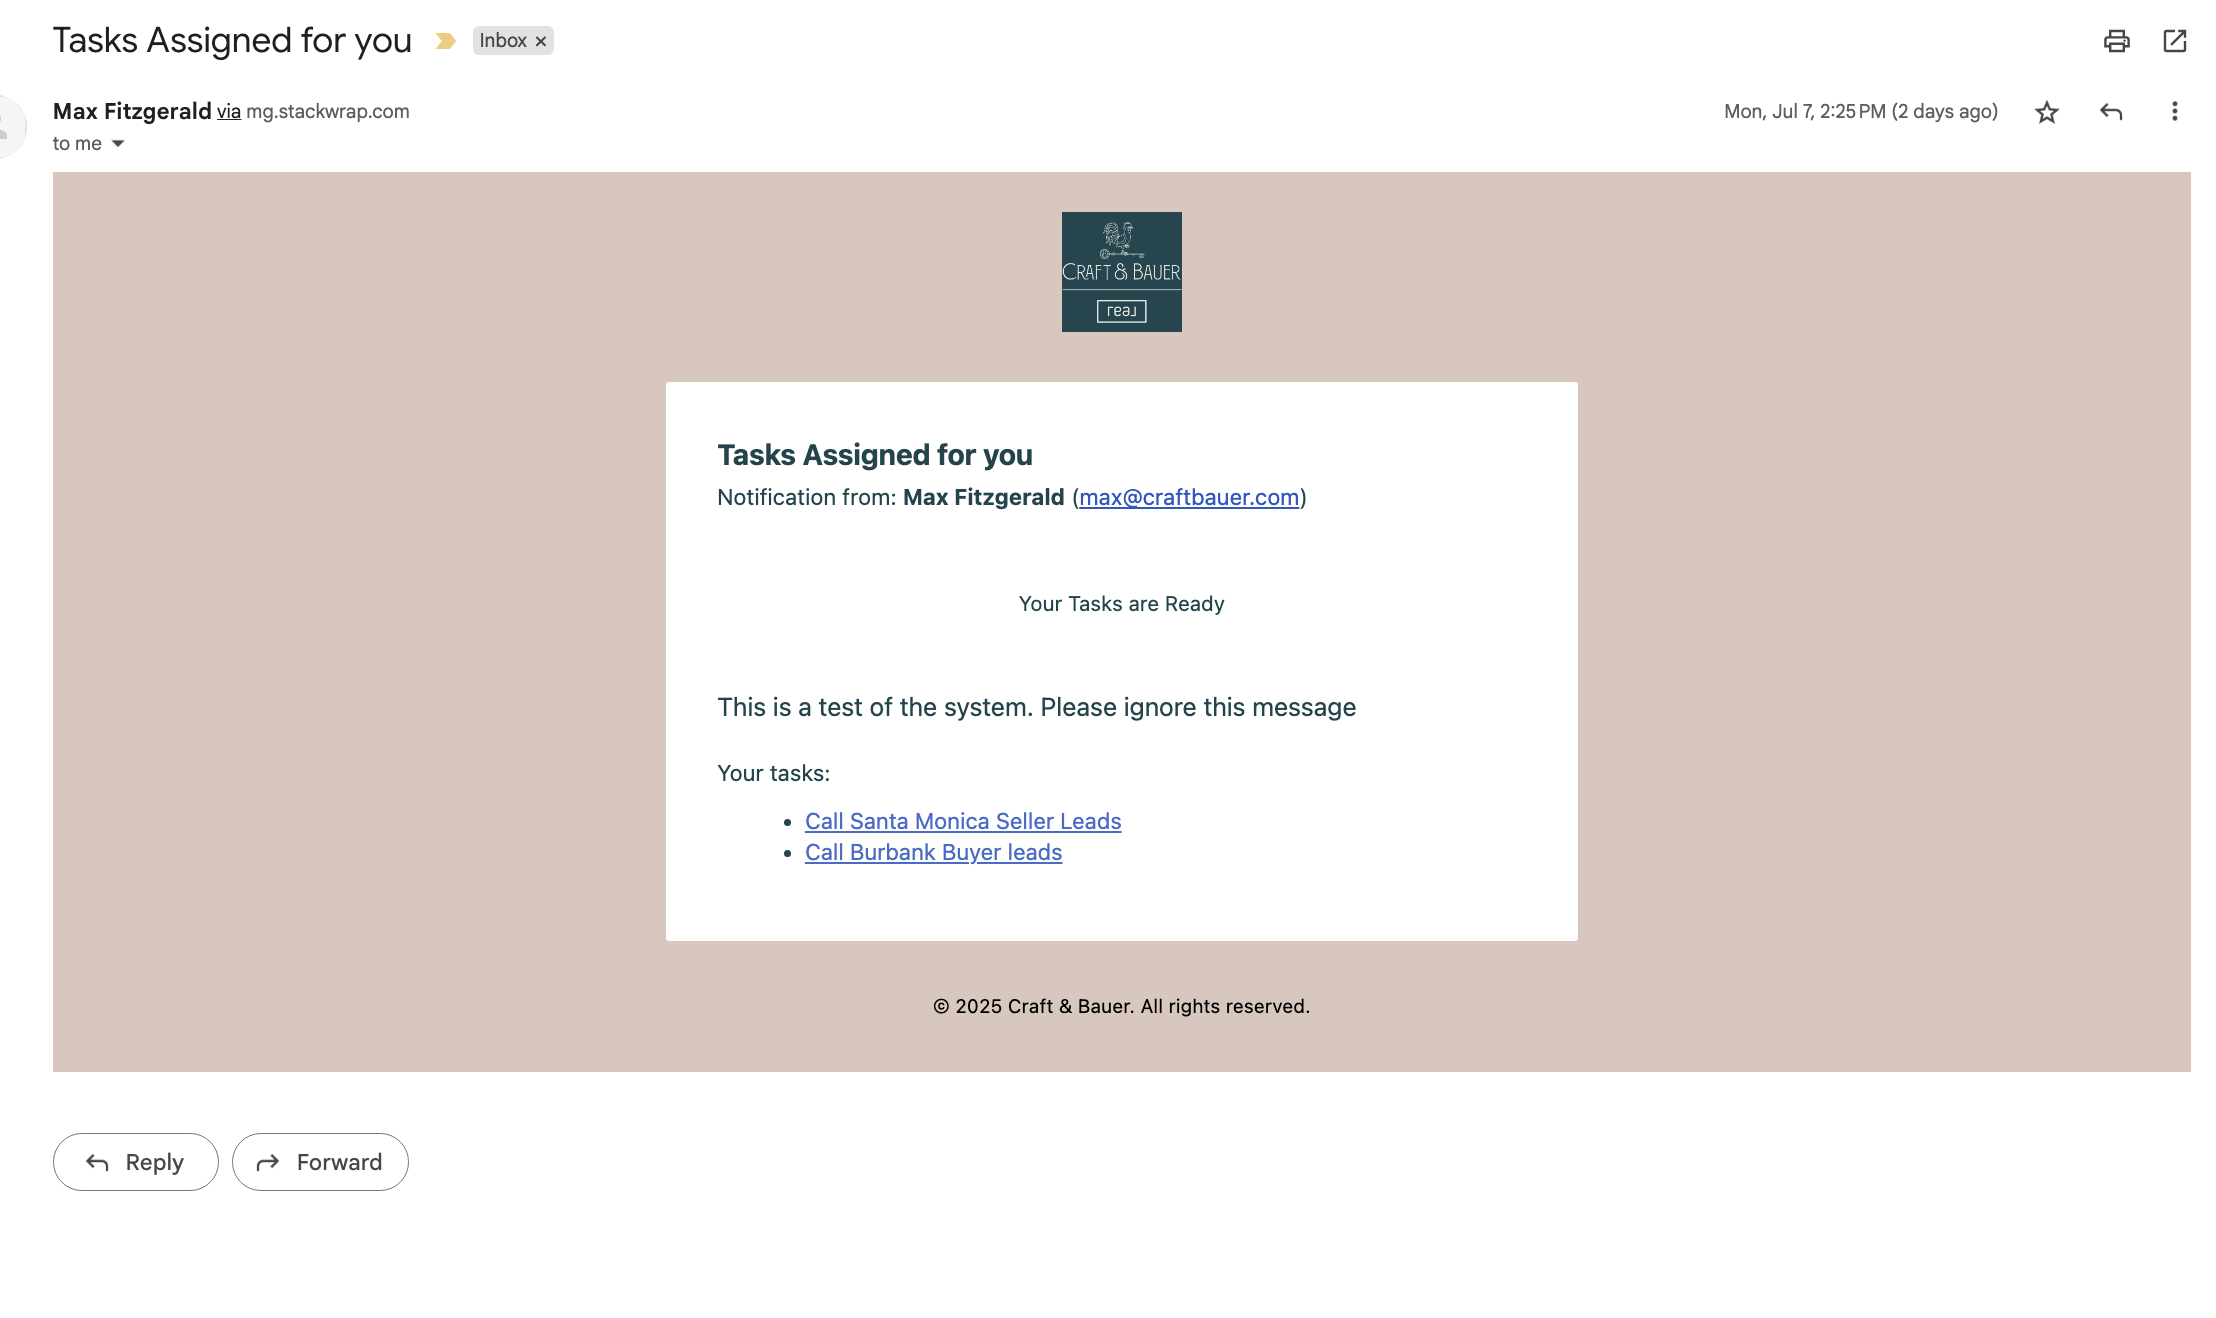
Here's what the email notification looks like (the system will automatically pull in your company's colors and logo if your account is white labeled):
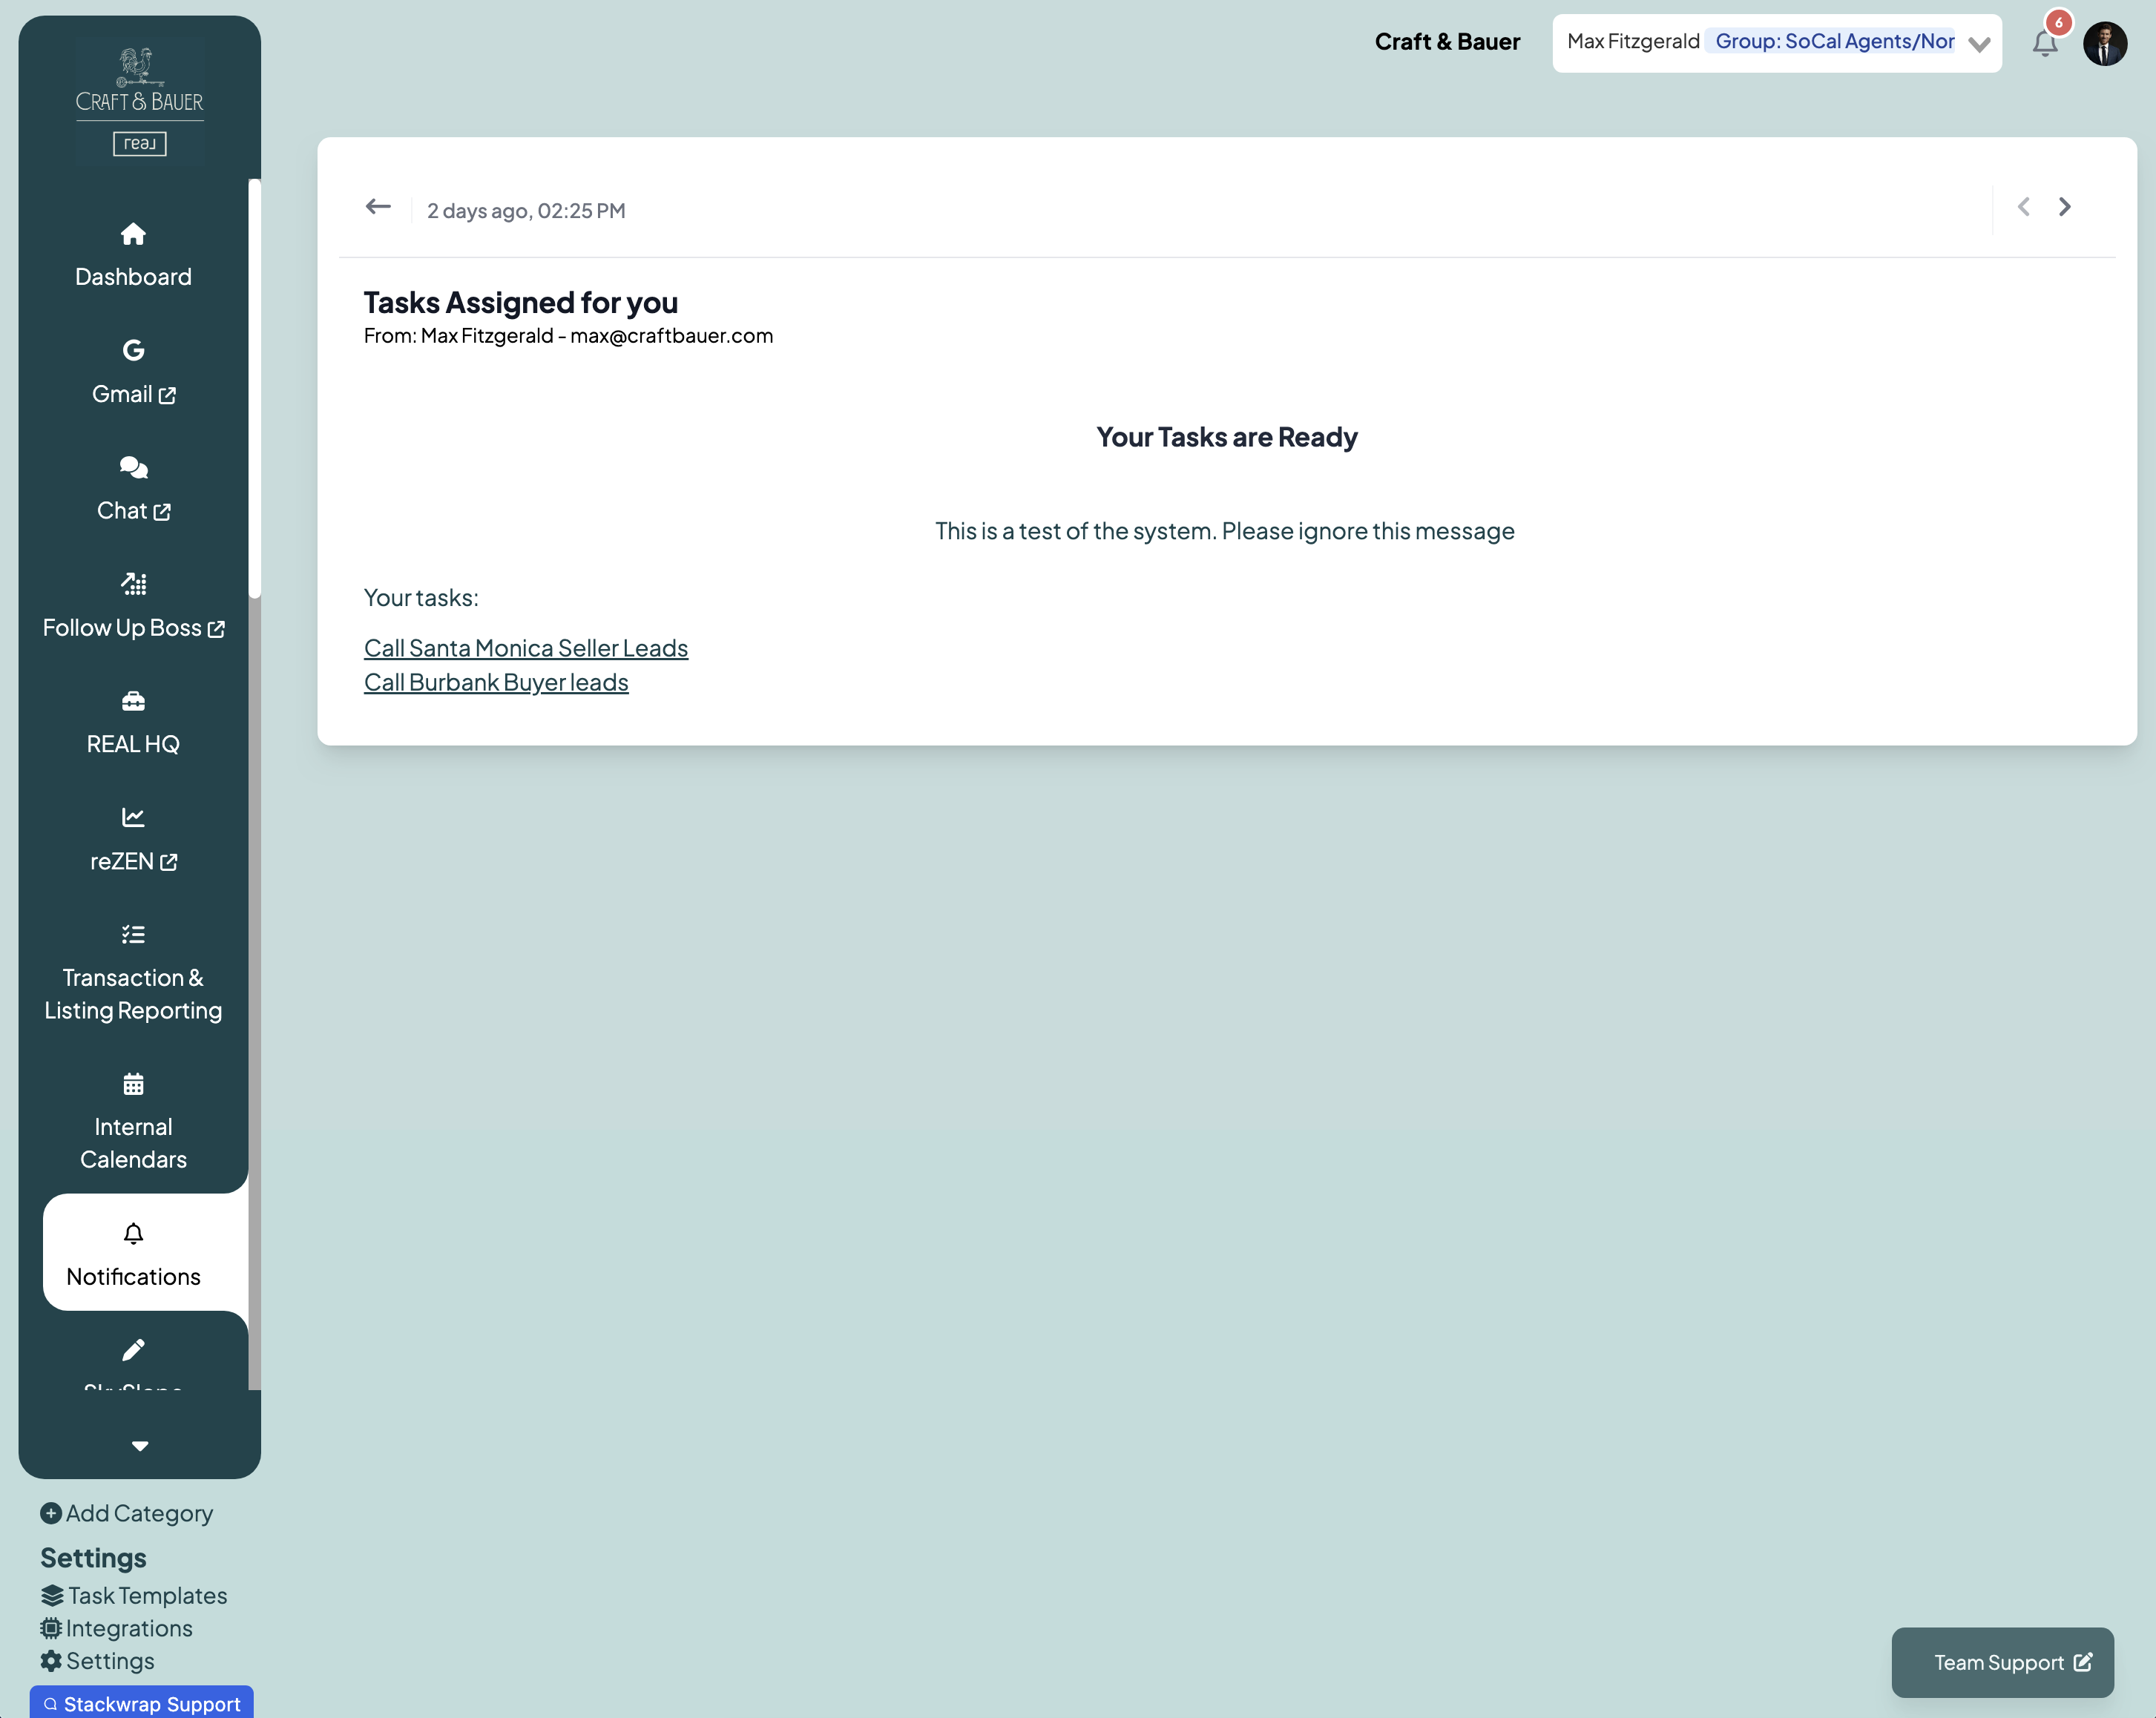
Here's what the in-app notification looks like:
7) Published Tasks
Once the tasks have been published to your users, they will see a "Business Plan" toggle option under their "My Tasks" widget with all of their assigned tasks
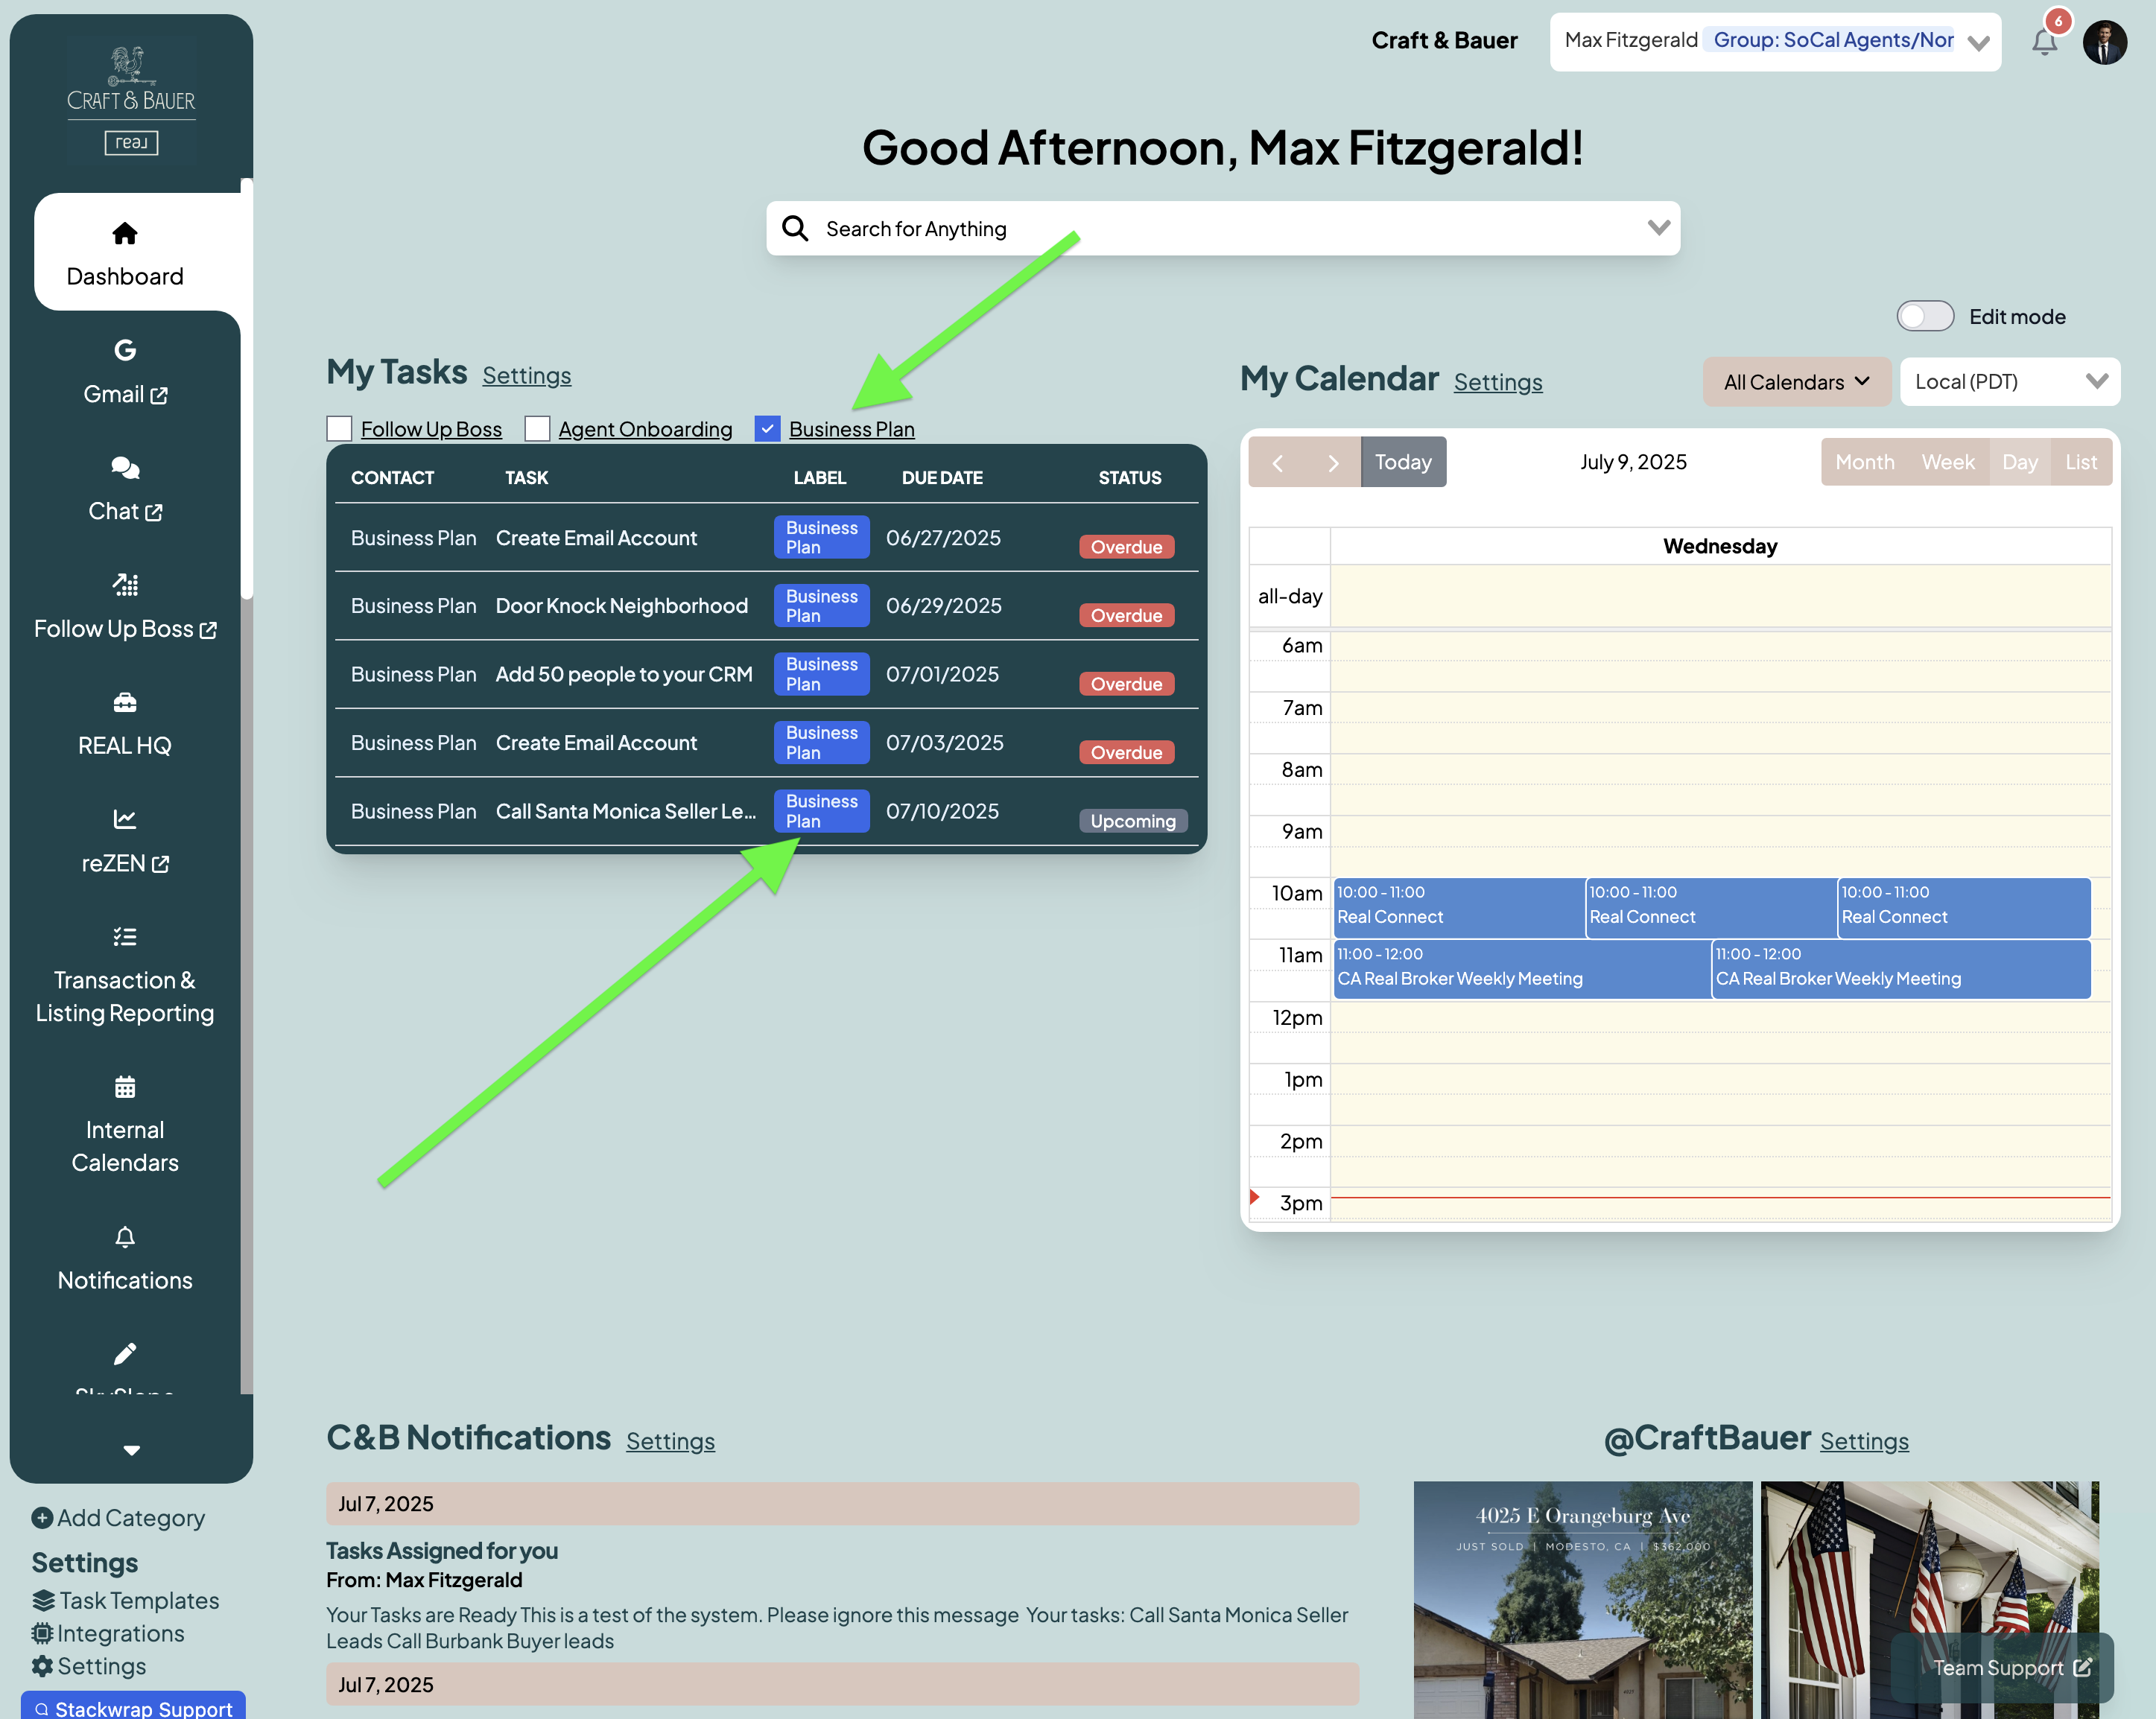
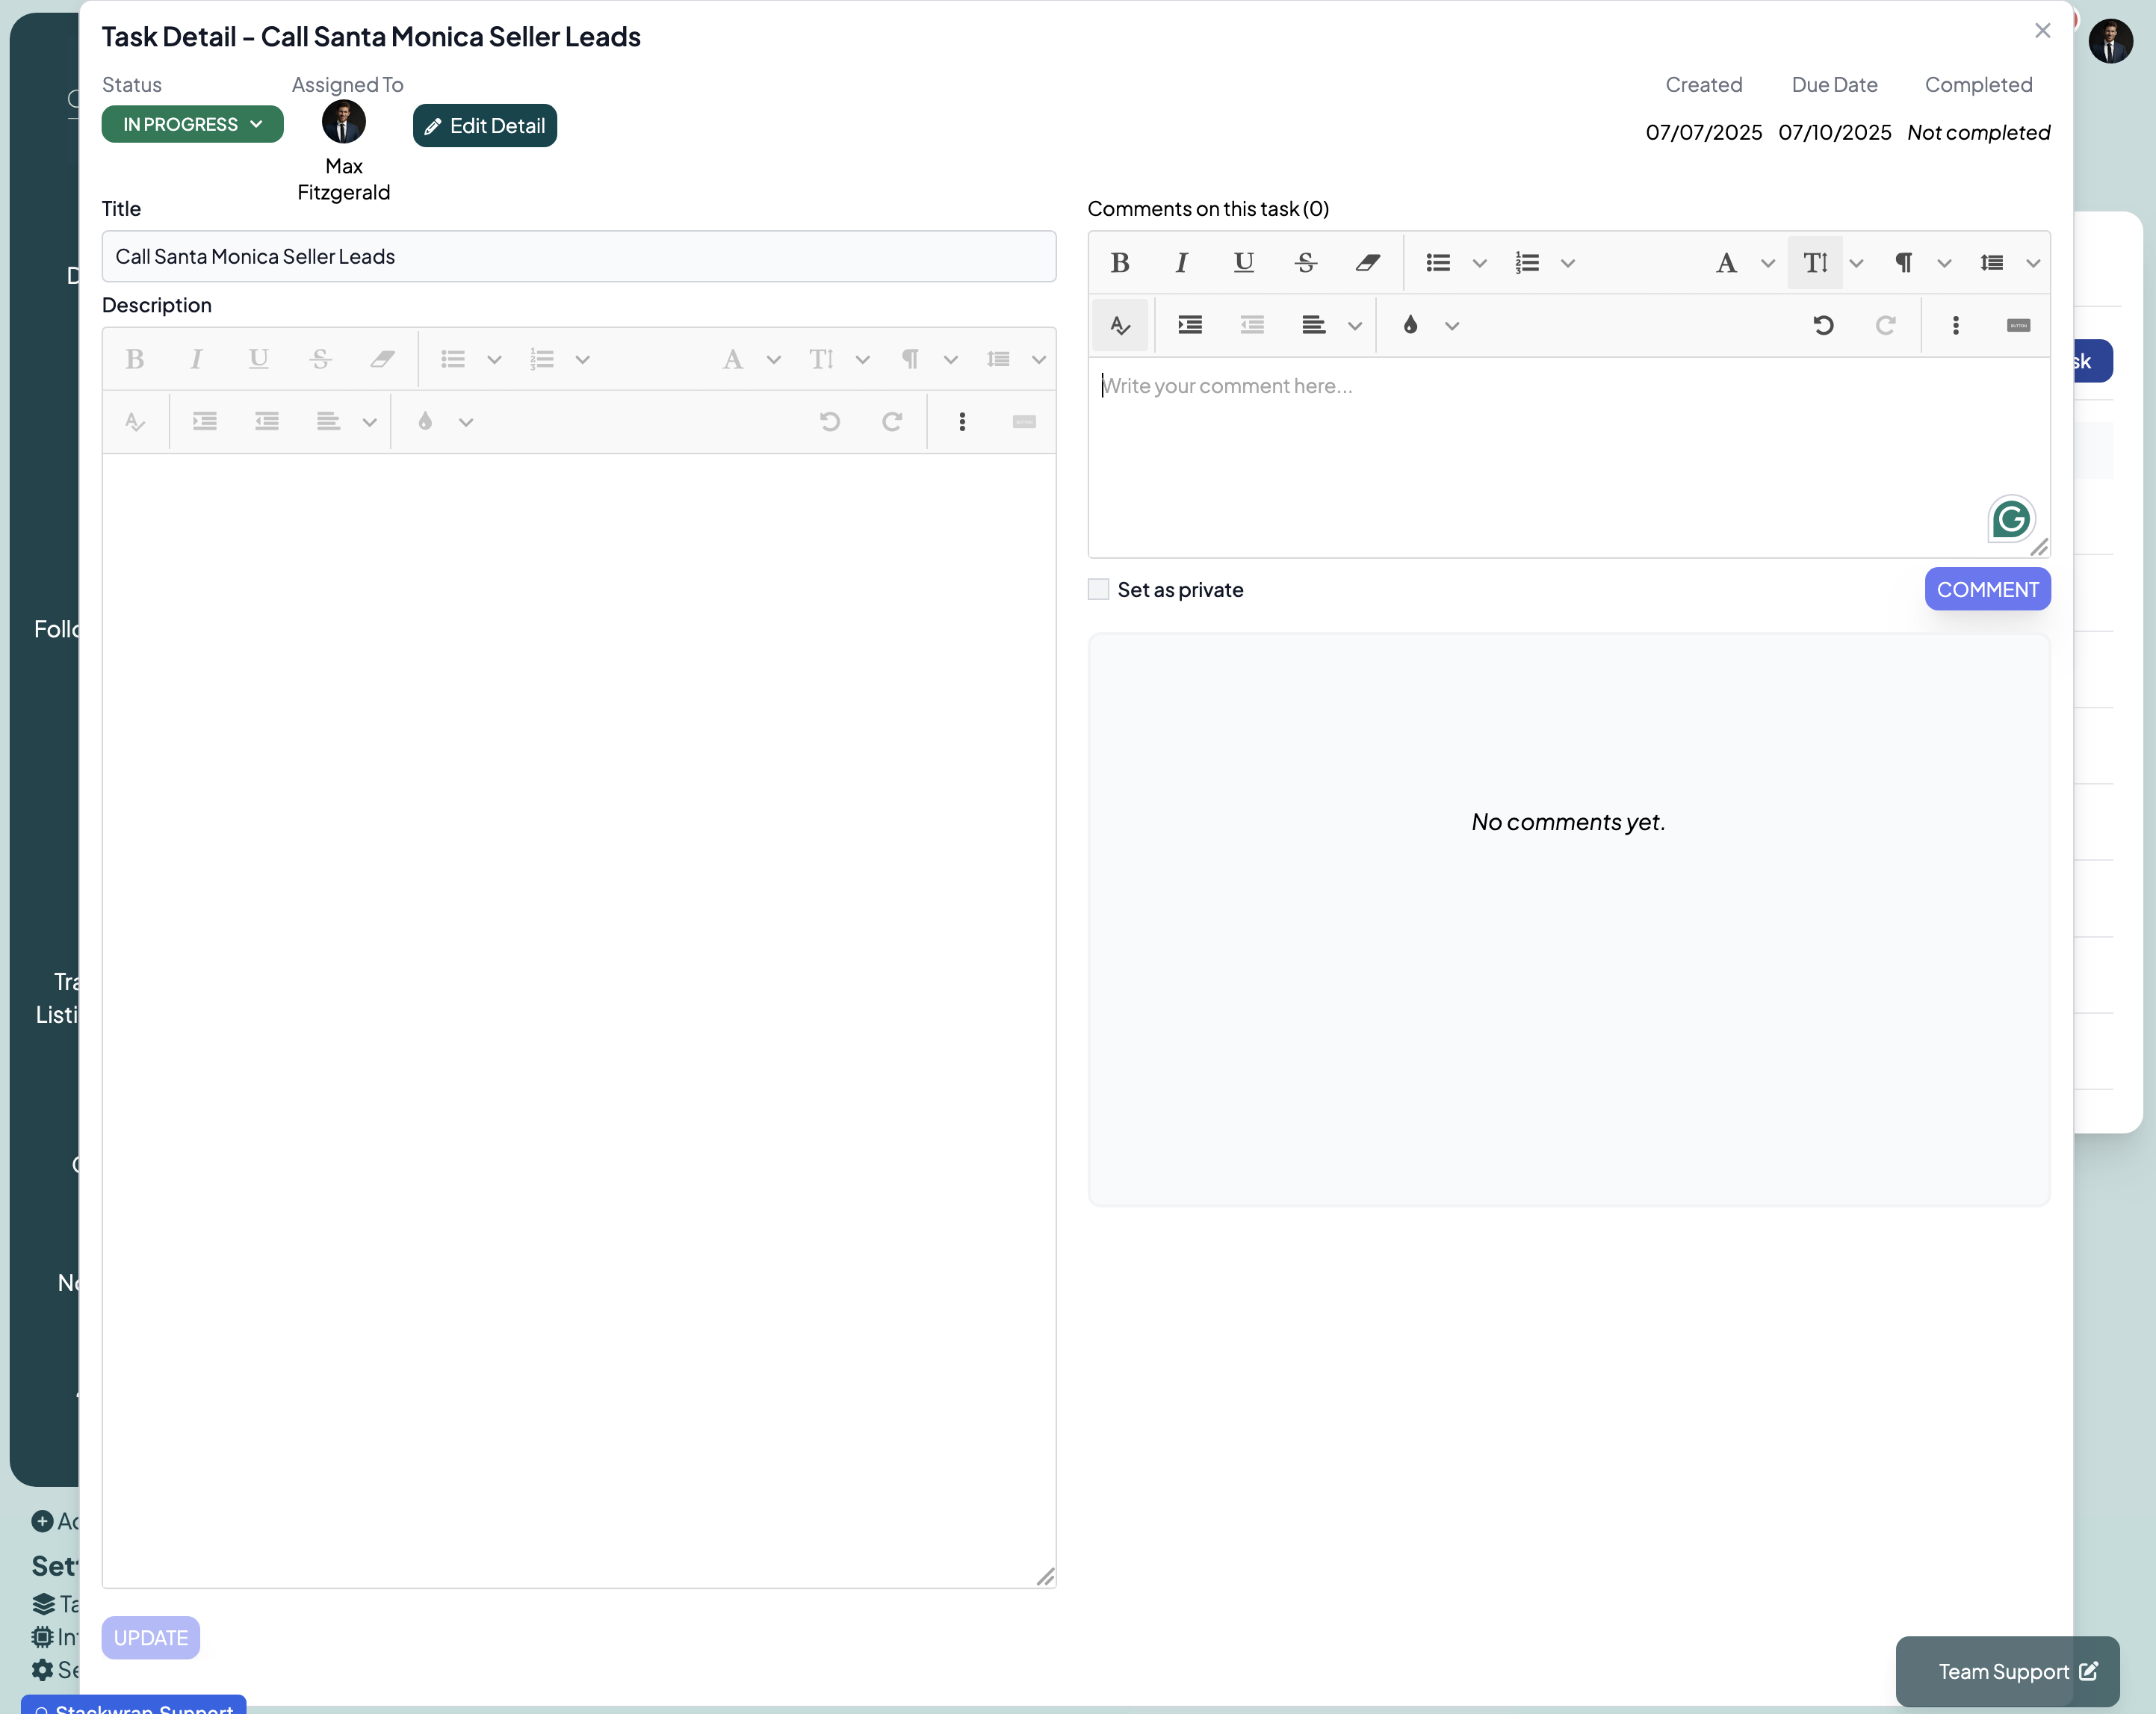
A user can click on a specific task to view the task's description. They can also live comment on a task if they need any additional clarification. These comments are visible by the agent, as well as anyone else on the Admin team. Admins can comment back to the agent to streamline communication on a particular task:
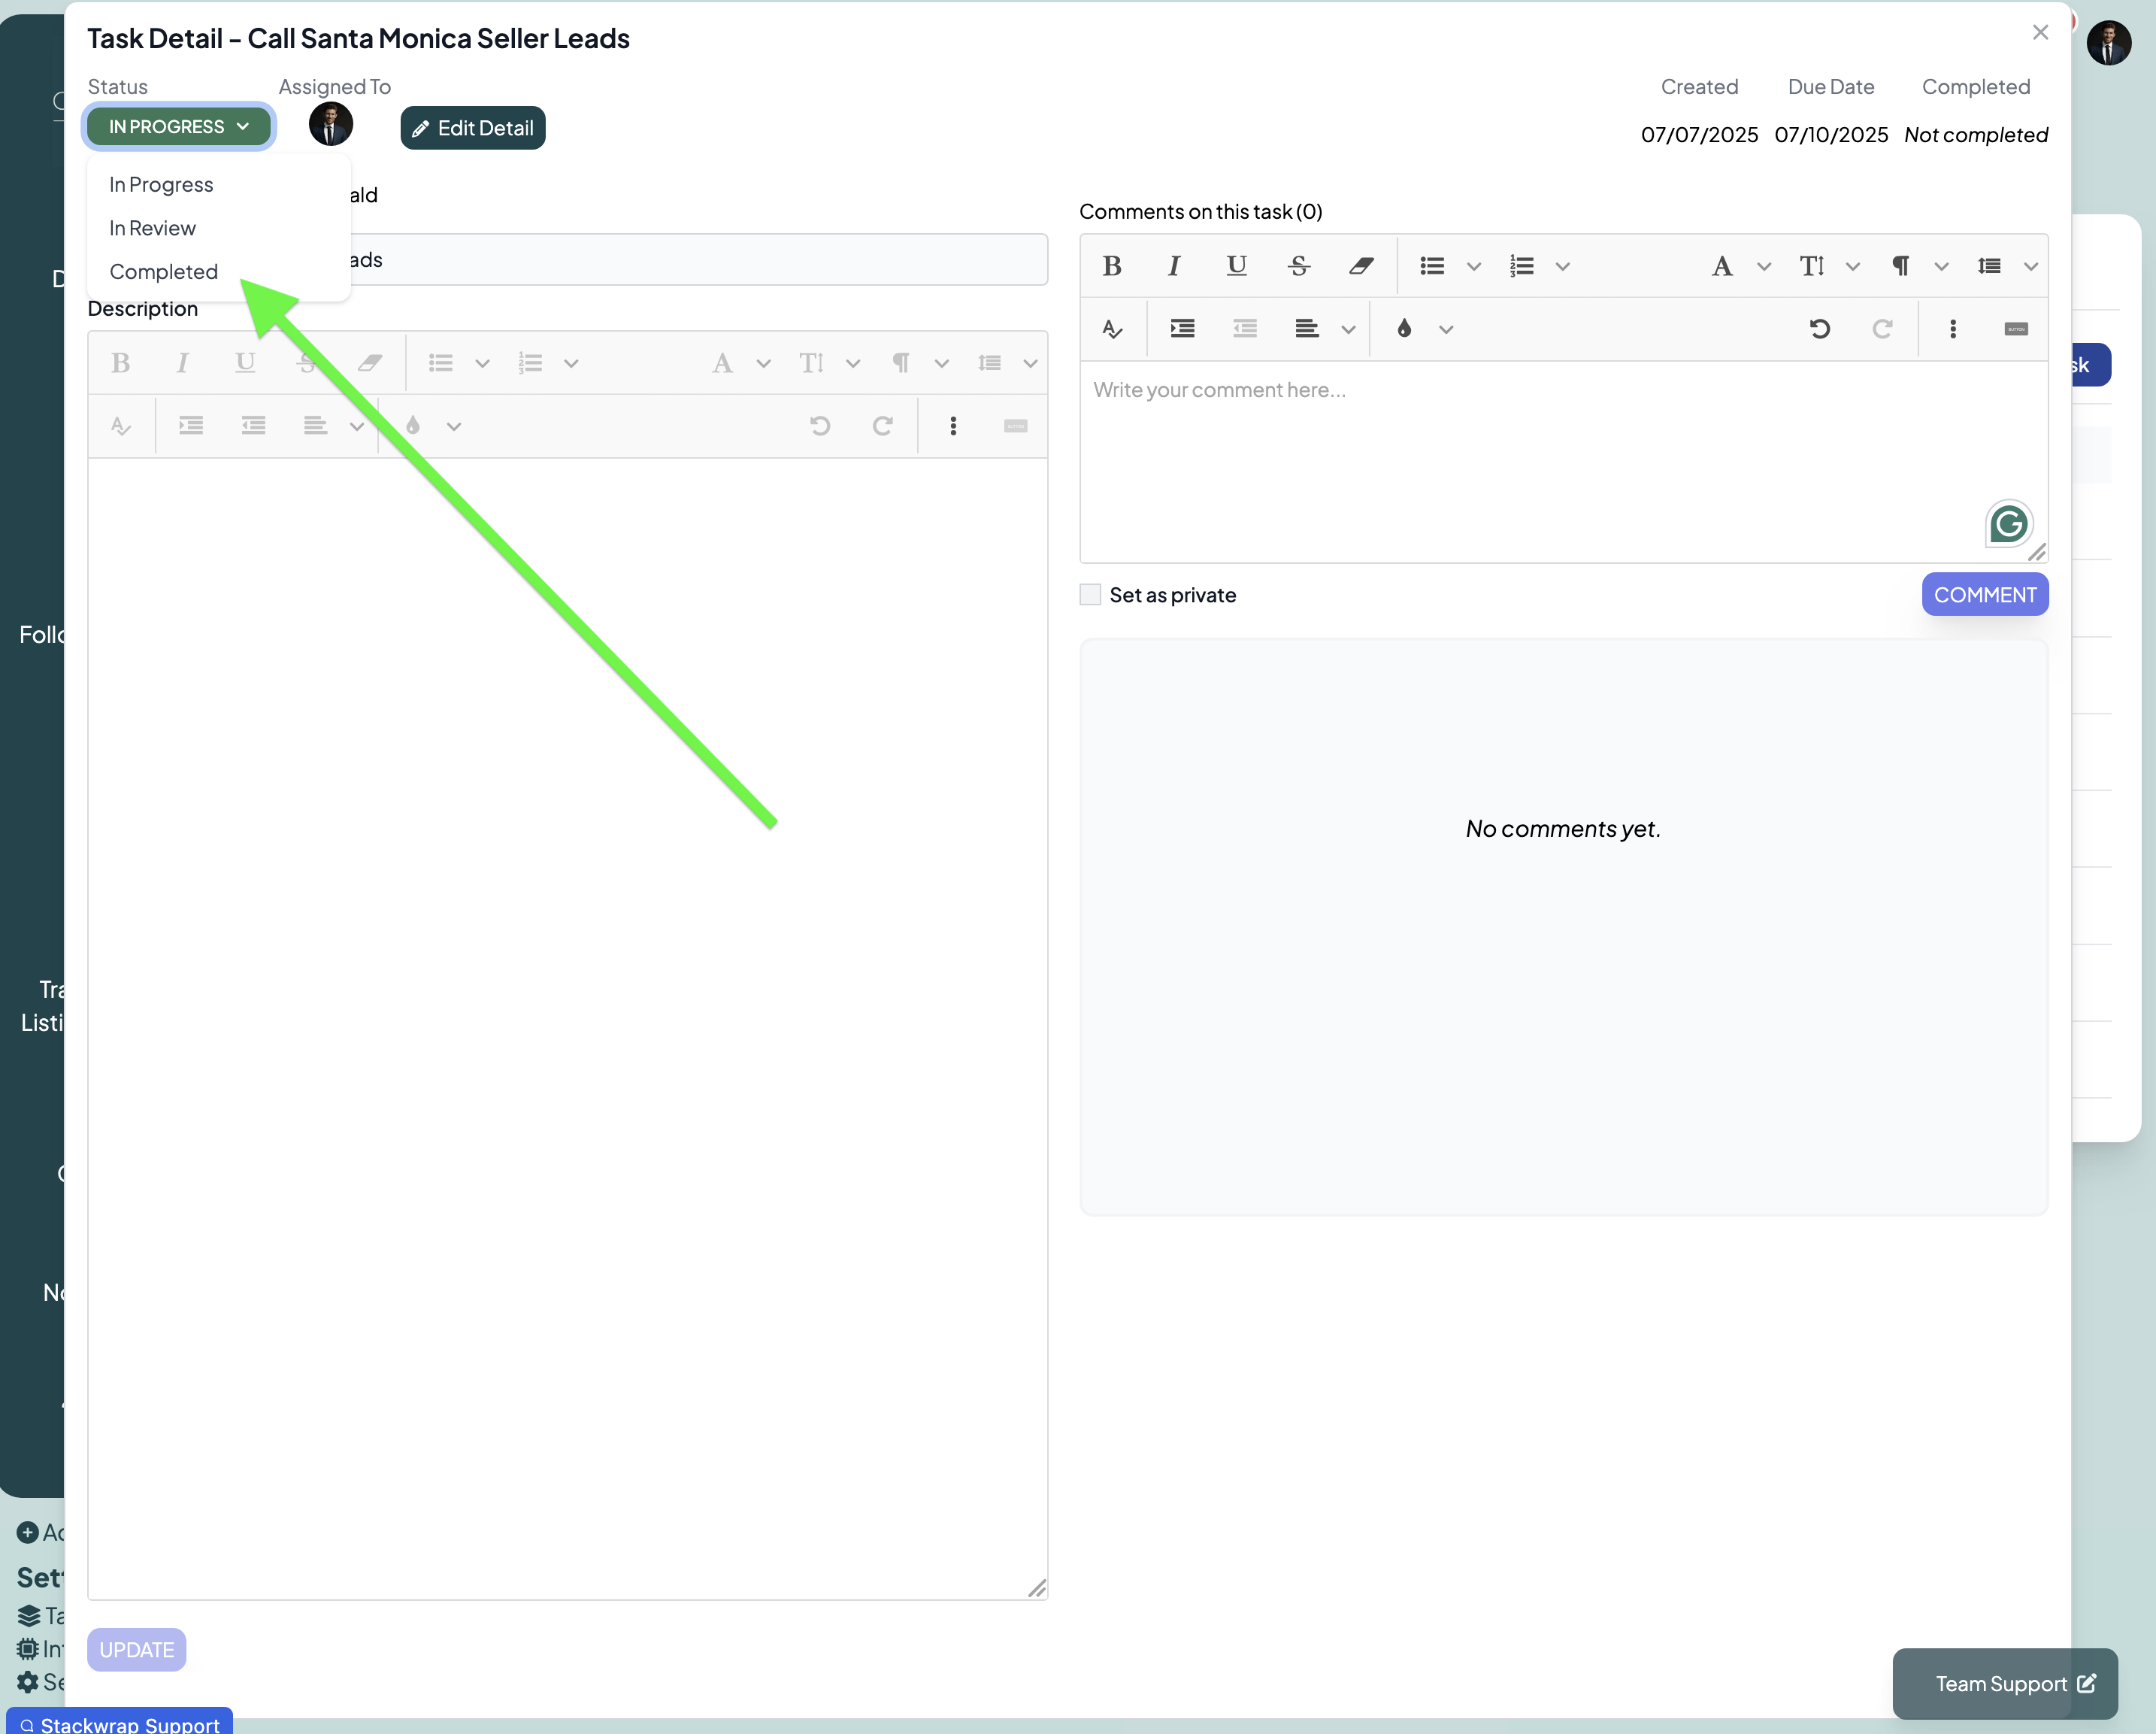
8) Changing the Status of Tasks
Once a task is complete, the agent can change the status of the task to "Completed". They can also select "In Review" if the admin needs to verify the task as complete. Once a task is marked as "Completed", it is cleared from the agent's "My Task" widget:
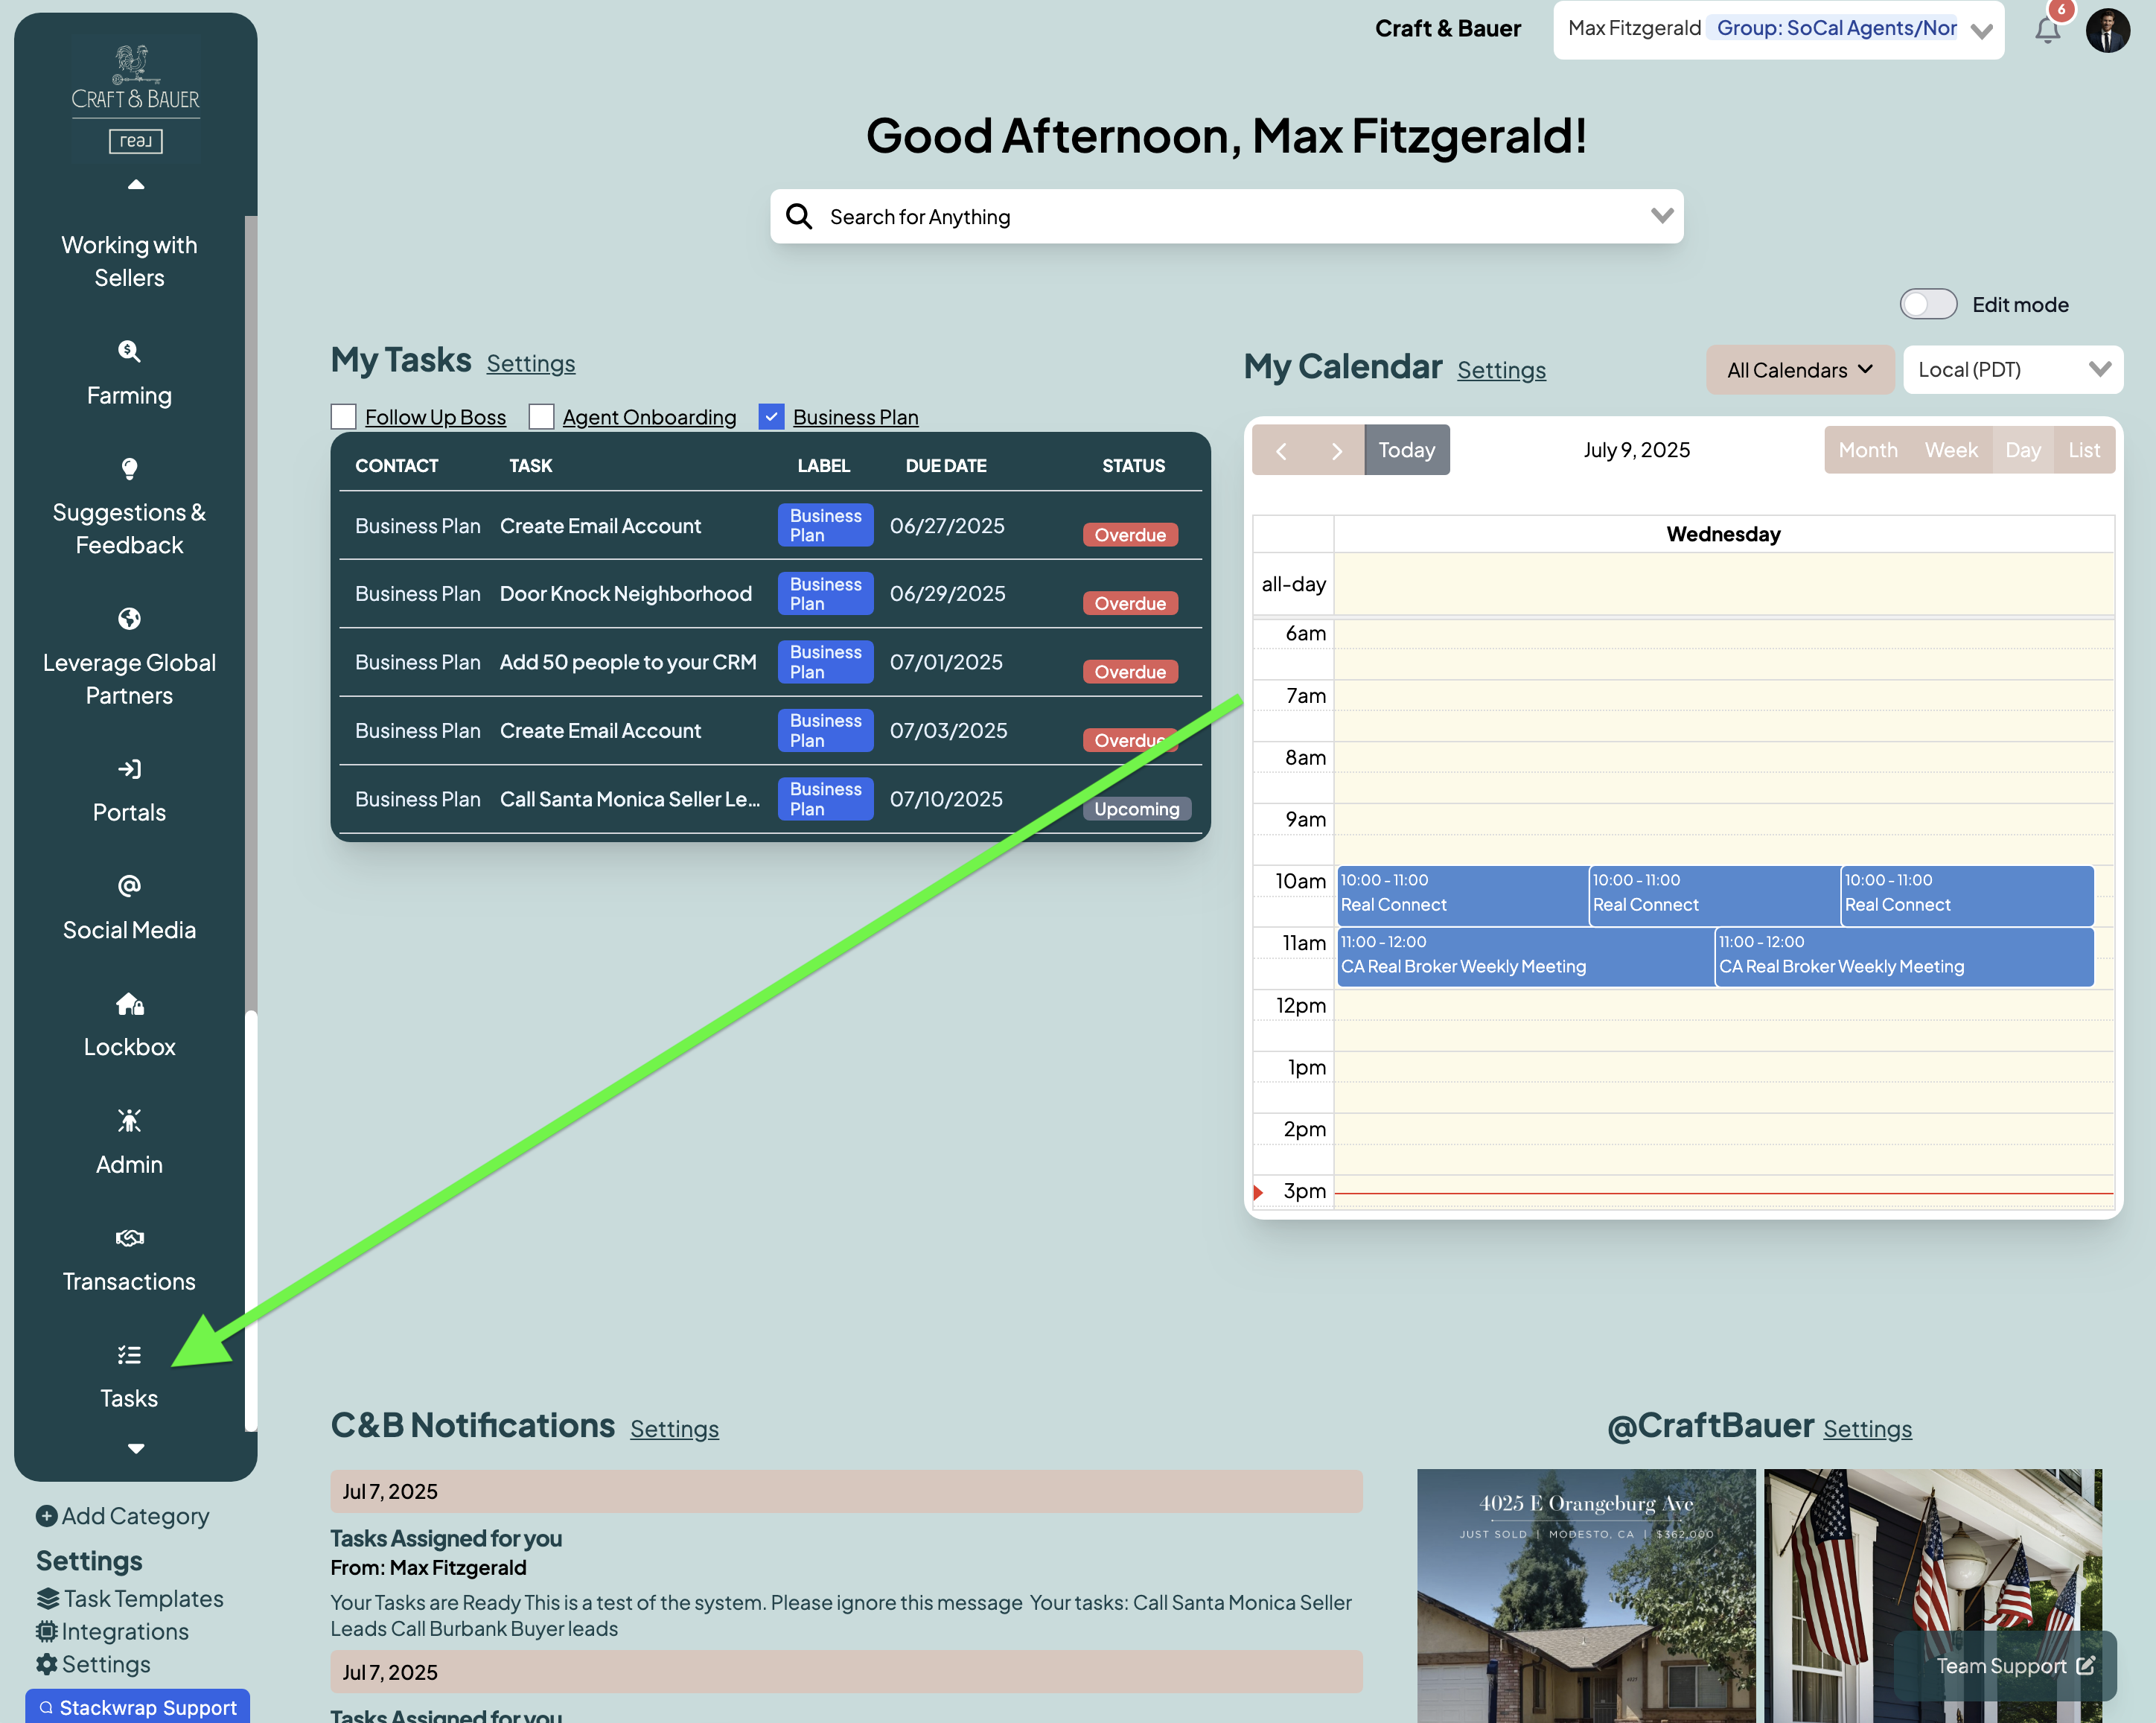
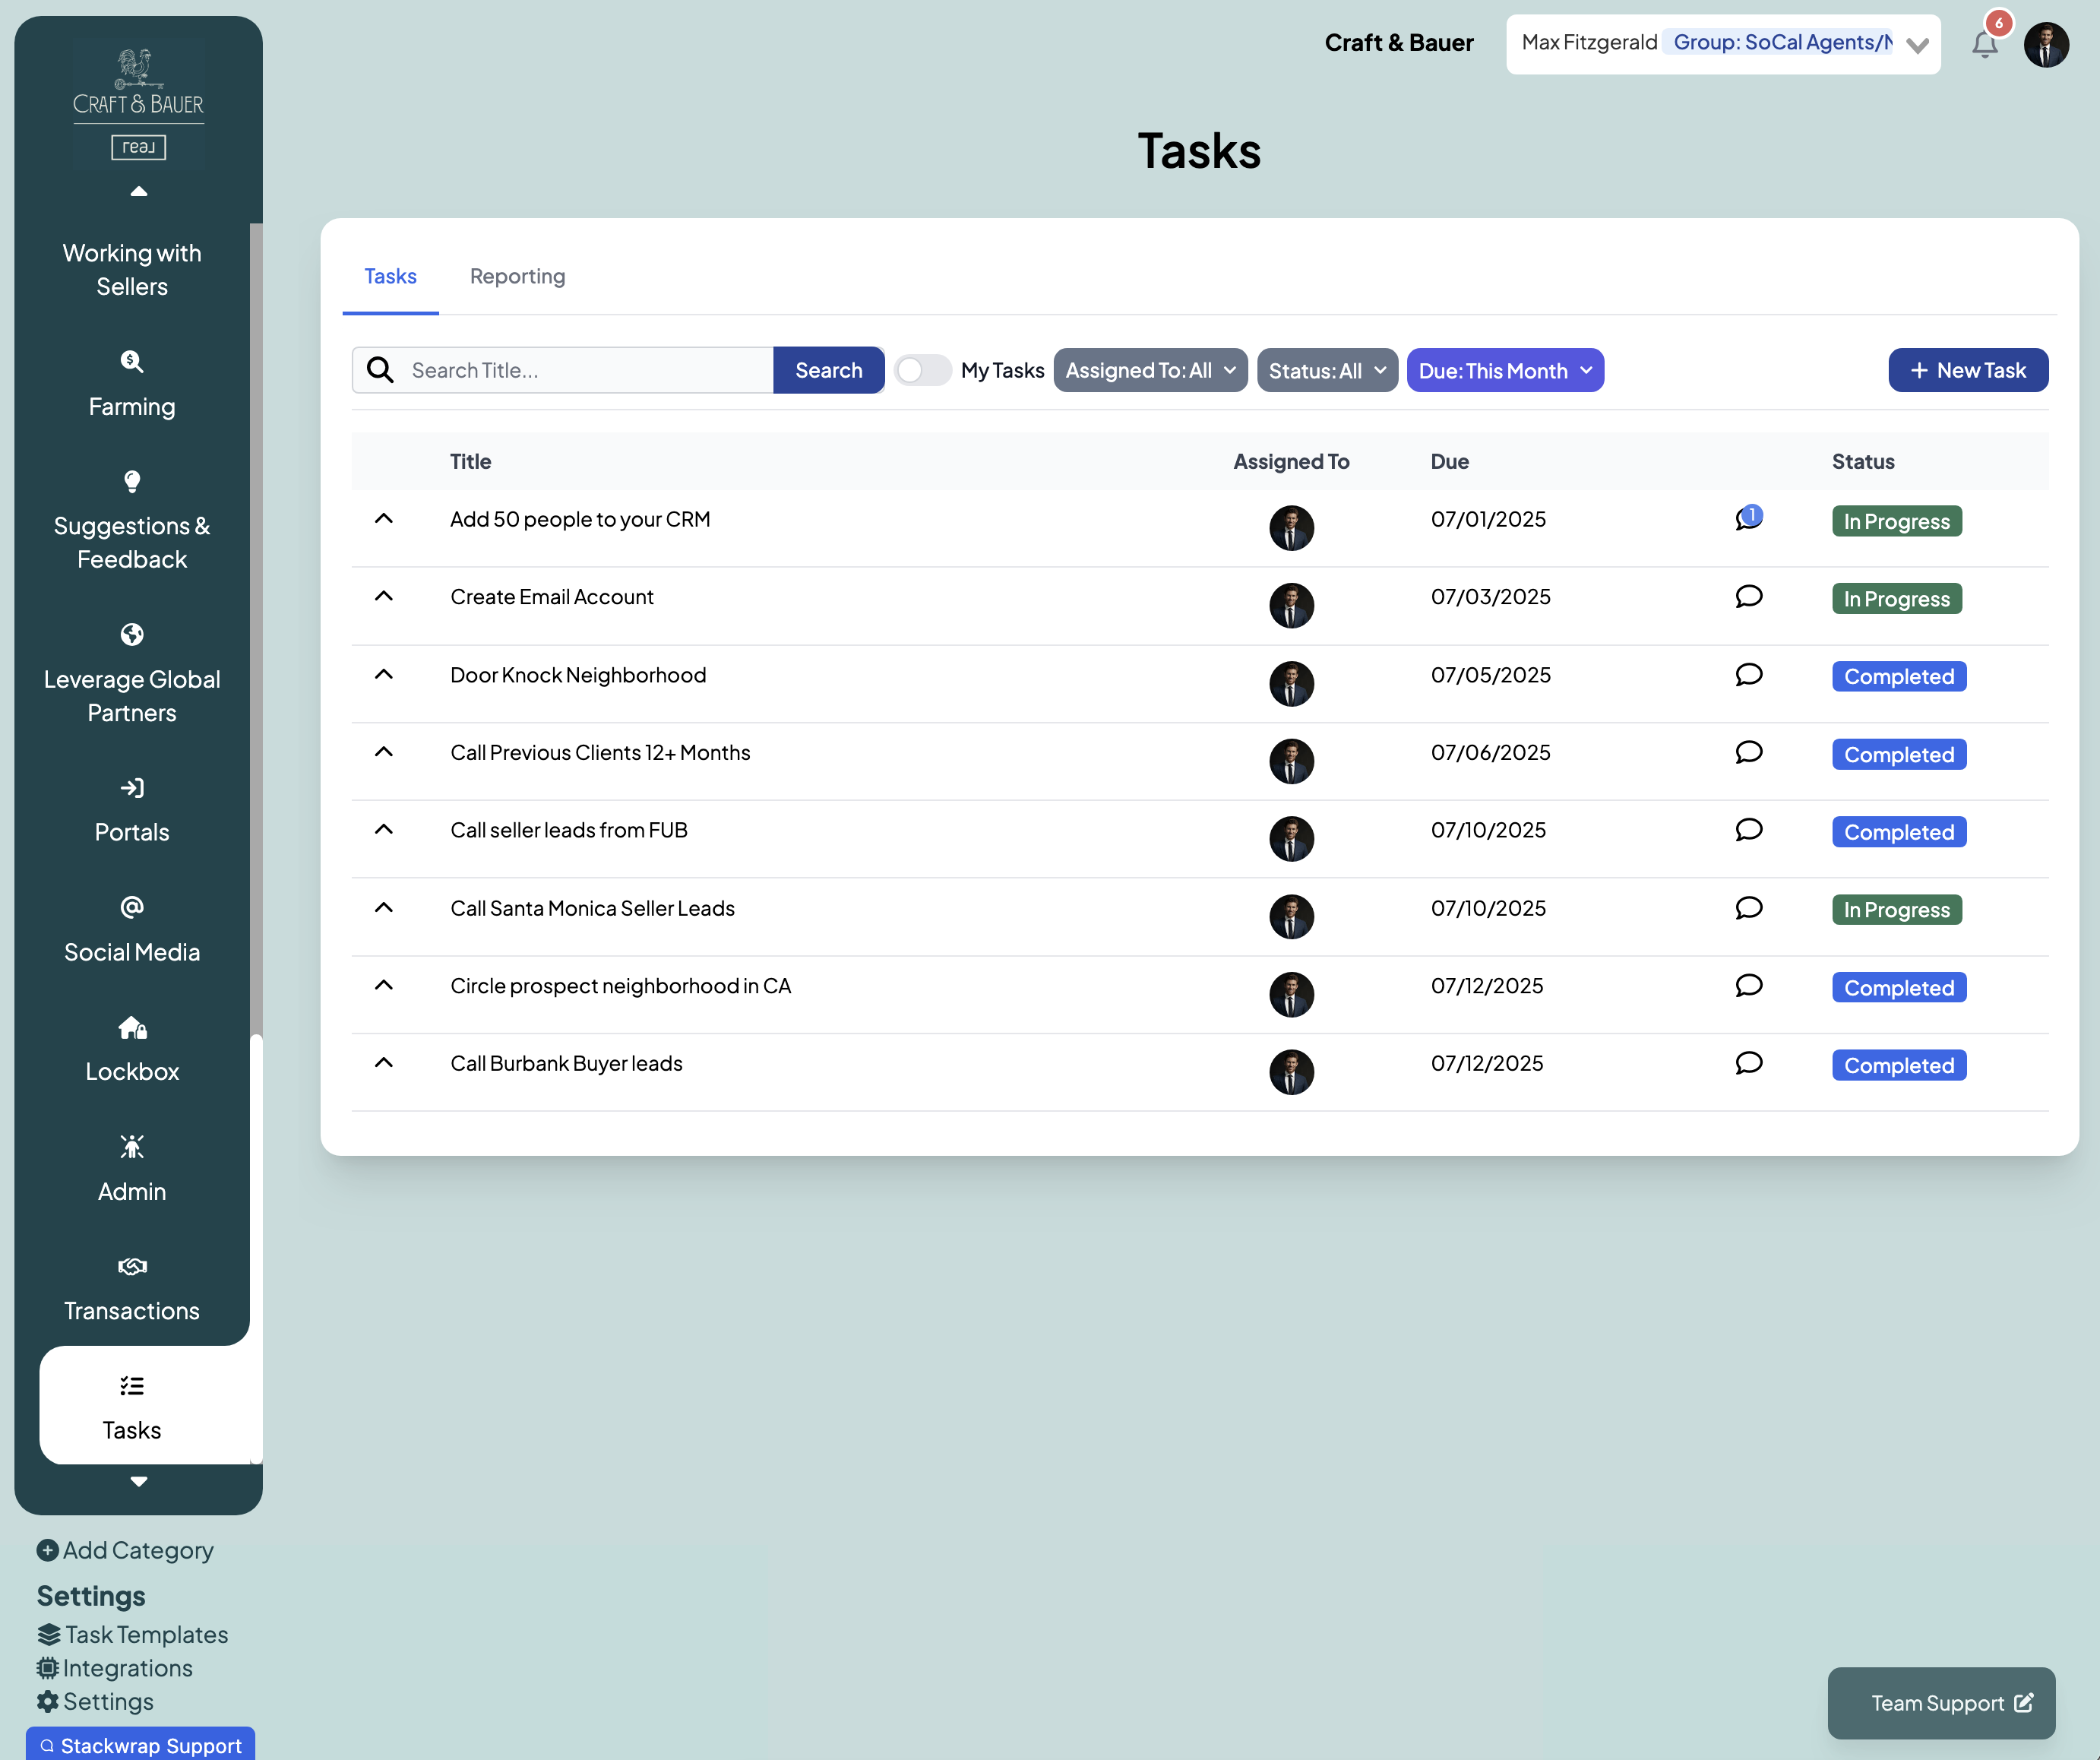
9) Admin's Visibility of Tasks
As the Admin, you have the ability to view all open tasks across your organization. To view all tasks, click on "Tasks" from within your Toolbar:
Once on this page, you'll see all tasks associated with your organization. You can do many different things on this page, including:
- Searching for tasks using the search bar
- Toggling "My Tasks" so that you're only seeing tasks assigned to you
- Filtering tasks by person, status, and due date
- View/respond to comments on particular tasks by clicking the conversation bubble
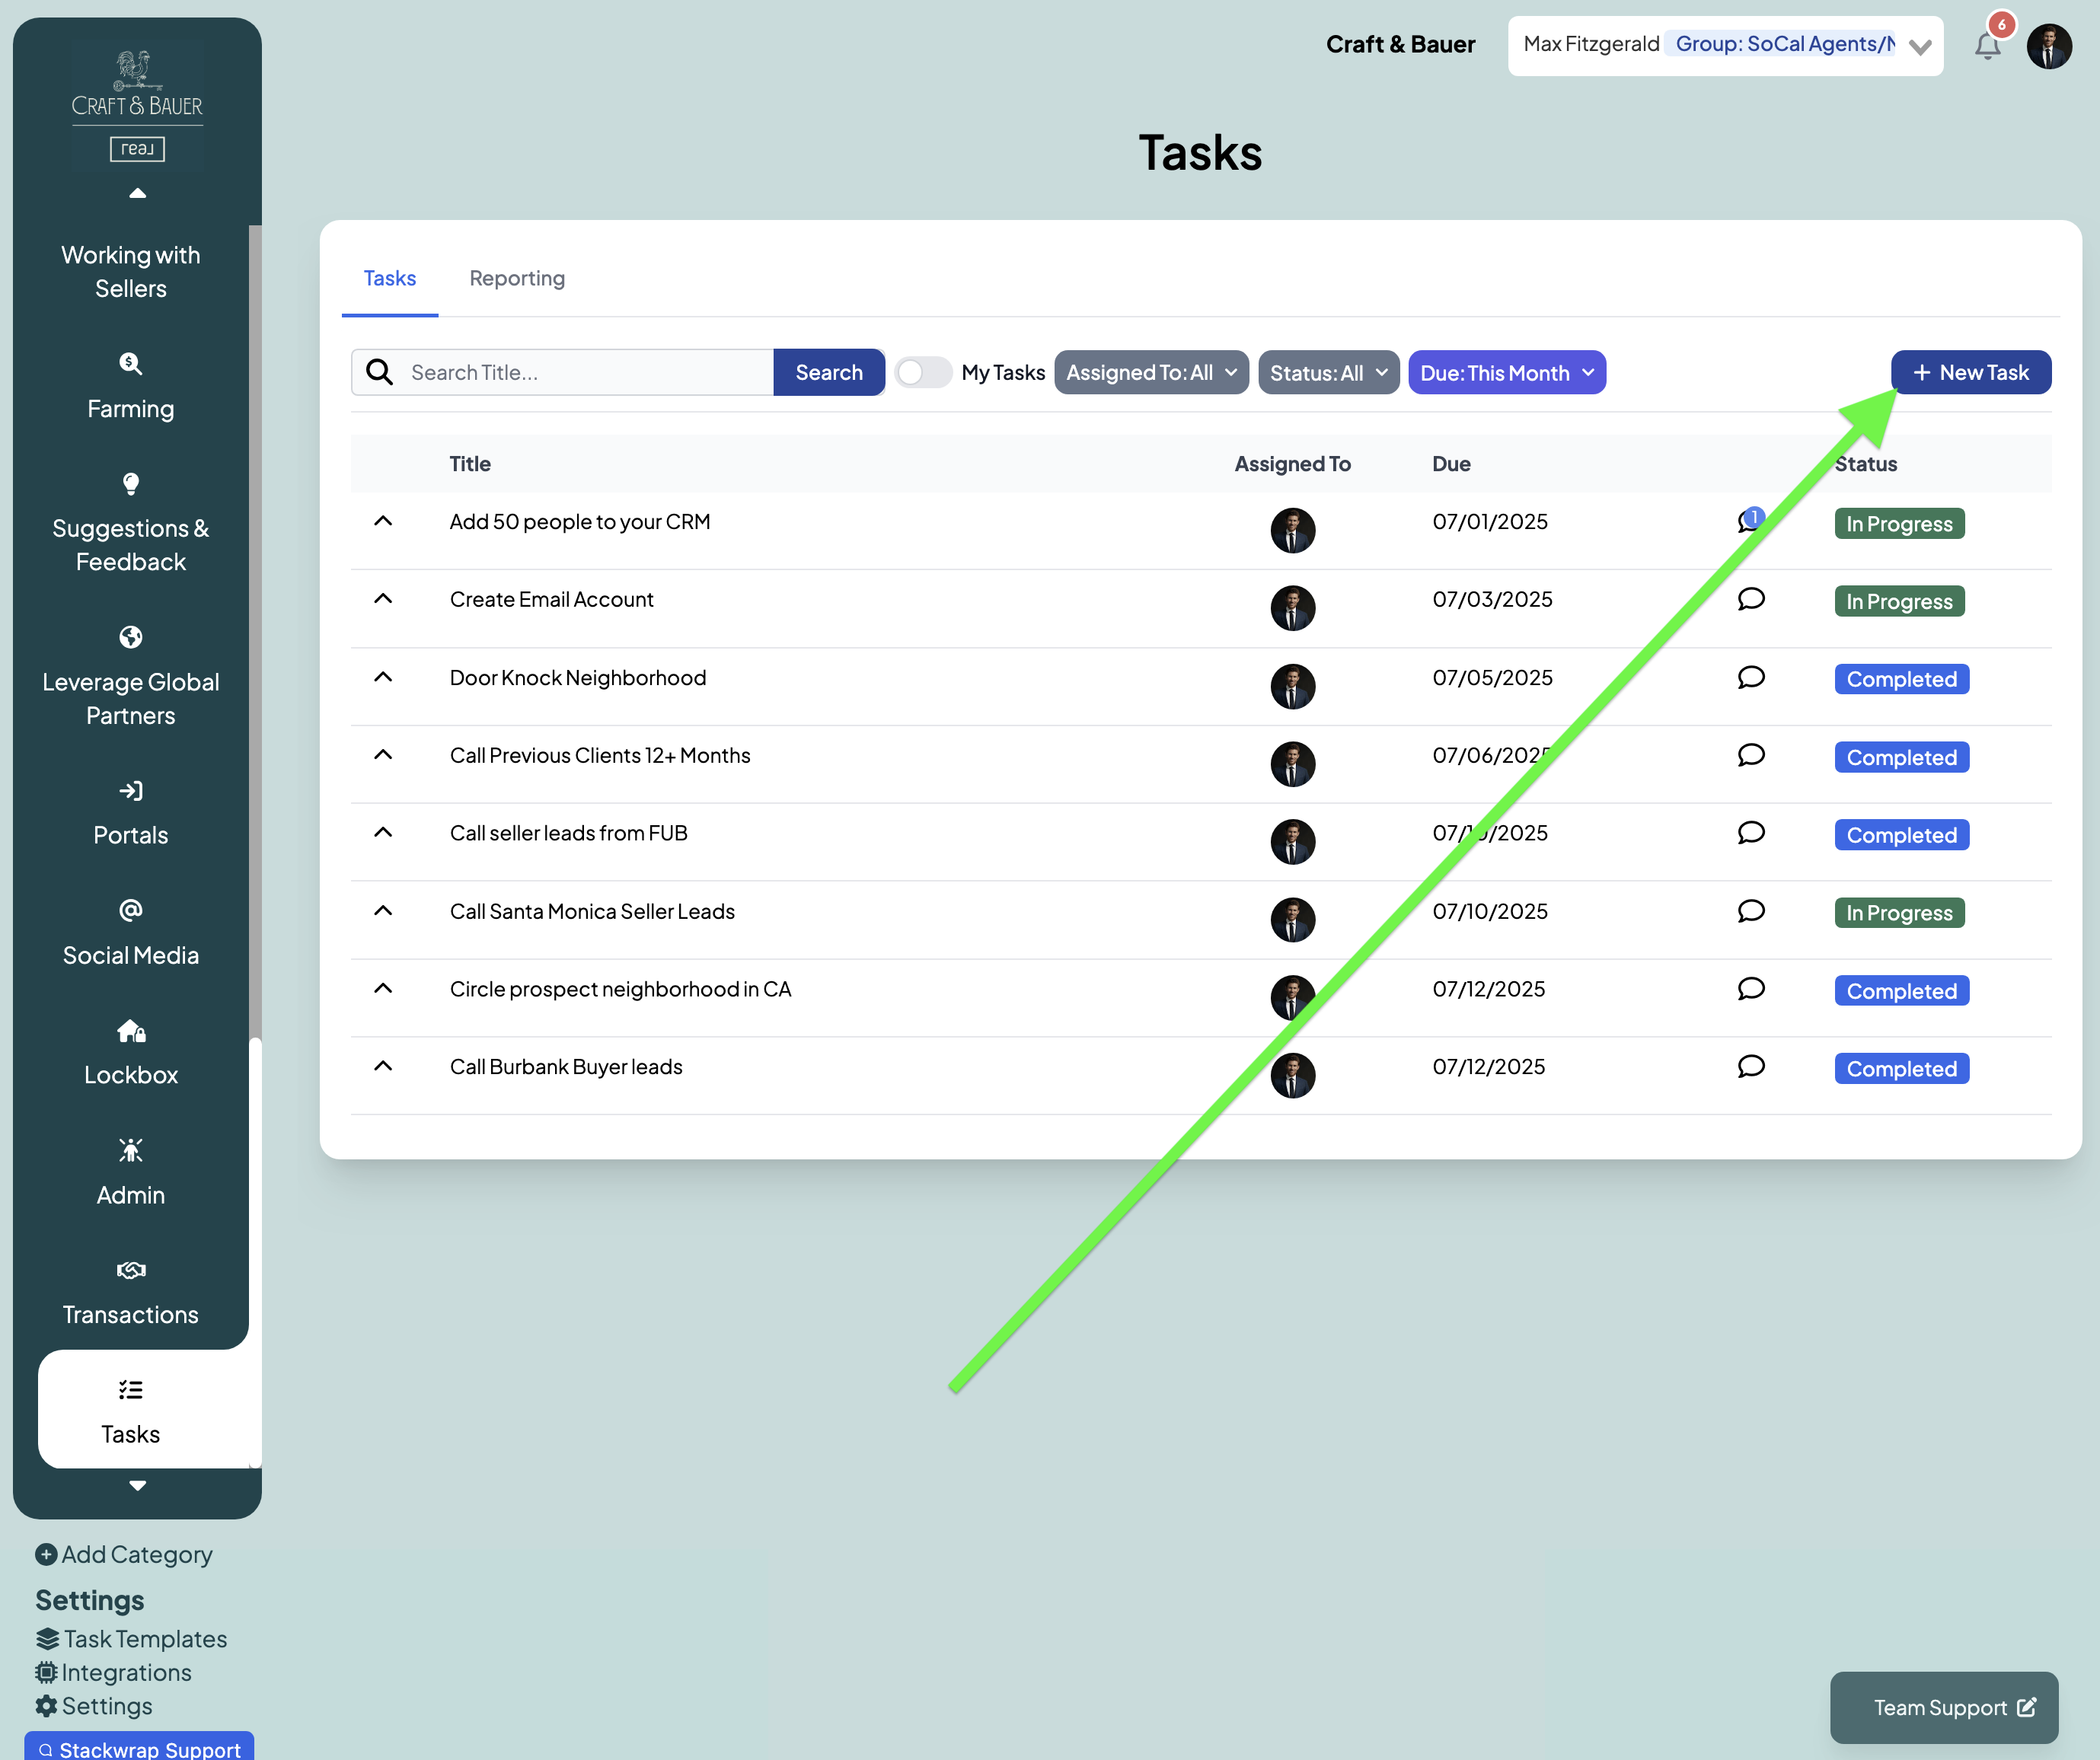
10) Creating Individual Tasks
You have the ability to create individual tasks for your agents that aren't tied to a specific template. To do this, click on the "New Task" button on the top right of your screen:
On the pop up, you can add the task's title, description, and due date. You can also choose to have this be a recurring task, a subtask of an existing task, and/or a task that is dependent on another task being completed. Lastly, you can select the Assigned Users of this task by typing in a Group, a Role, or individual user(s).
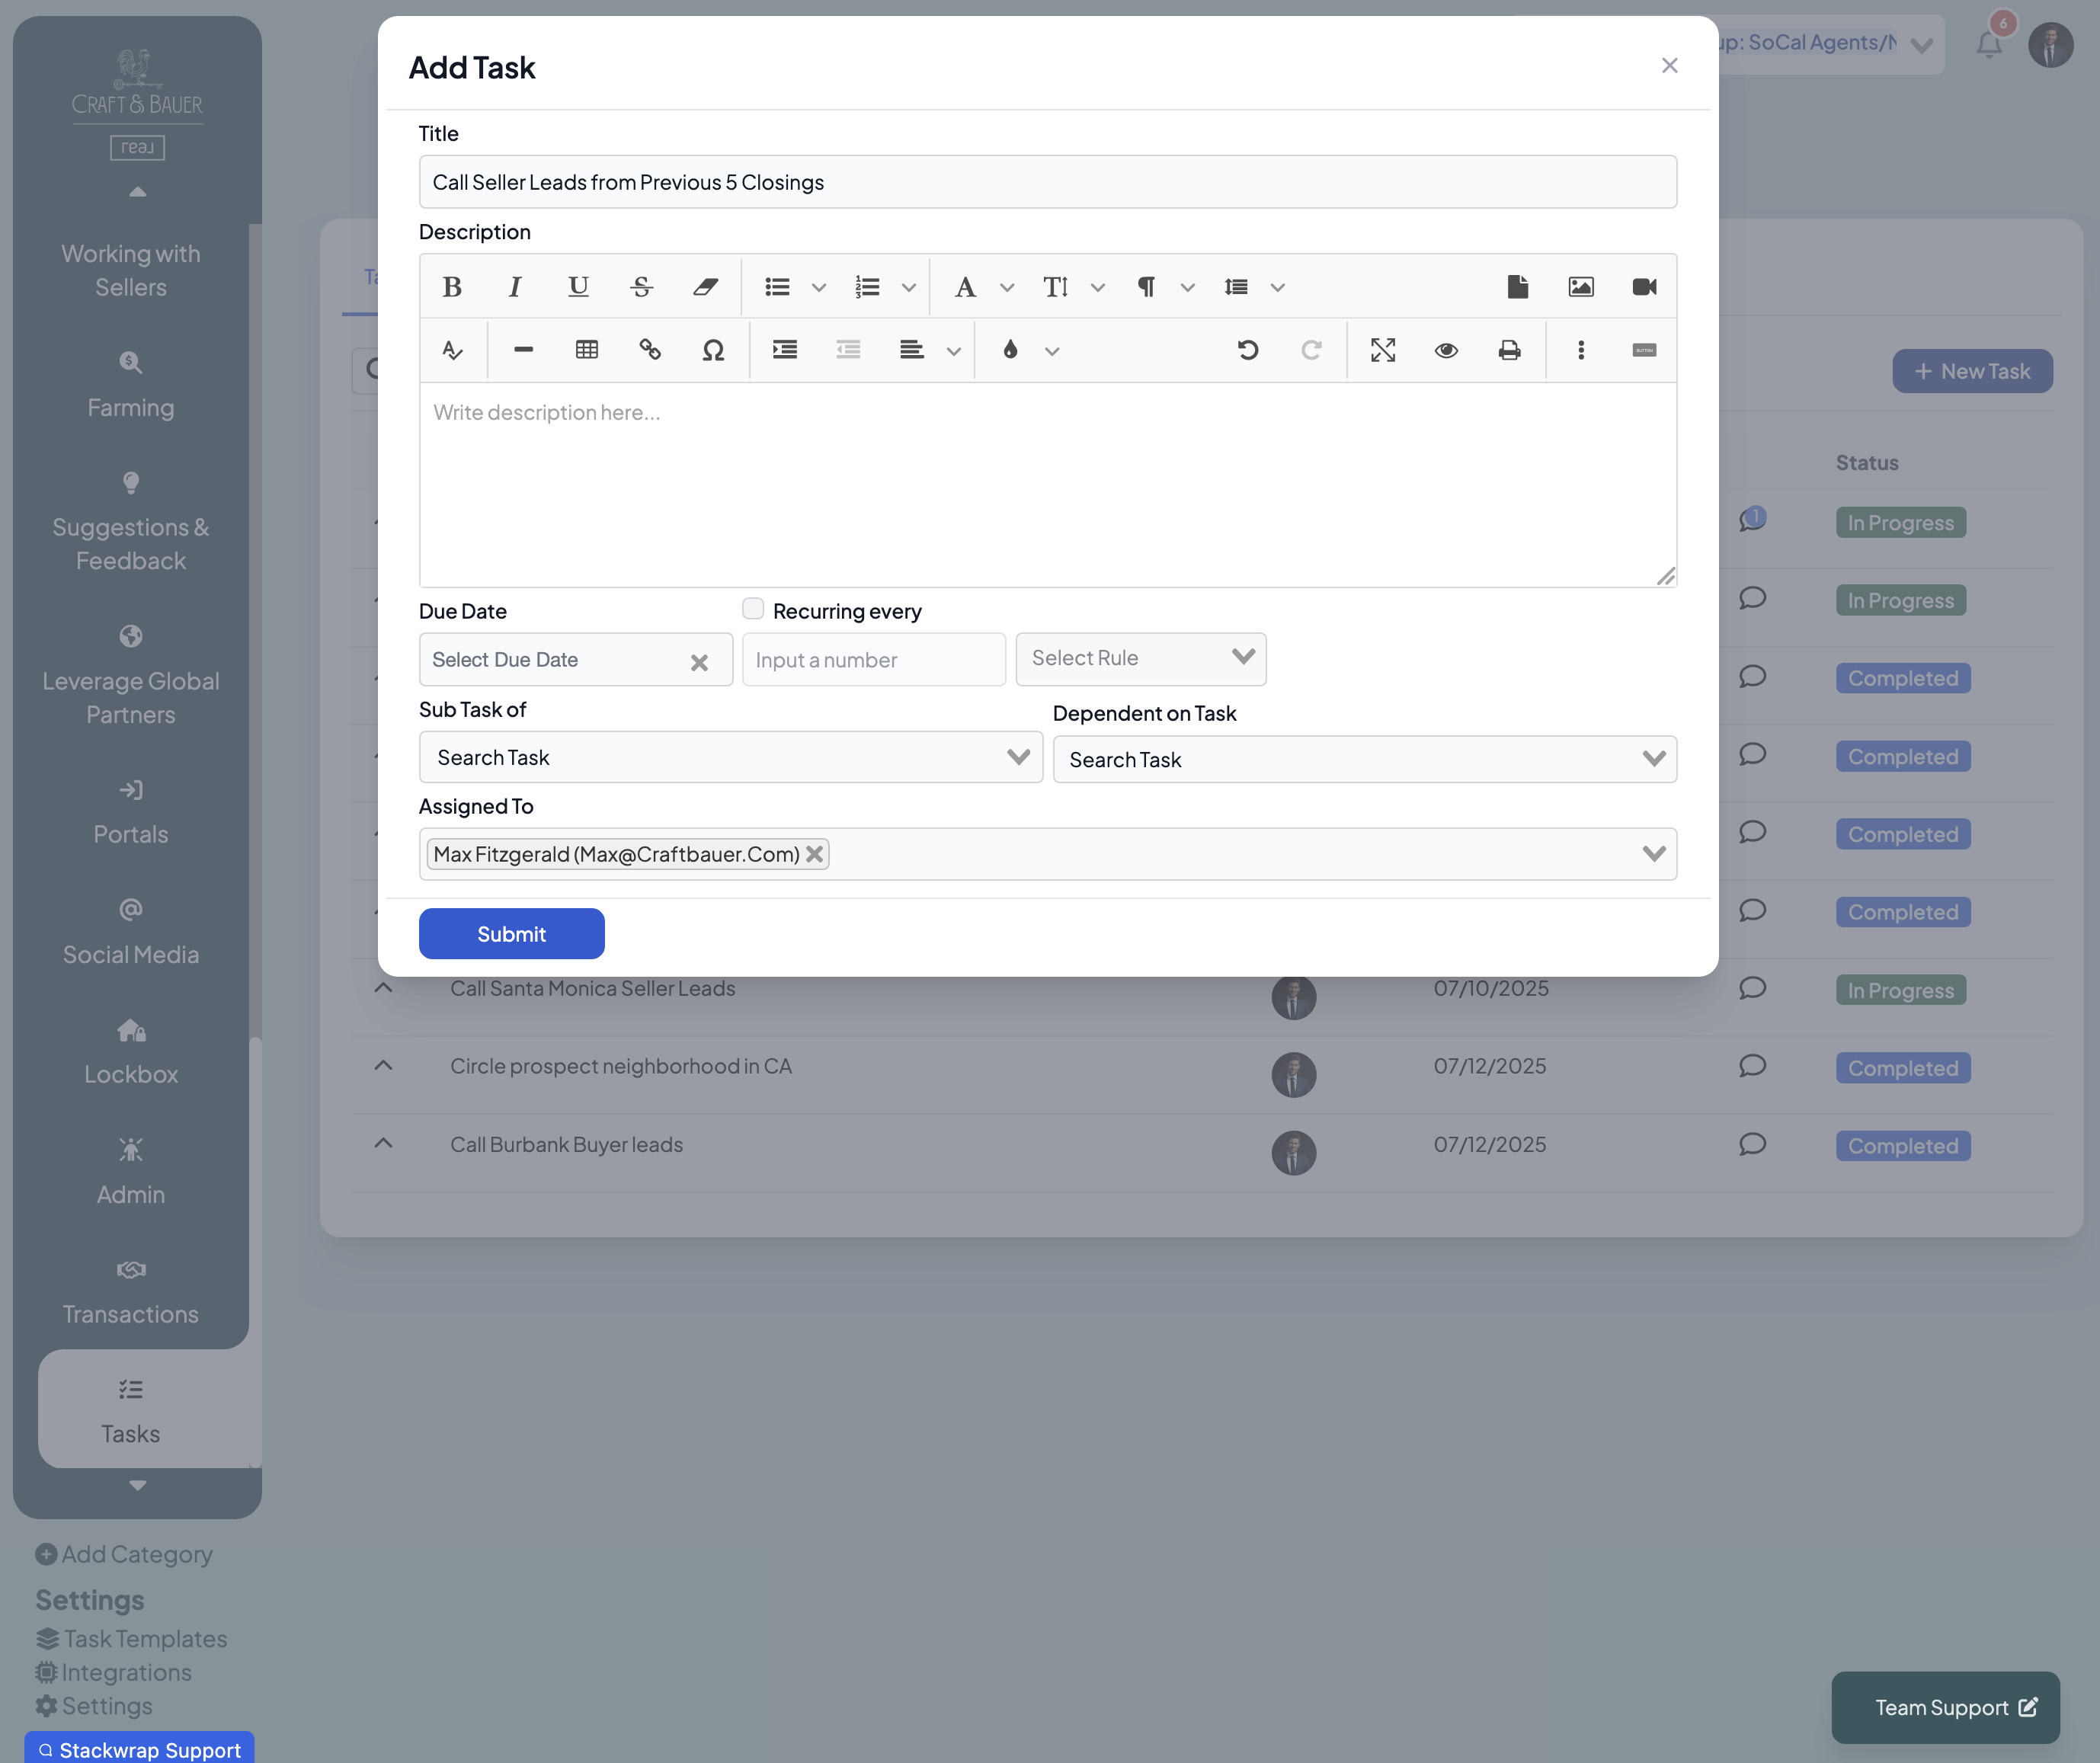
After clicking "Submit", that new task will populate to the user(s) "My Task widget on their homepage dashboard: