StackWrap Onboarding Prompts - Internal
The goal of this revised onboarding process is to prompt a new account through the set up process.
There will be 2 types of StackWrap accounts that we offer customers: an account for teams (the current version of StackWrap), and an account for individuals (this will be created/launched in August 2025).
We want all new account sign ups to occur through StackWrap.com. When the user signs up for an account, they will designate whether they are an individual, or if they run a team/company. Depending on their answer, the correct onboarding template will be applied.
Regardless of what type of account is created, the Admin needs the ability to do the following:
- Interact with all onboarding prompts from start to finish
- Collapse the onboarding prompts so they can manually edit/manage their account
- Resume the onboarding prompts at any time at the point where they last collapsed the prompts
- See a status bar so they know where they are in the onboarding process, and what remaining tasks need to be completed
- For remaining tasks, they should have the ability to click on a task and be brought to that section of the onboarding process.
When an account is opened, they will go through the current onboarding prompts that Matt built.
Welcome to StackWrap Onboarding Prompts:

Once inside the account, we will insert "Show Me How" buttons throughout to start the guided tutorial for each feature.
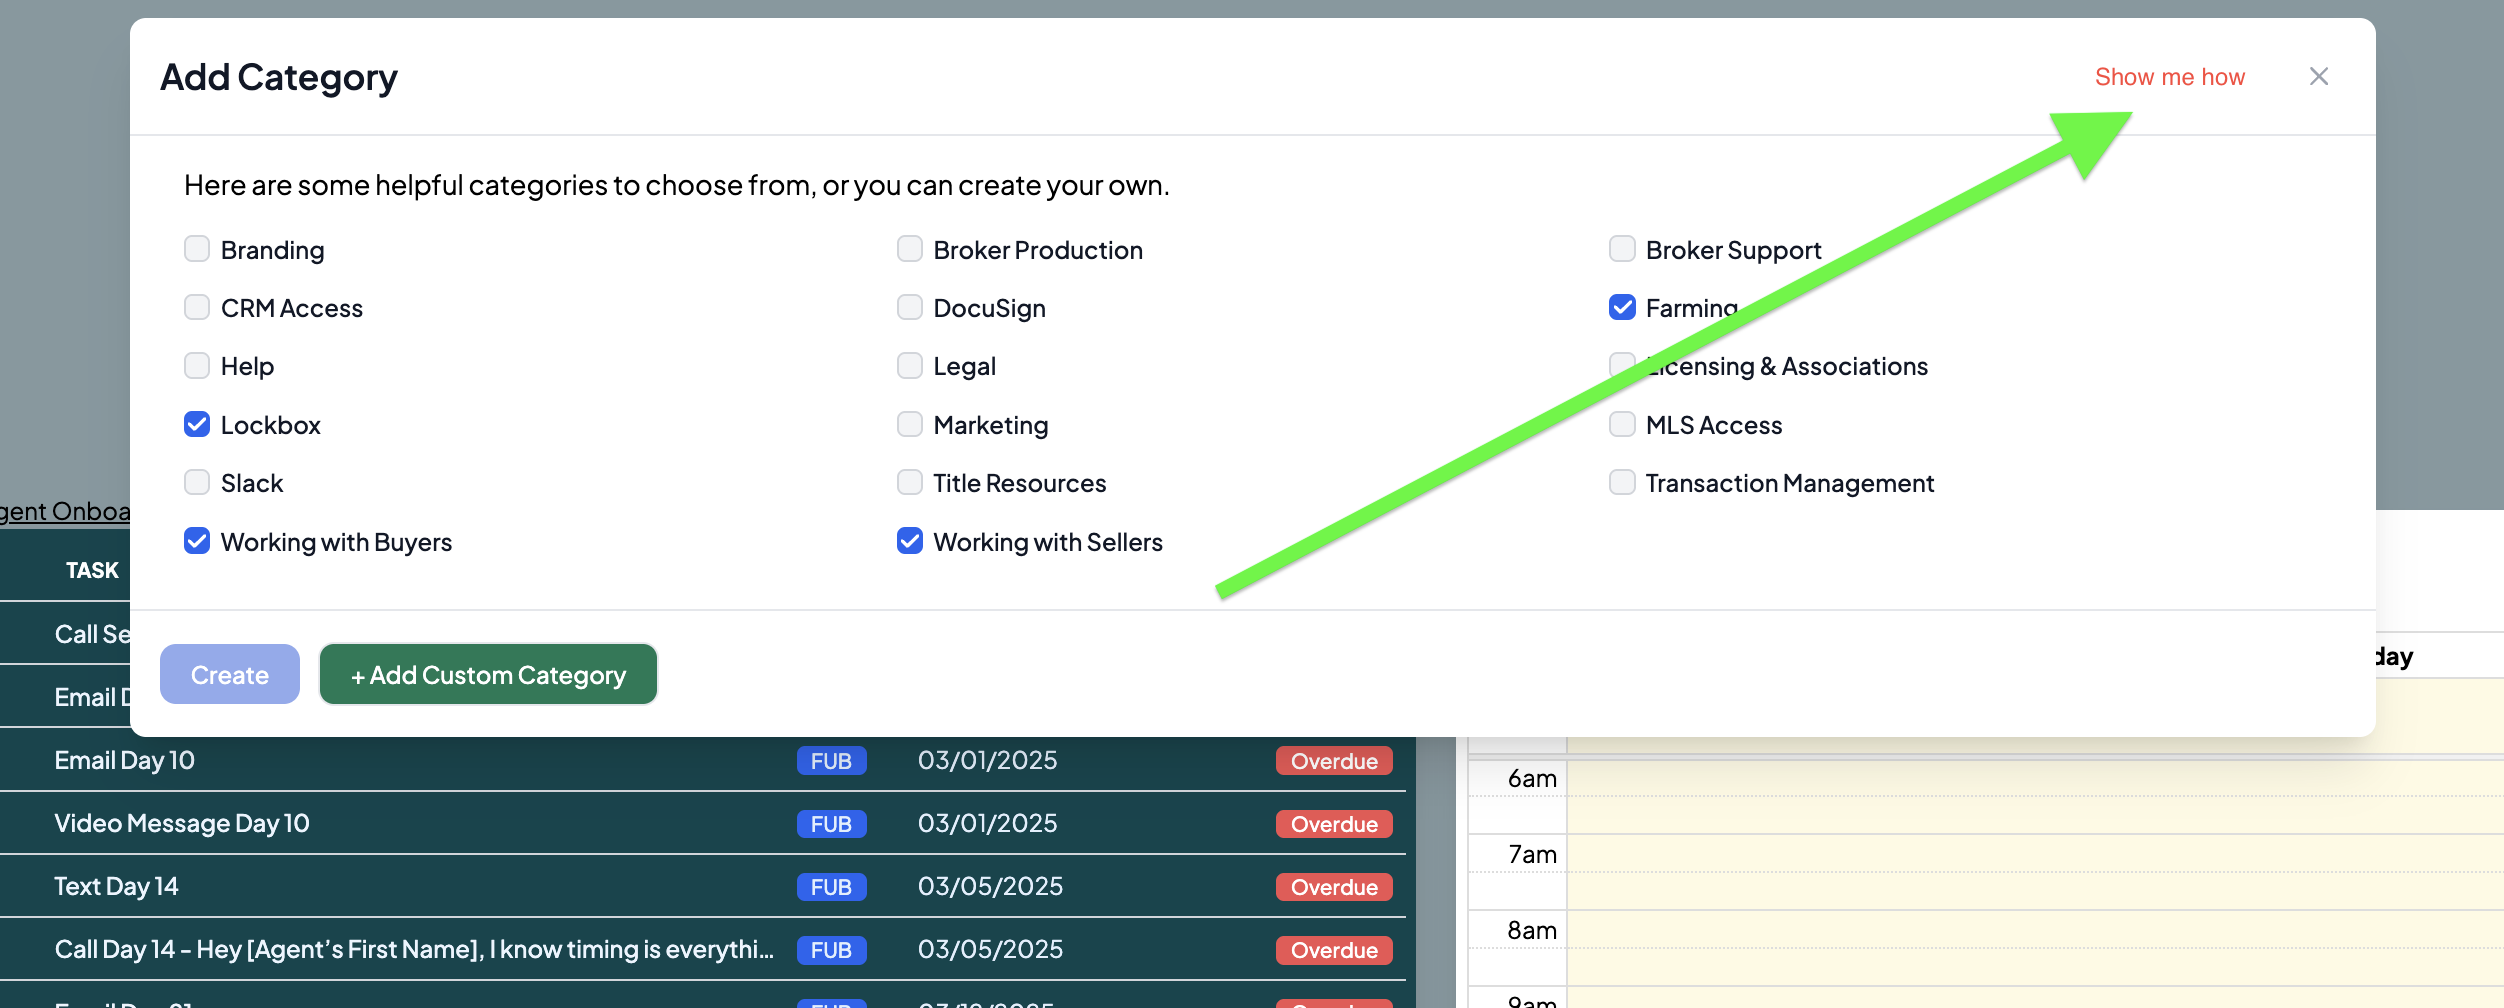
Prompt - Creating and Managing Categories
(Add "Show Me How" button here)
(When "Show Me How" button is clicked, Spotlight the left hand toolbar)
Body Text:
Organizing your tools as Categories within the lefthand Toolbar is a core feature of StackWrap, and allows you and your team easy access to everything offered within your organization. Categories can be created to do the following:
- Redirect to a 3rd-party URL
- Consolidating like-for-like Items (explained in the next step)
(Click “Next”)
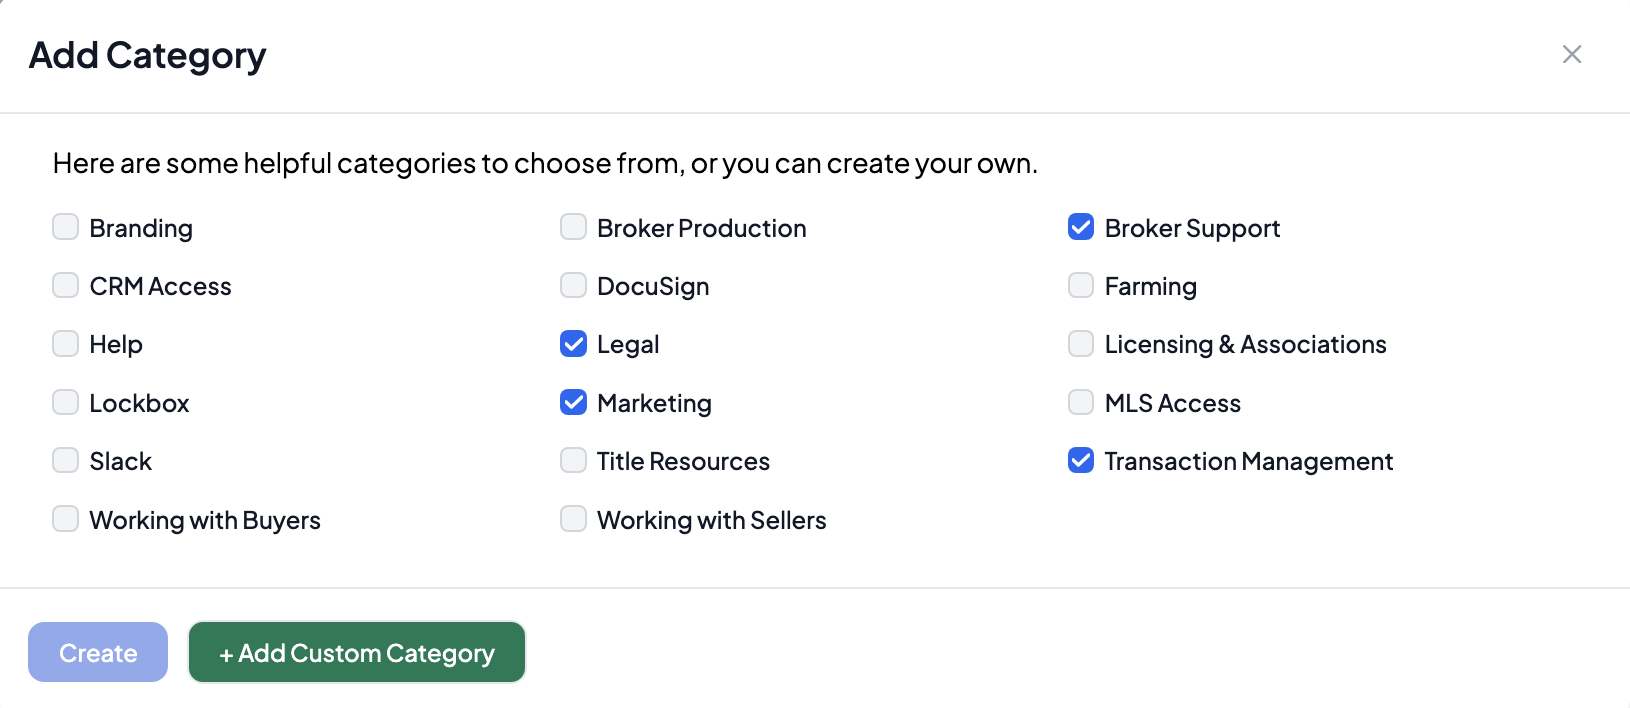
Let’s create your first few Categories! Please select a few from the list below to add them to your Toolbar. Don't worry, Categories can always be edited from within the system once they are created.
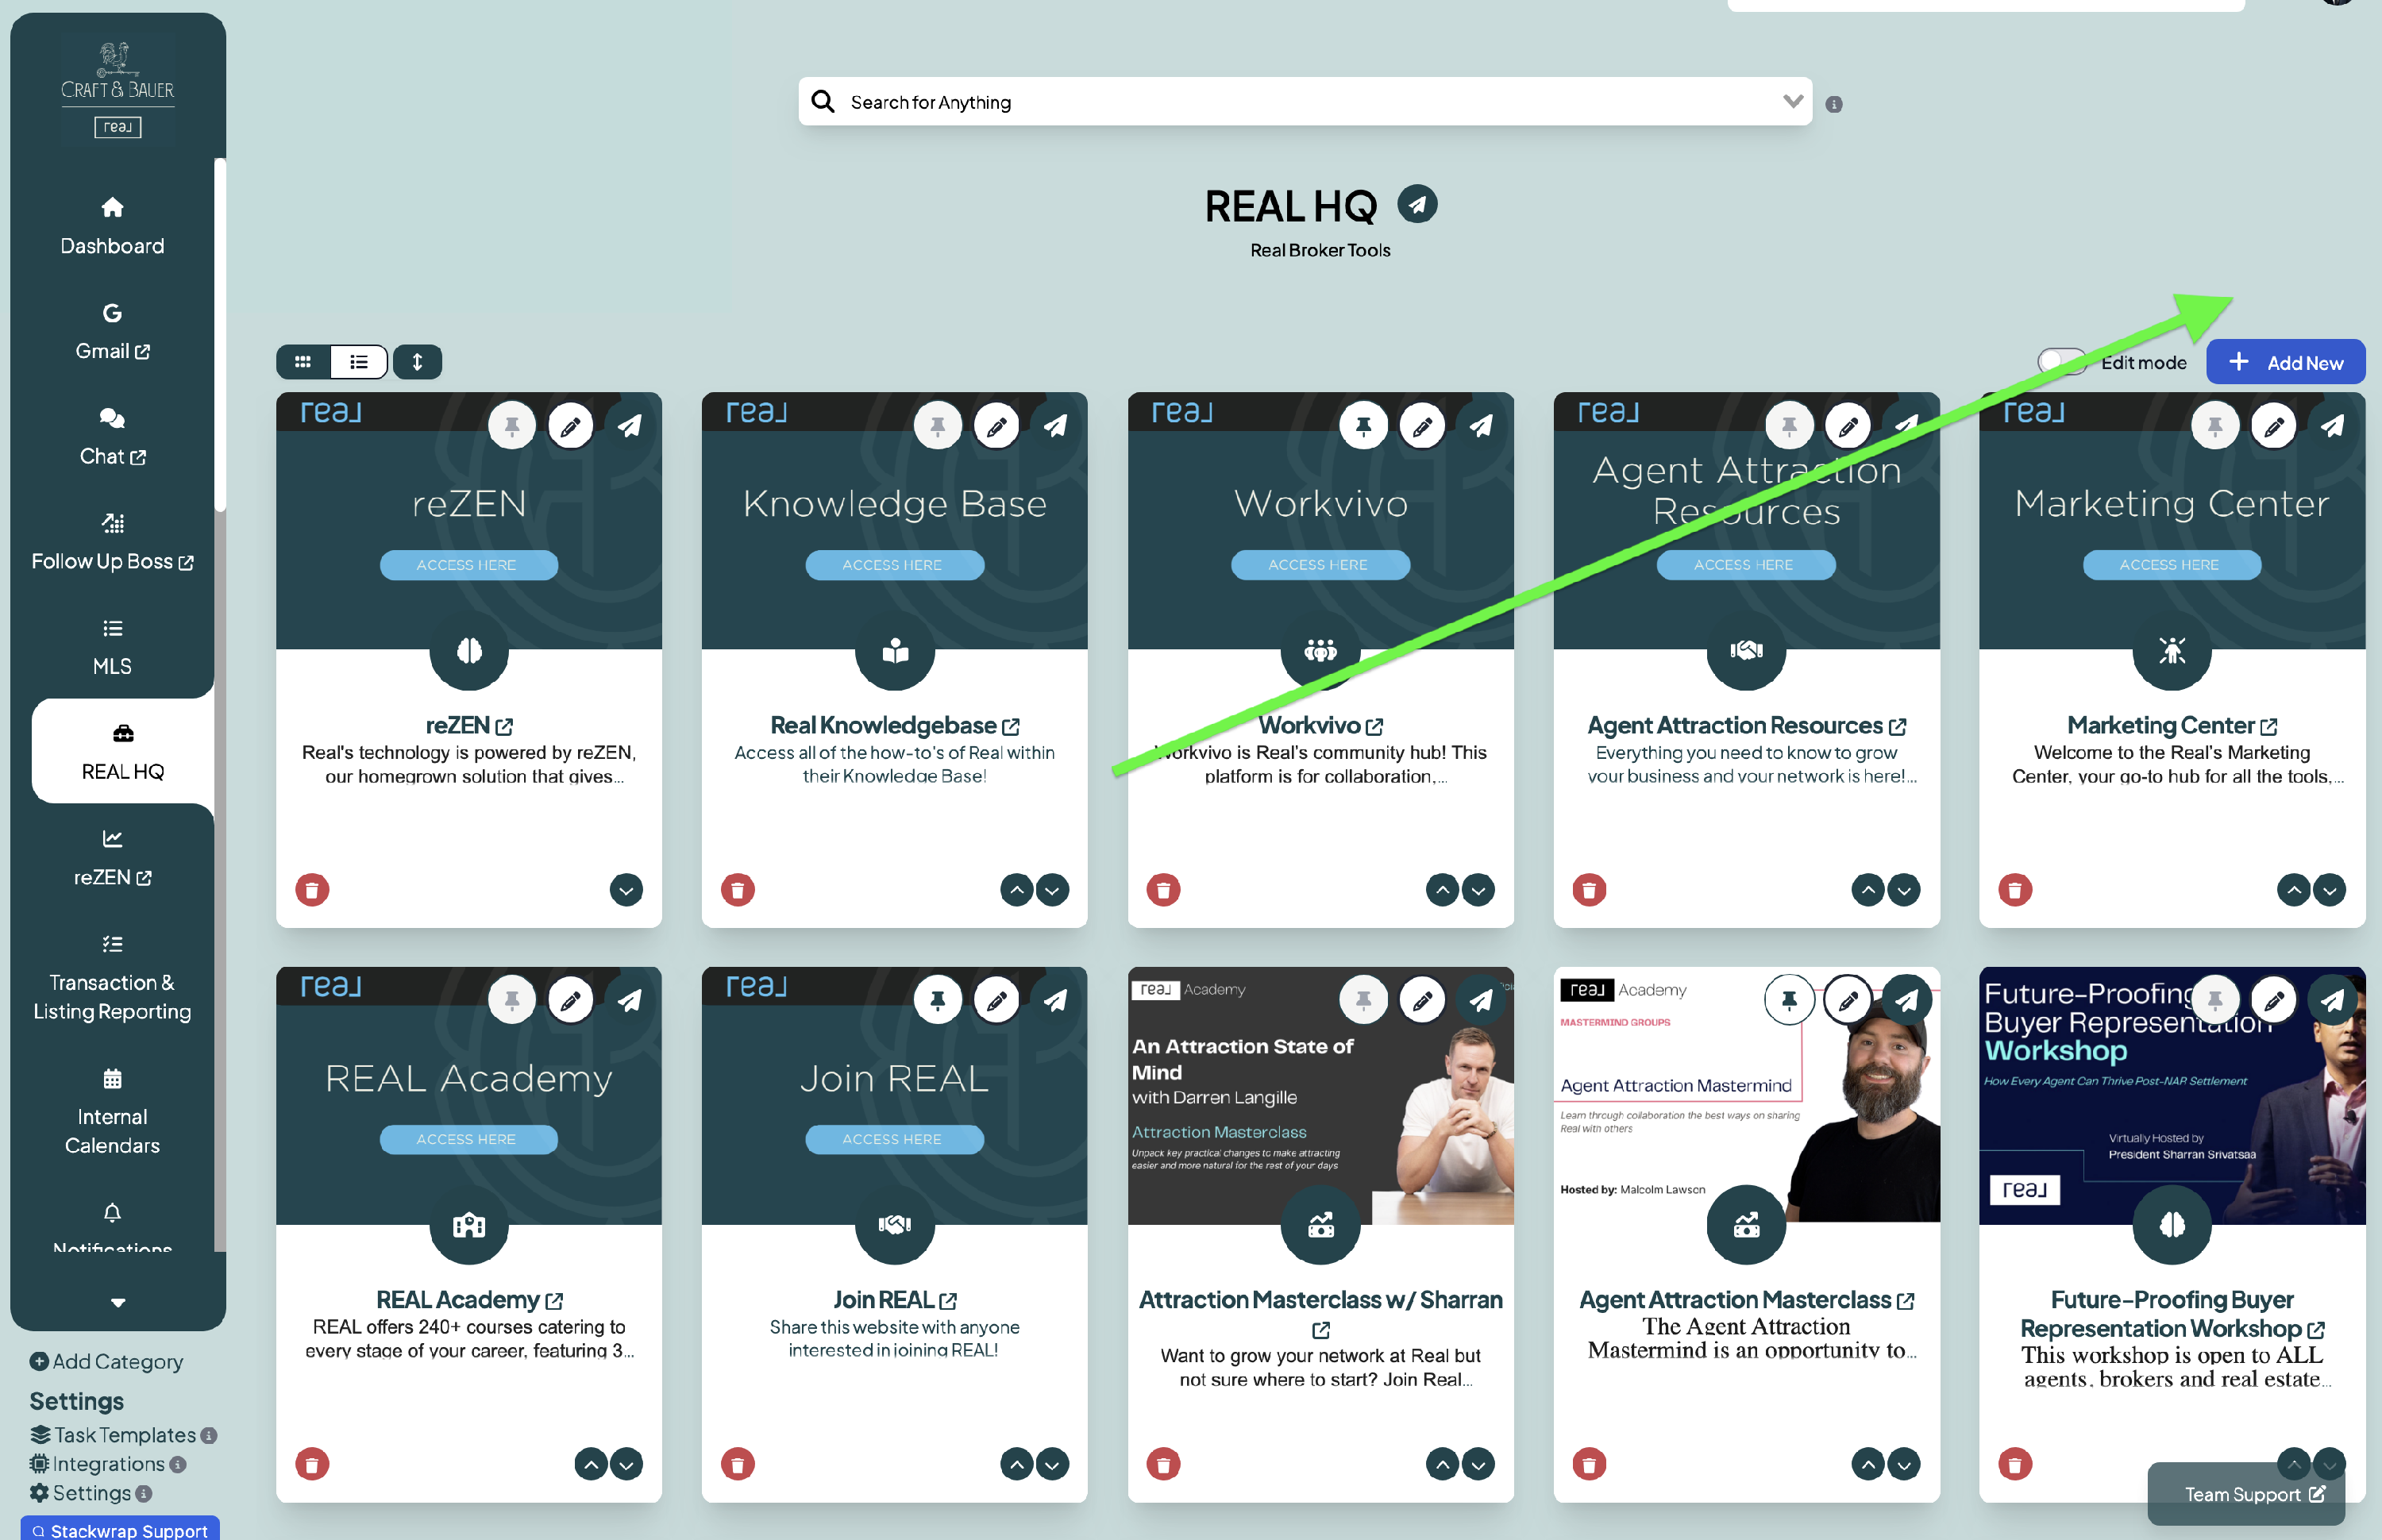
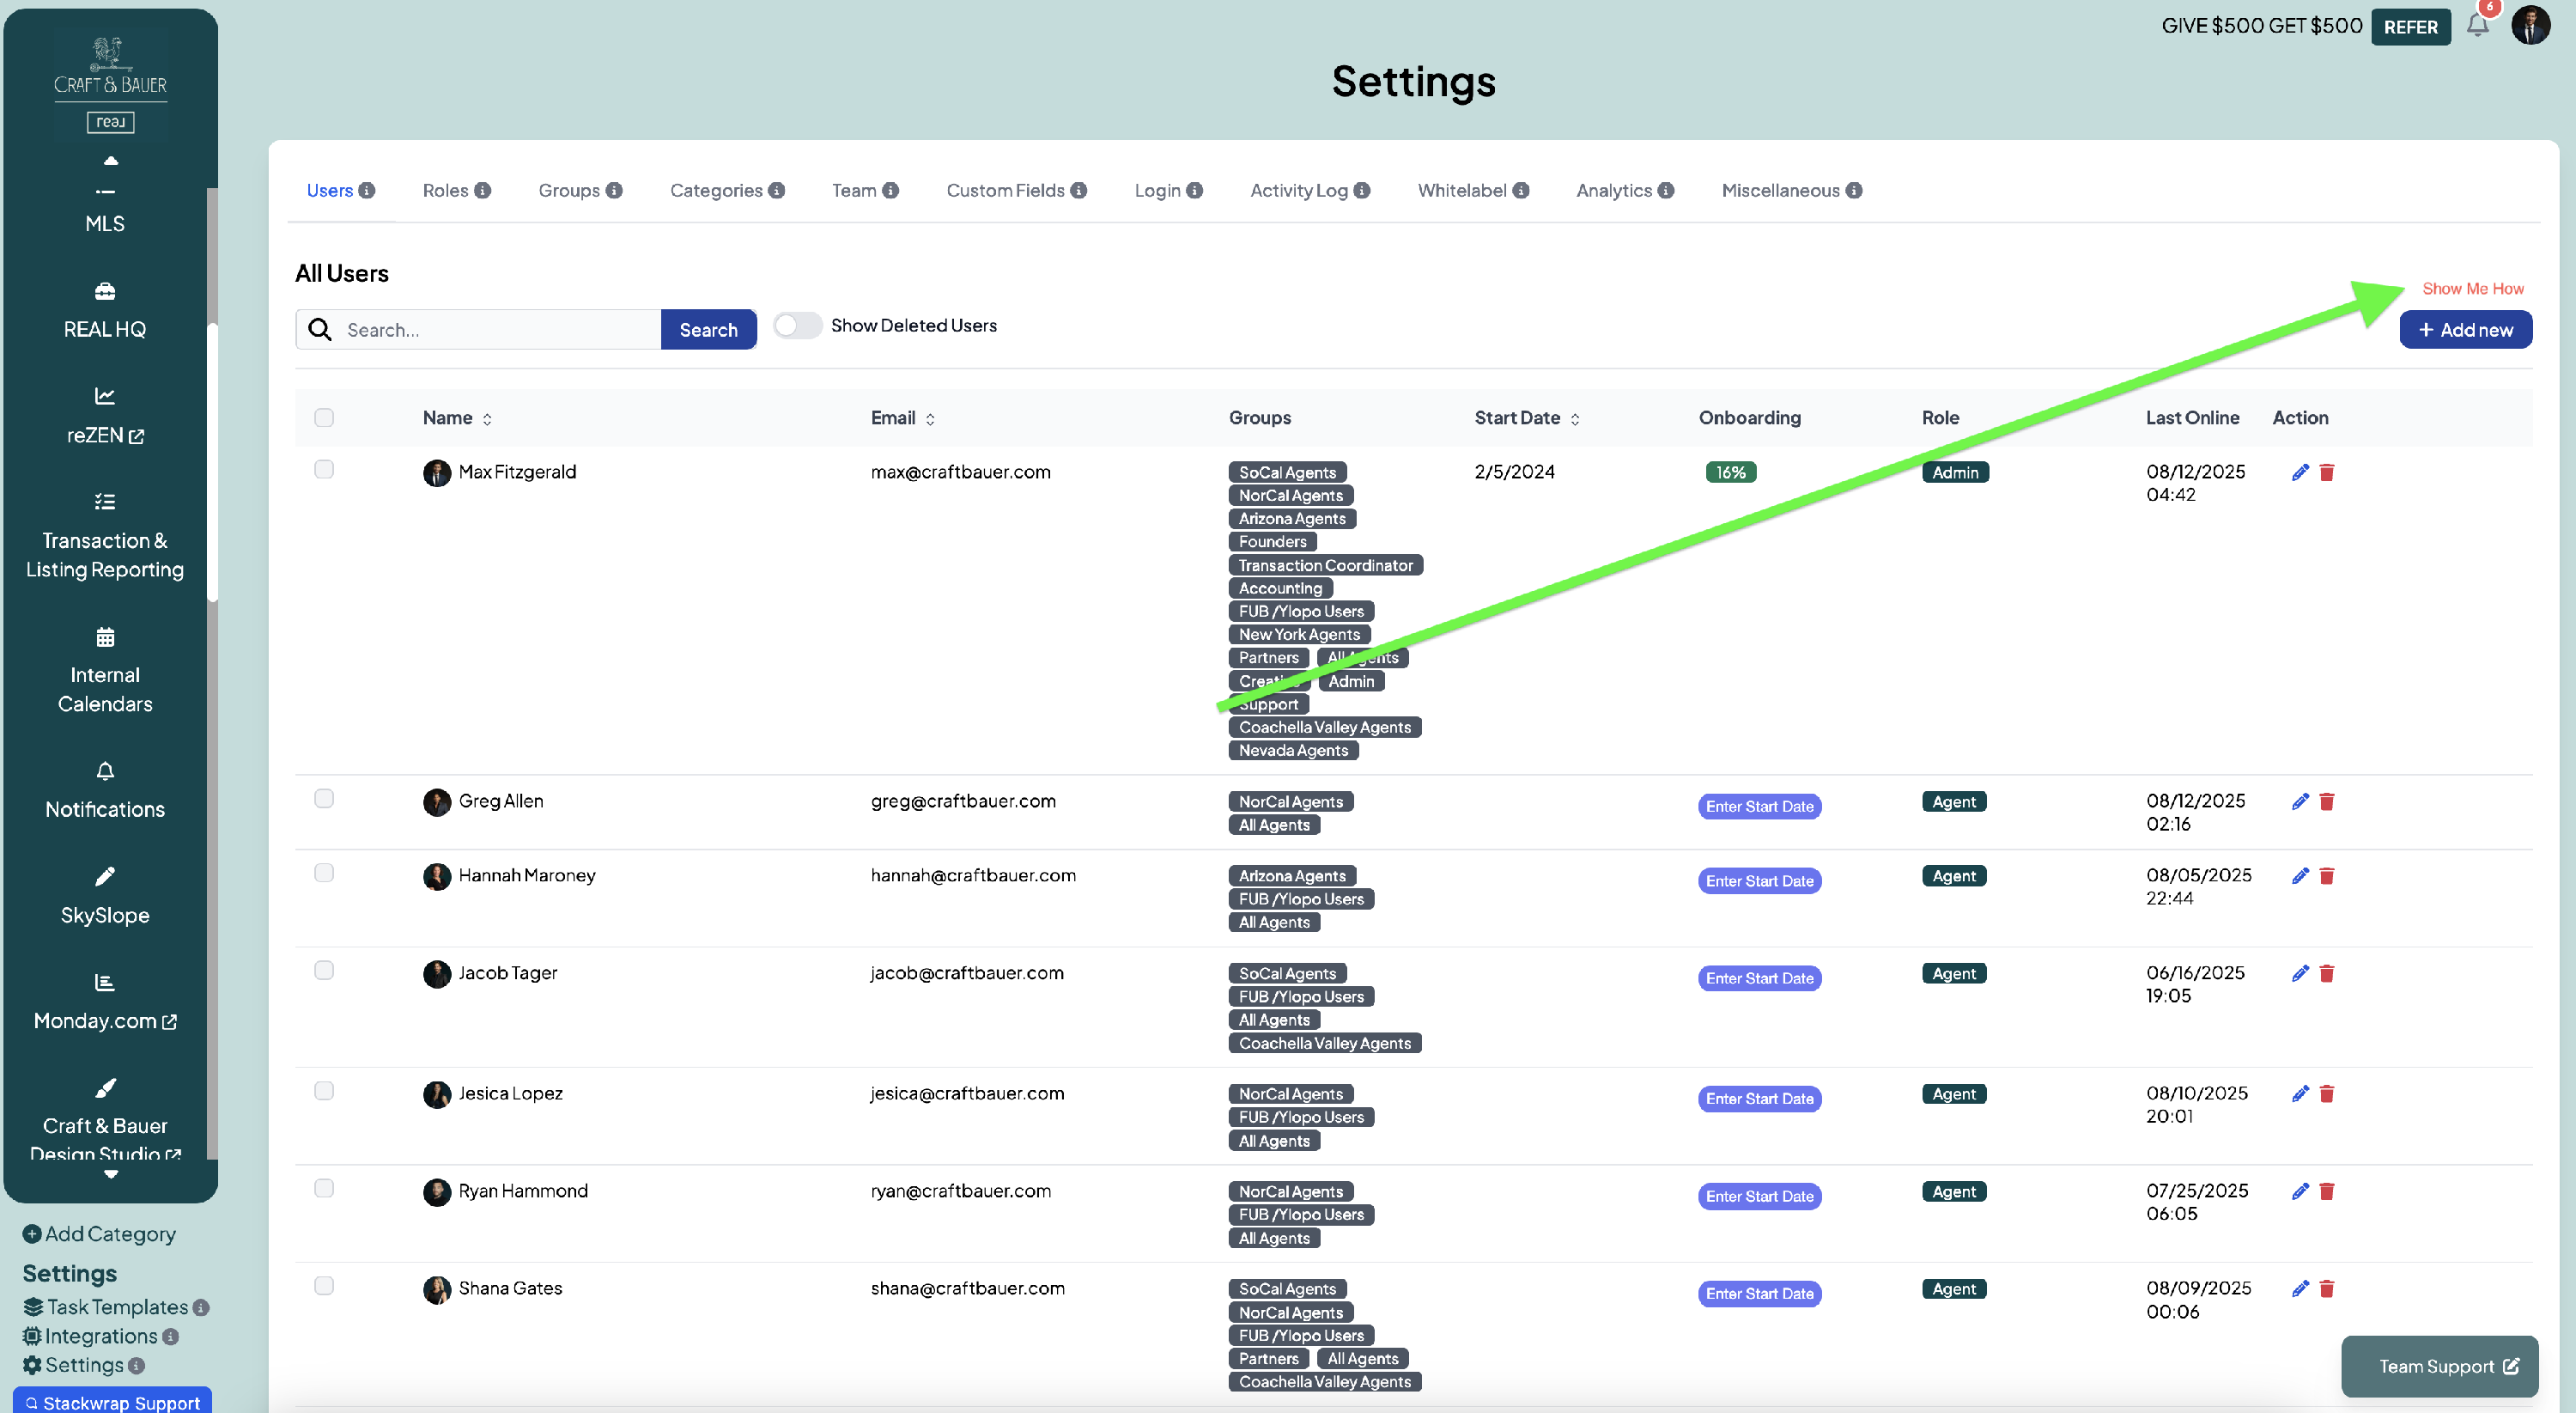
(spotlight Settings)
This Settings button is your admin mission control for your StackWrap account. To add, edit, and manage your Categories, click on Settings, and then click the Categories tab. On this page, you can do things such as:
- Add a new category by selecting "Add New"
- Manage existing Categories by selecting the "Edit" pencil icon
- Share Categories with your team by selecting the "Share" paper plane icon
For a full tutorial on how to add, edit, and manage your Categories, click here.
(click "Done")
Prompt: Creating Items:
(Let's add a "Show Me How" button, which will then begin the prompt)
(When "Show Me How" is clicked, let's have a text pop up box with a darkened background so text pop up is more visible)
Text: For organizational purposes, Items are best used when they pertain to the specific Category they are under. For example, you could create a Social Media Category, and then create Items for Facebook, Instagram, and LinkedIn that redirect to each one of these accounts.
(click "Next")
Items can be configured for specific actions like redirecting to 3rd-party URLs, organizing internal documents, creating contacts, embedding forms, initiating calls, and more!
(click "Next")
(spotlight "Add New")
Now that we're inside one of your Categories, click on "Add New" to add an Item to this Category
(spotlight this pop up below)
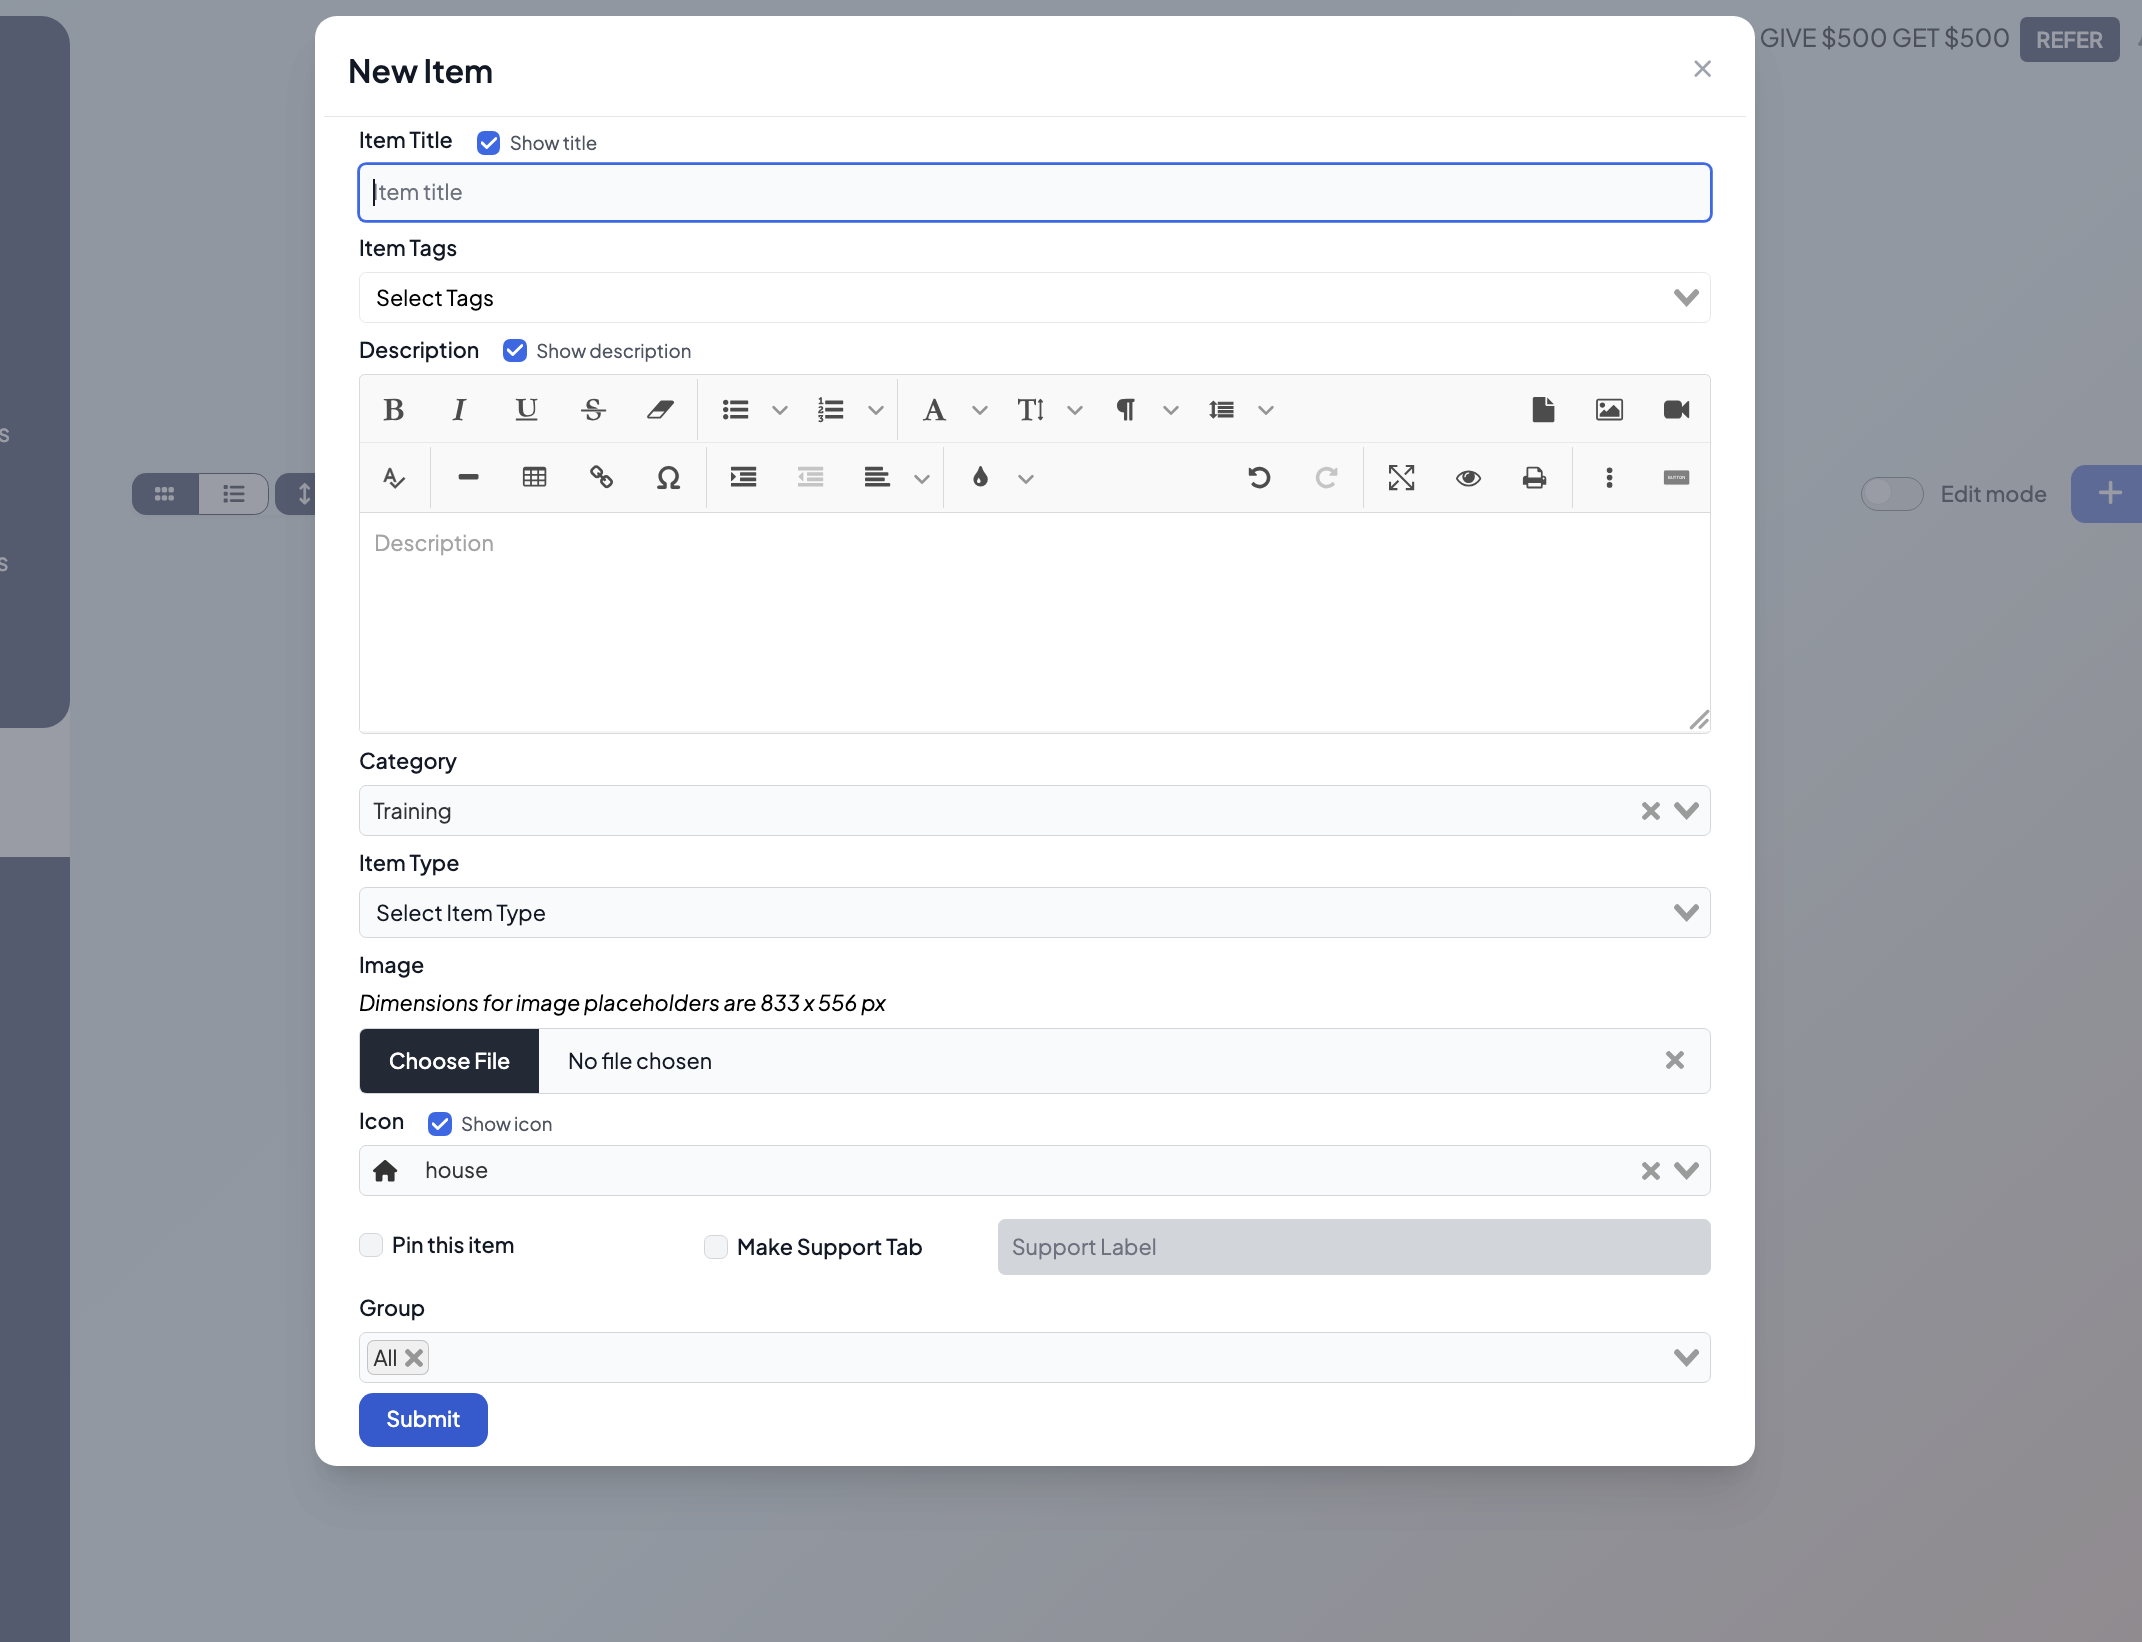
When you are creating an Item, you'll notice that you have the ability to map the functionality of the Item under "Item Type". You can also define the accessibility of this Item under "Group". You can even
upload a custom image placeholder for this Item.
(click "Next")
You can add as many Items as you'd like to a specific Category. Once Items are created, they become searchable under the "Search for Anything" toolbar.
For a full tutorial on how to create and manage Items, click here.
(click "Done")
Prompt - Customize Your Homepage Dashboard
(Internal note - the following widgets should be by default on the homepage dash for all newly created accounts:
- My Tasks
- My Calendar
- Notifications
- Featured
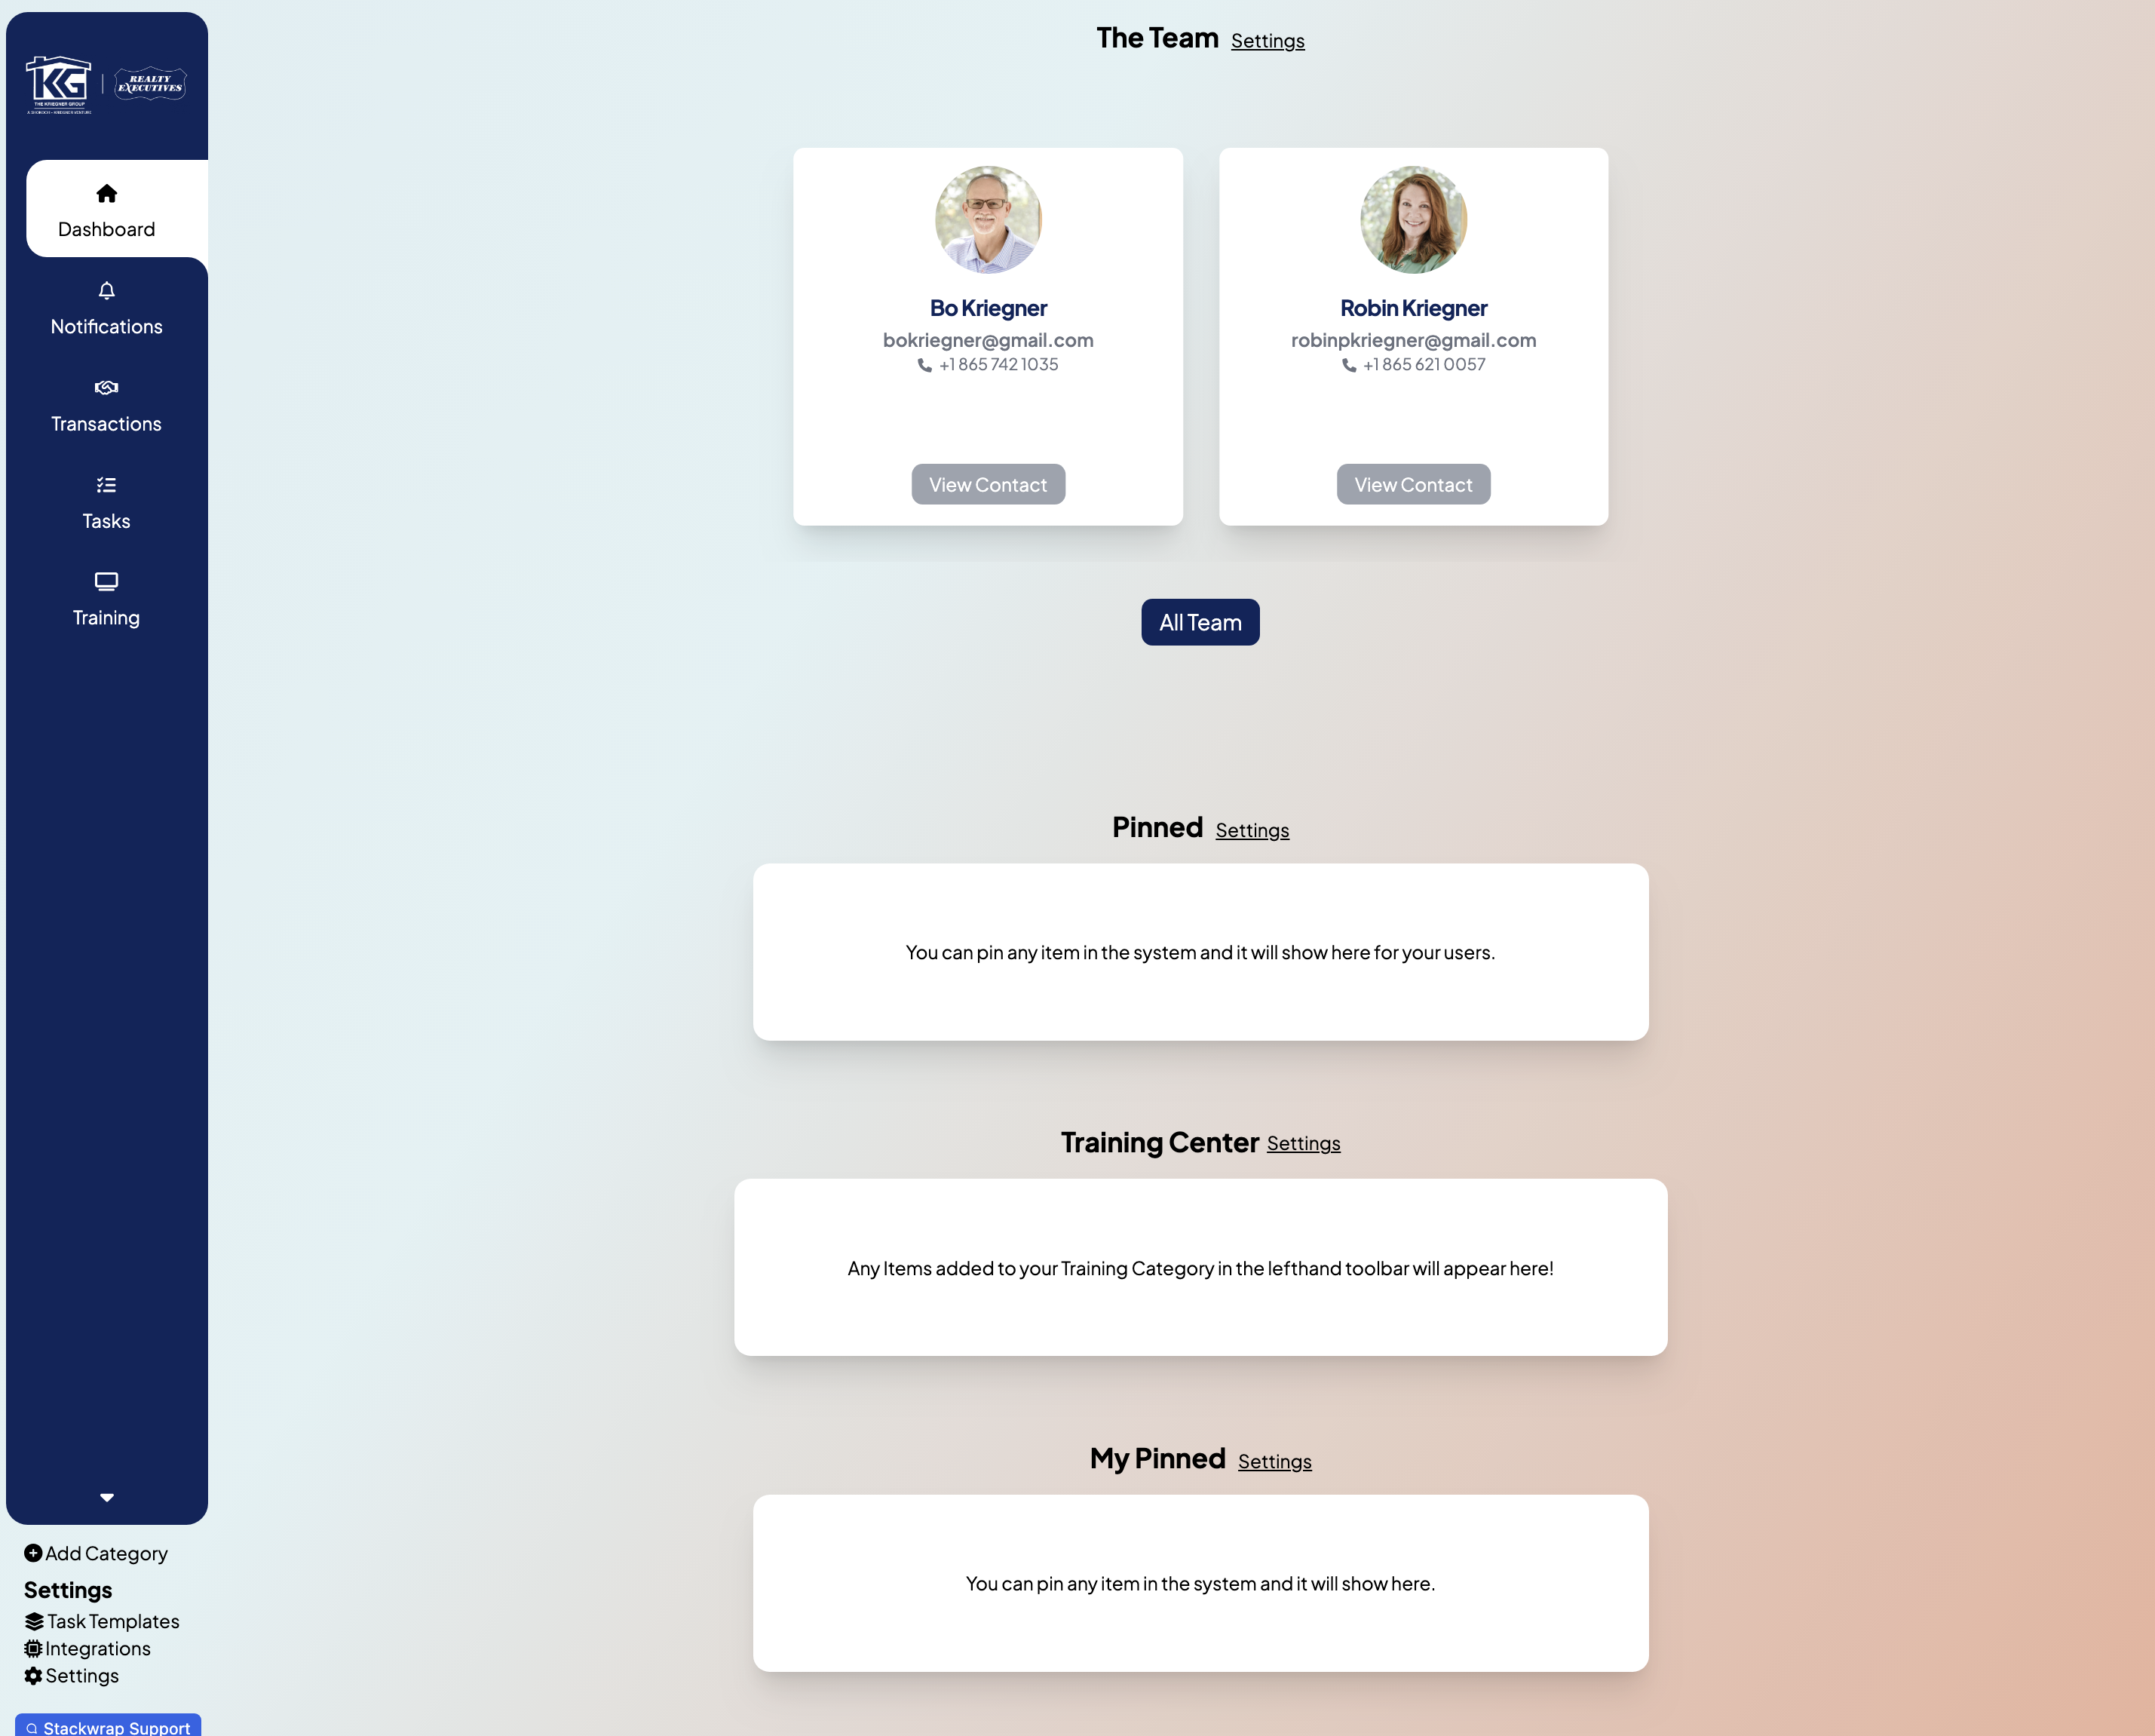
- The Team
- Pinned
- Training Center
- My Pinned
This is how the layout of the newly created account should be:
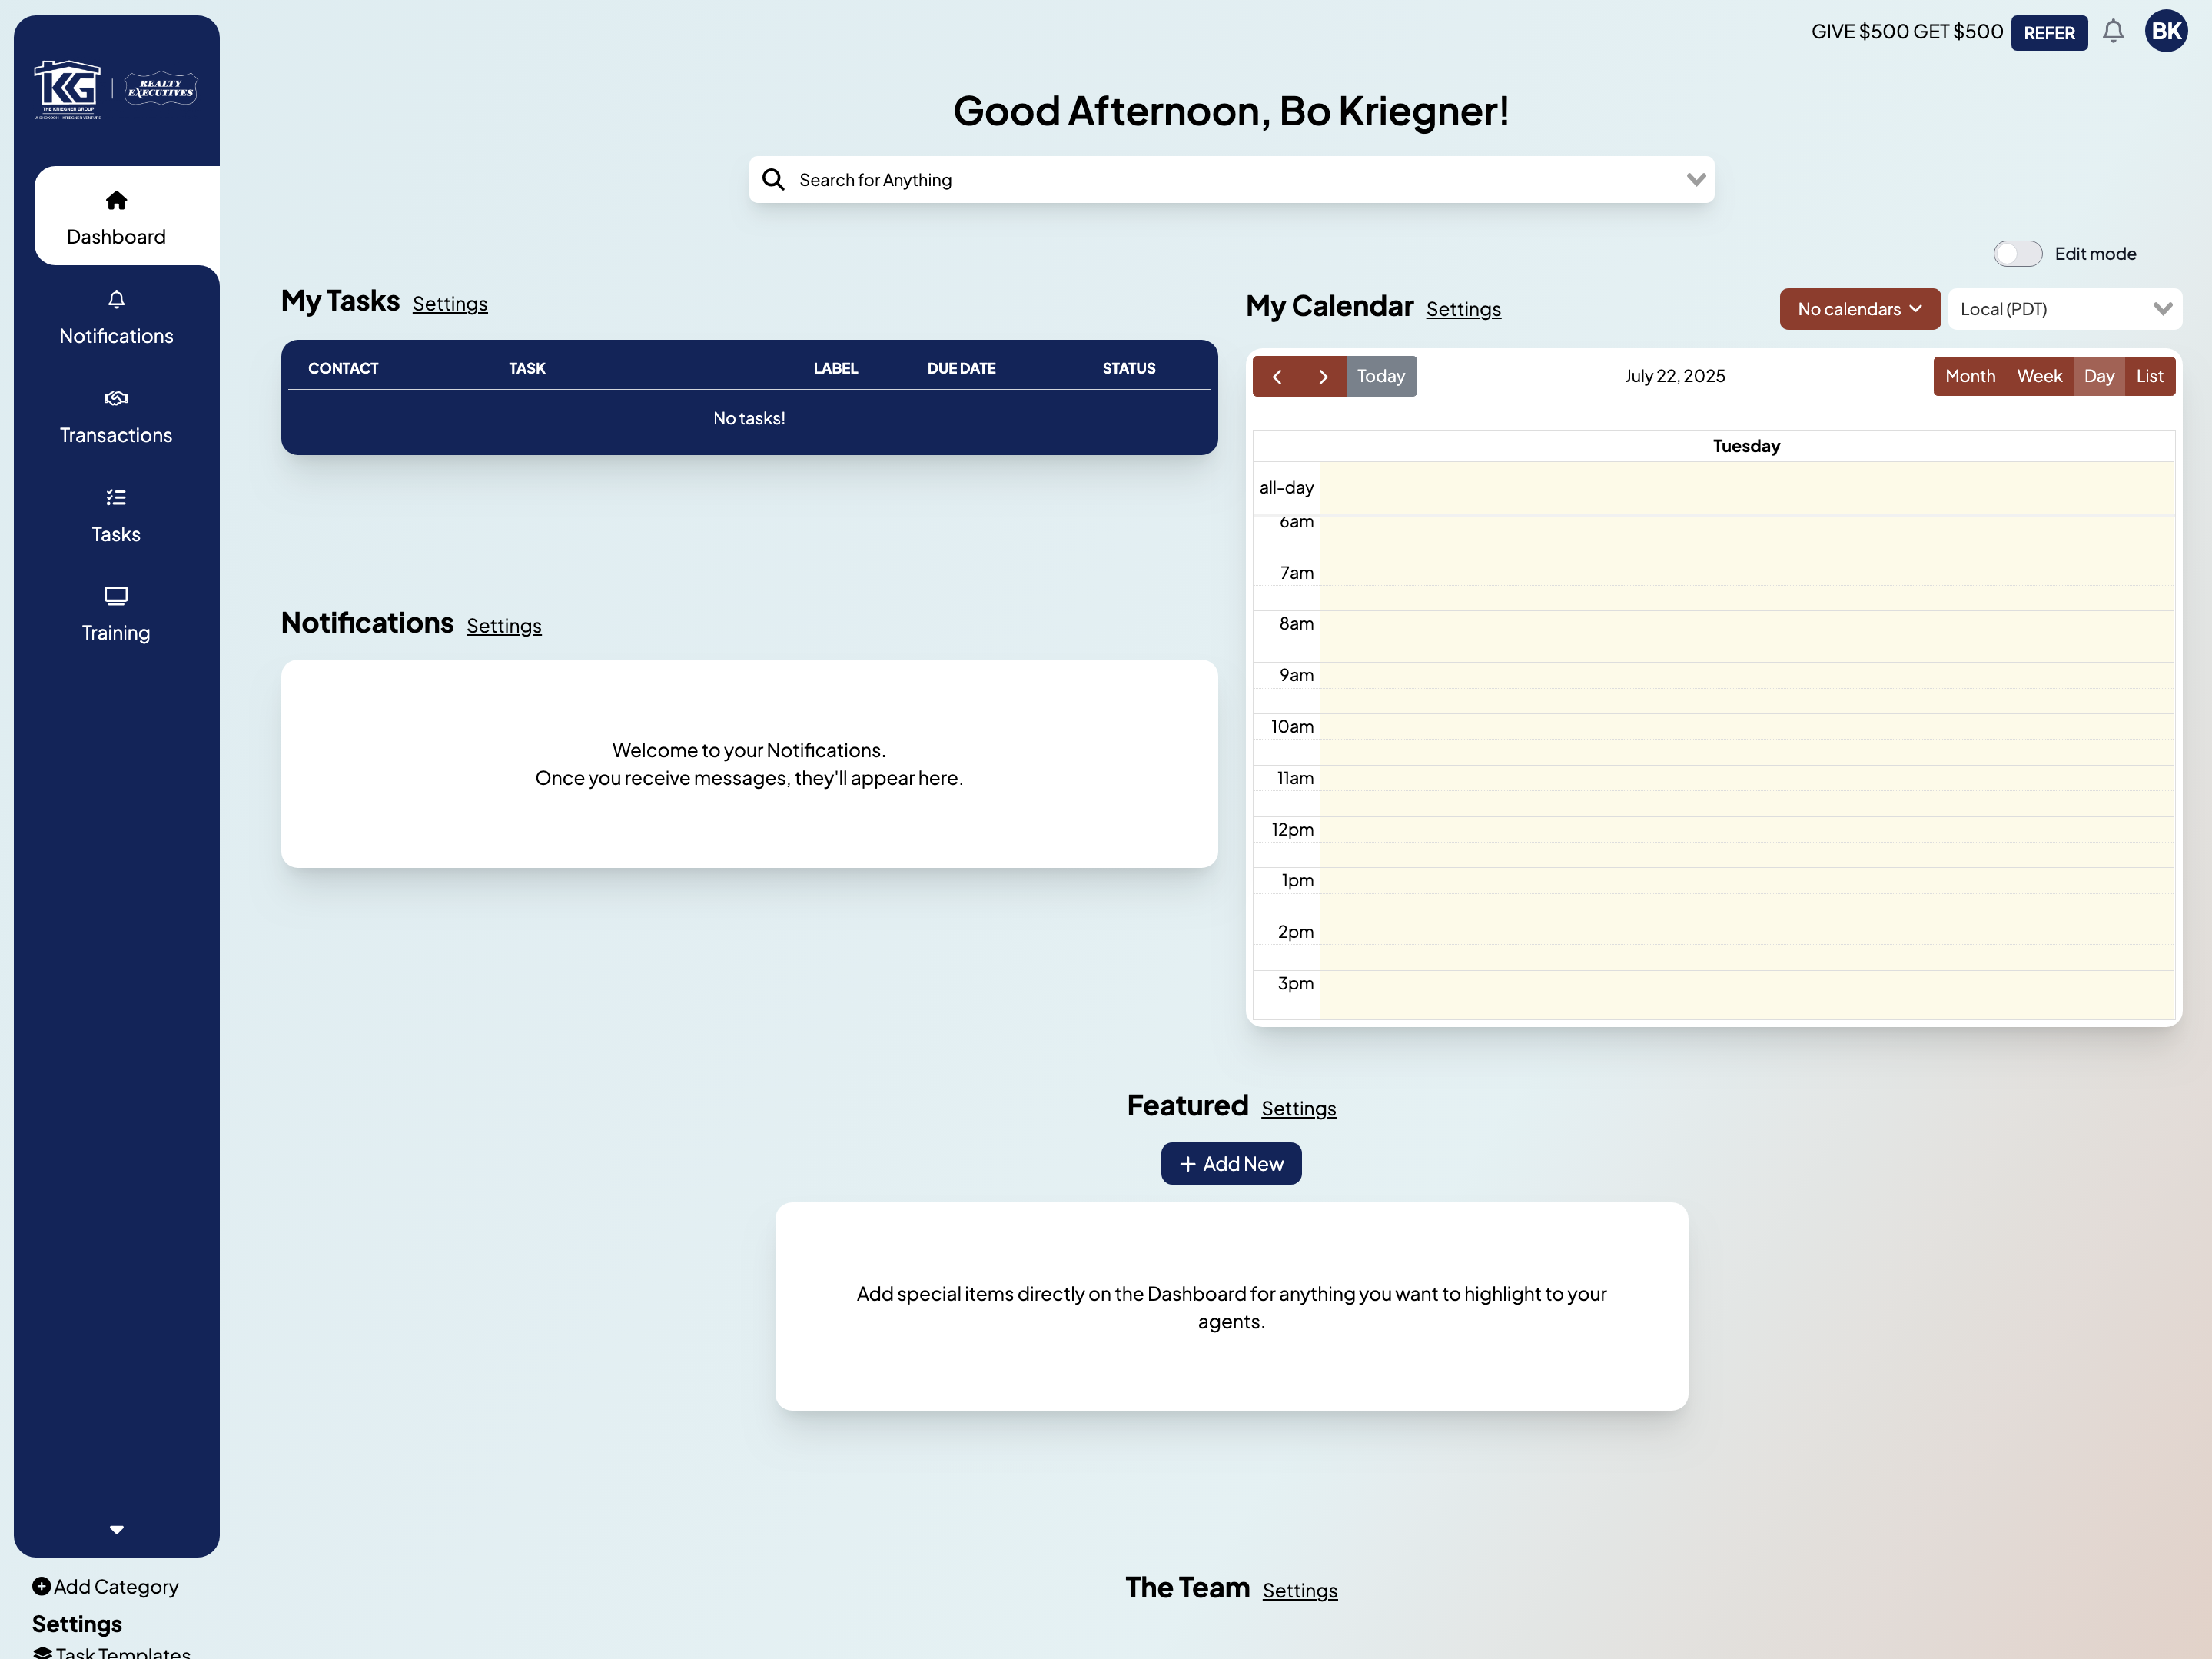
Body Text:
(Add "Show Me How" button here)
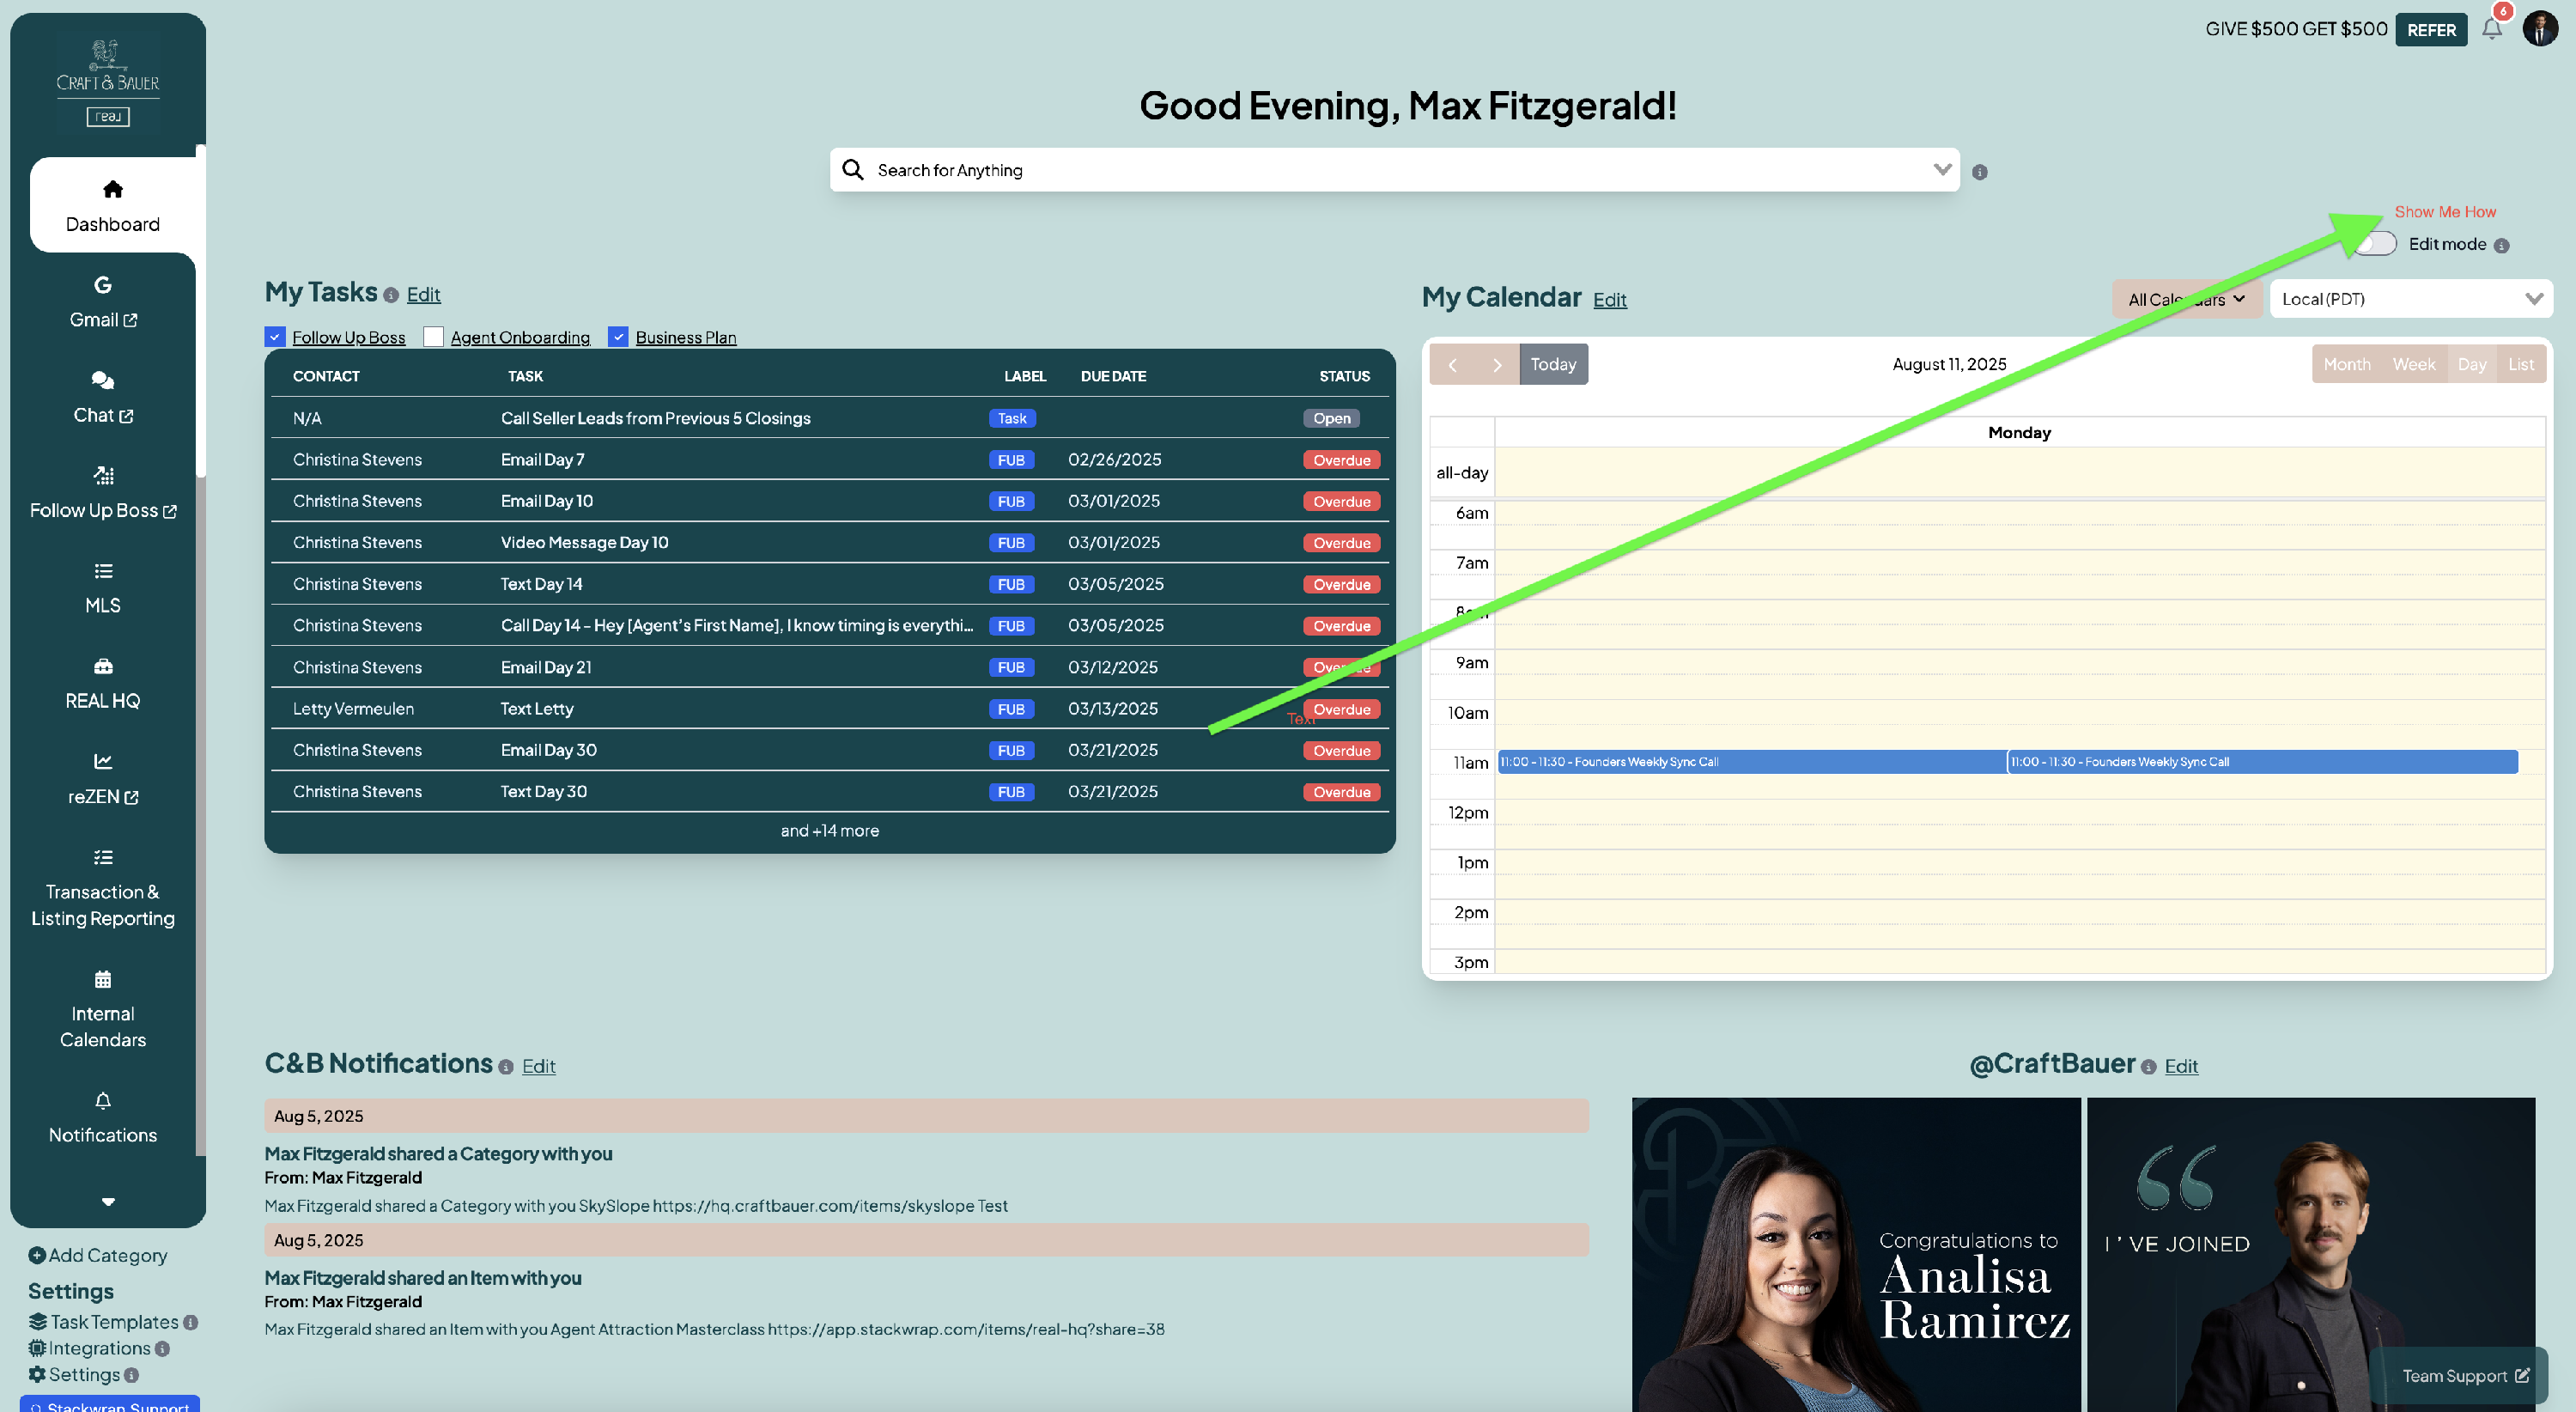
The StackWrap Dashboard serves as your central hub offering quick access to your homepage Widgets. Your Widgets are connected to essential tools, tasks, and systems within StackWrap.
(click "Next")
(spotlight "Edit Mode")
To add, edit, delete, and rearrange your Widgets, toggle "Edit Mode" on. Please note that if this is a team account, only Admins have the ability to manage Widgets. Let's review a few of the most important Widgets
(click "Next")


Notifications (Spotlight widget)
Notifications is your StackWrap-to-StackWrap inbox, and allows you to keep your team informed with timely updates, reminders, and action items directly within the platform. This ensures that important information is centralized and easily accessible.
(click "Next")
A few Widgets can synced to 3rd-party tools, and might require custom integrations handled by our development team. Click here to schedule an account review call with your StackWrap Success Manager.
(click "Next")
For a full tutorial on managing your Widgets, click here.
NOTE FOR BAM - All of these widgets should not have the ability to be deleted except Training Center
(click "Done")
Prompt - Create Groups of Users
(Add "Show Me How" button here)
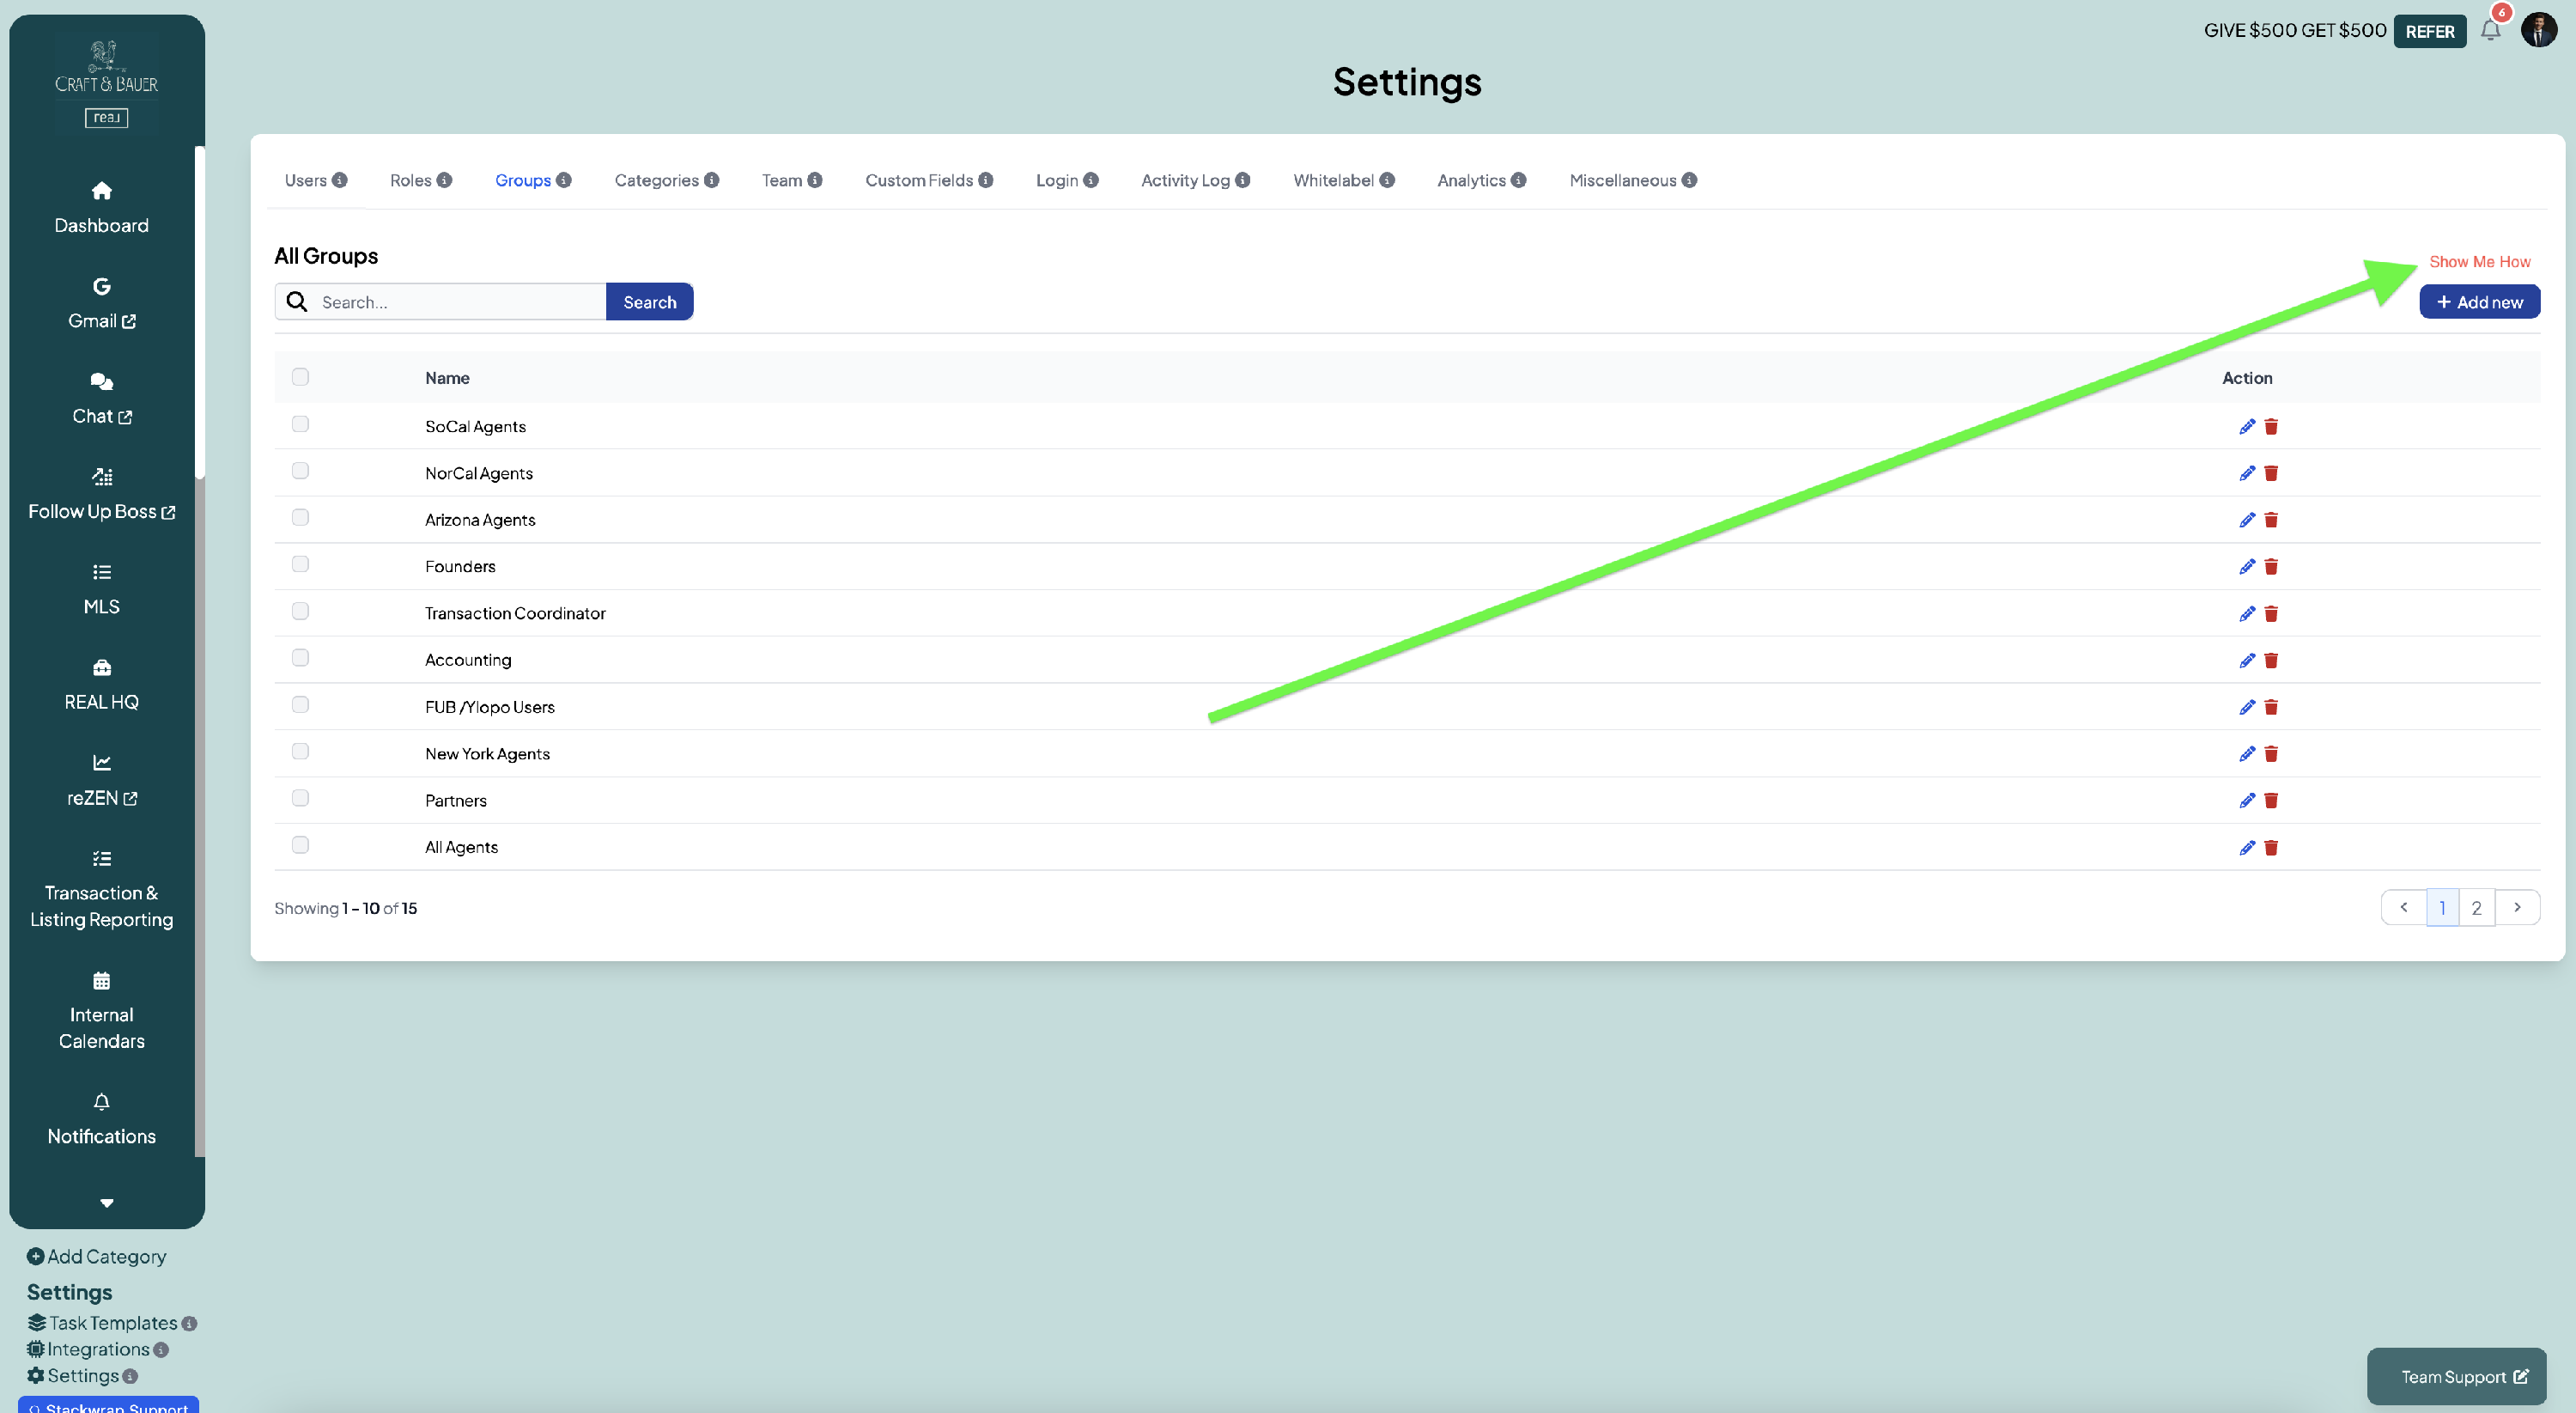
Body Text:
You have the ability to create Groups of users. Groups can be used to define the accessibility of tools within your StackWrap account.
For example, if you have agents in different regions, you might want to create a Group for each region. That way, you can apply the Group(s) to the Categories and Items you want those agents to have access to.
(click "Next")
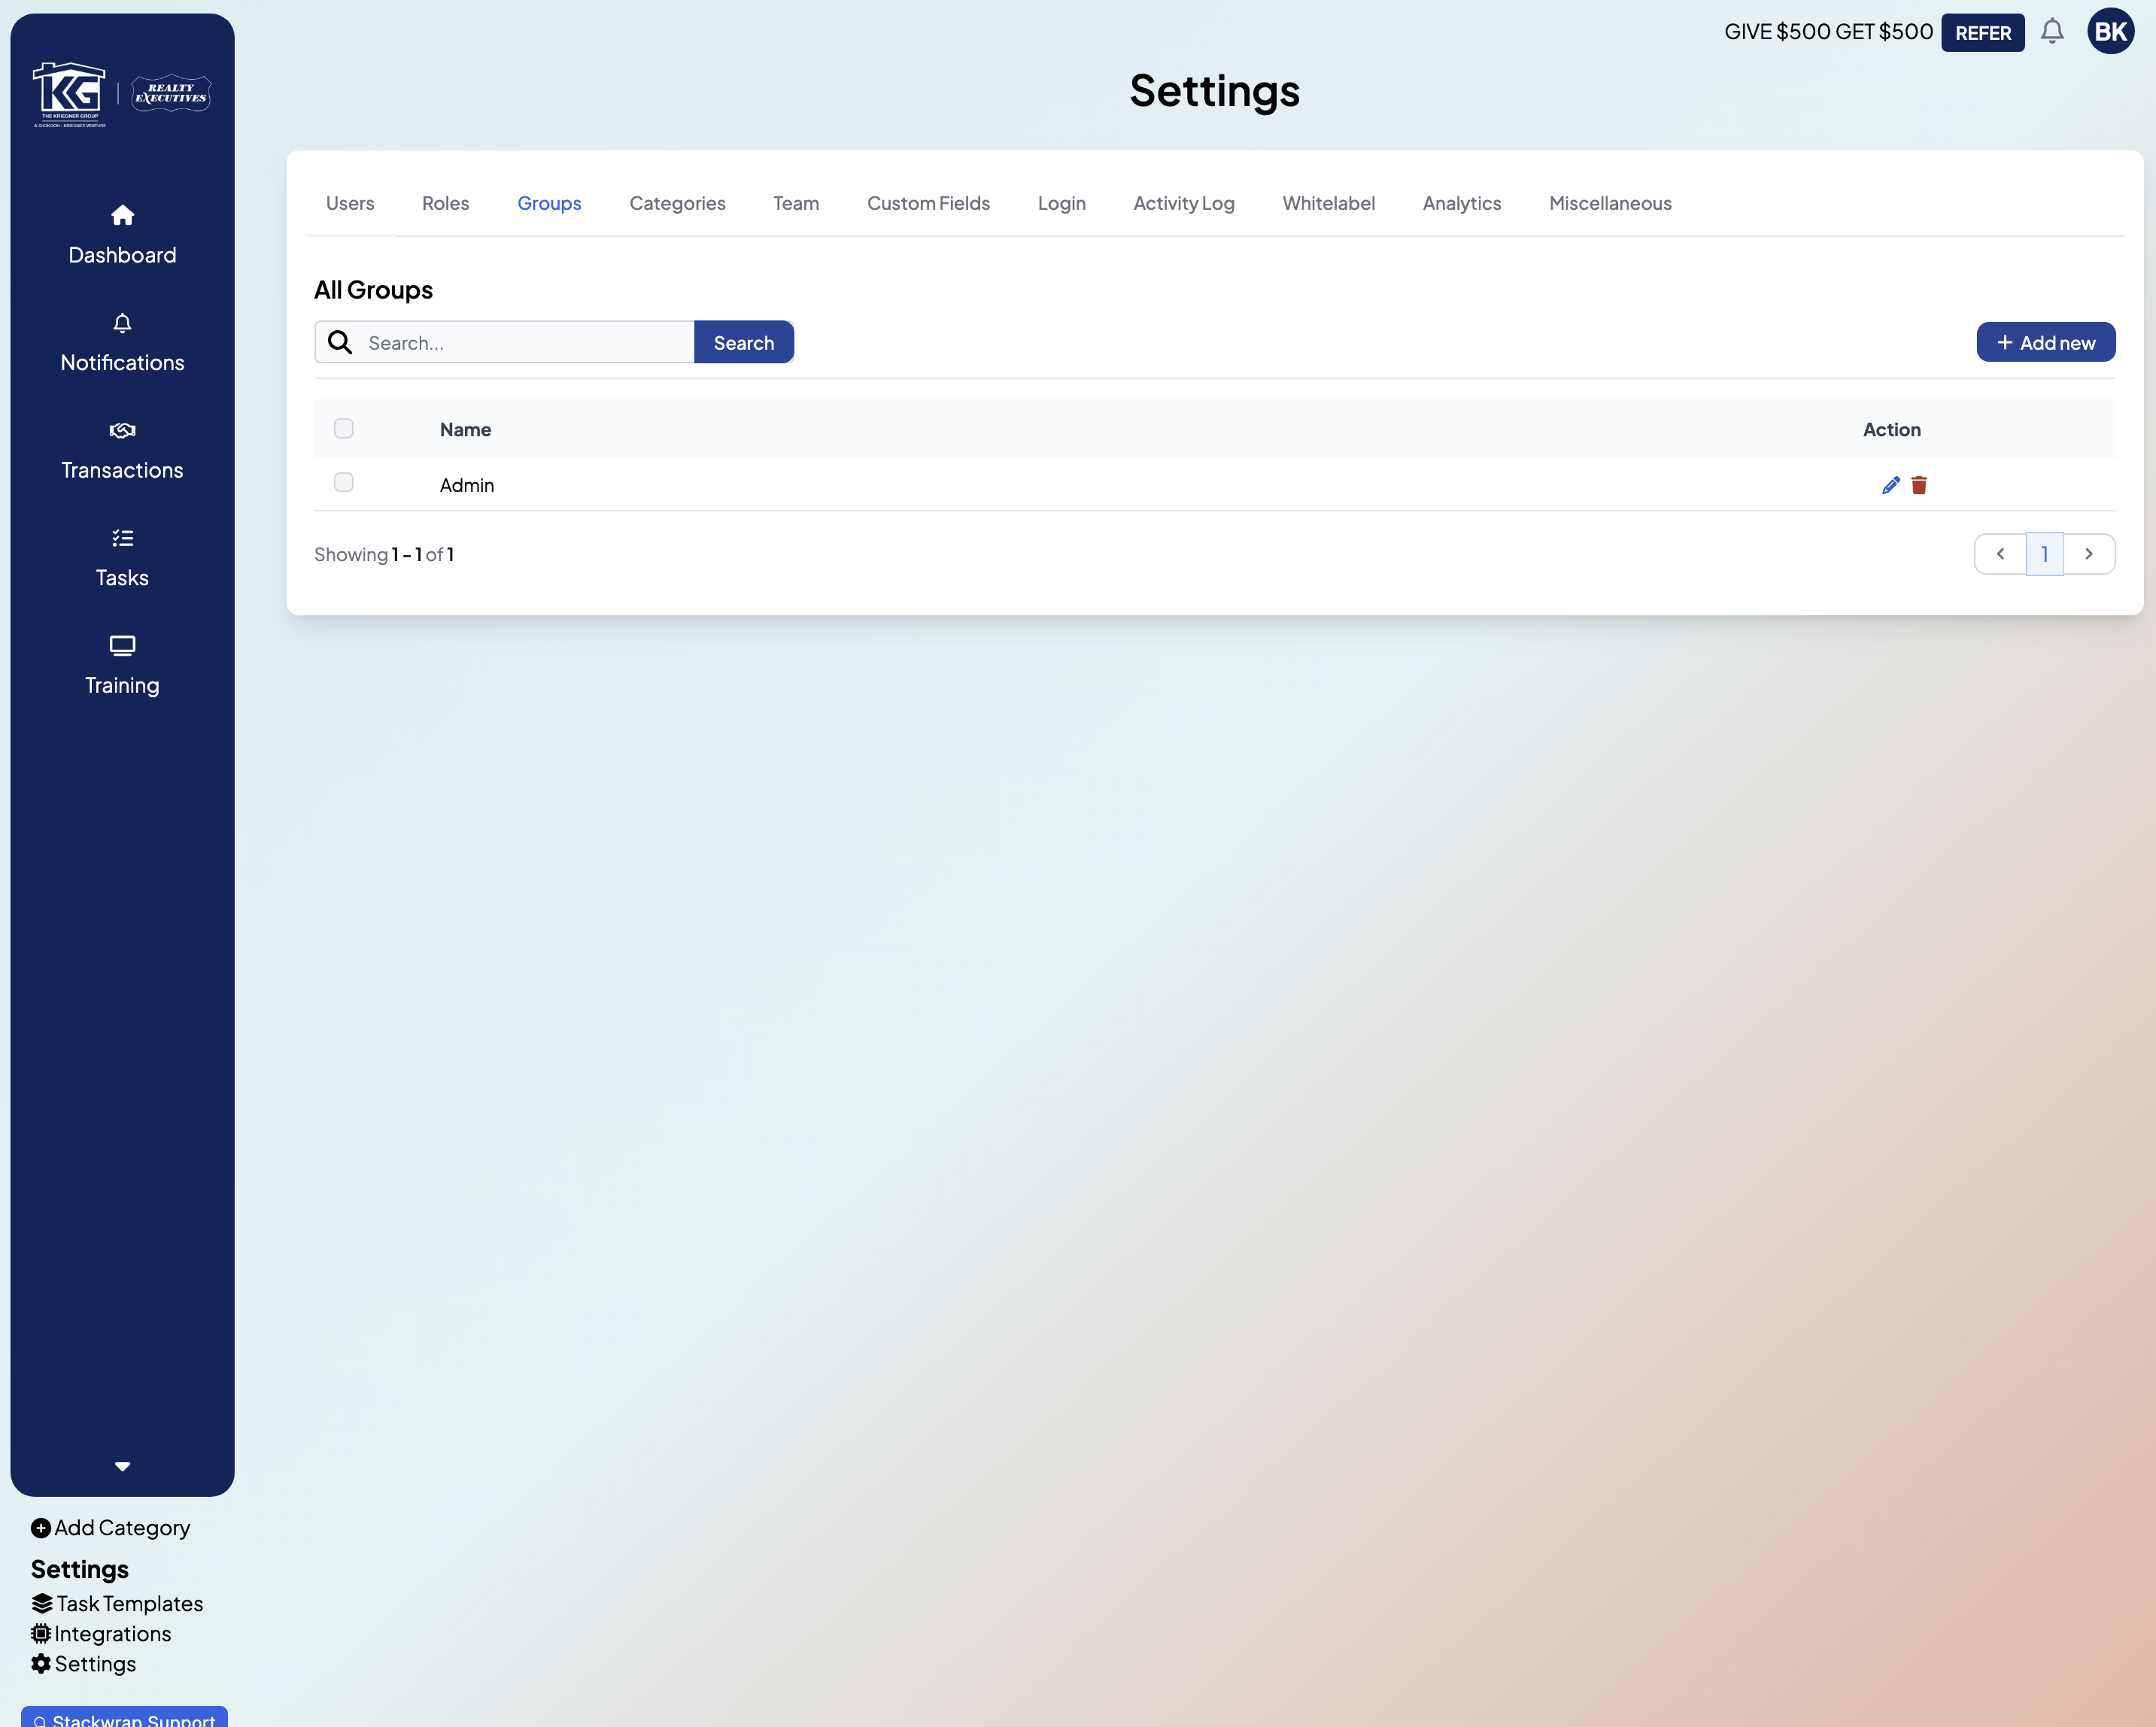
(Spotlight "Add New")
You can create as many Groups as you’d like by clicking the "Add new" button on this page, but keep this in mind:
- Anyone in an Admin Group or Admin Role has the ability to manage the StackWrap account
- When an Item or Category is created, the system defaults to ALL users having access to that new Item or Category. You can override this by selecting the Group pertaining to that Item or Category.
(click "Next")
For a full tutorial on Groups, click here
(click "Done")
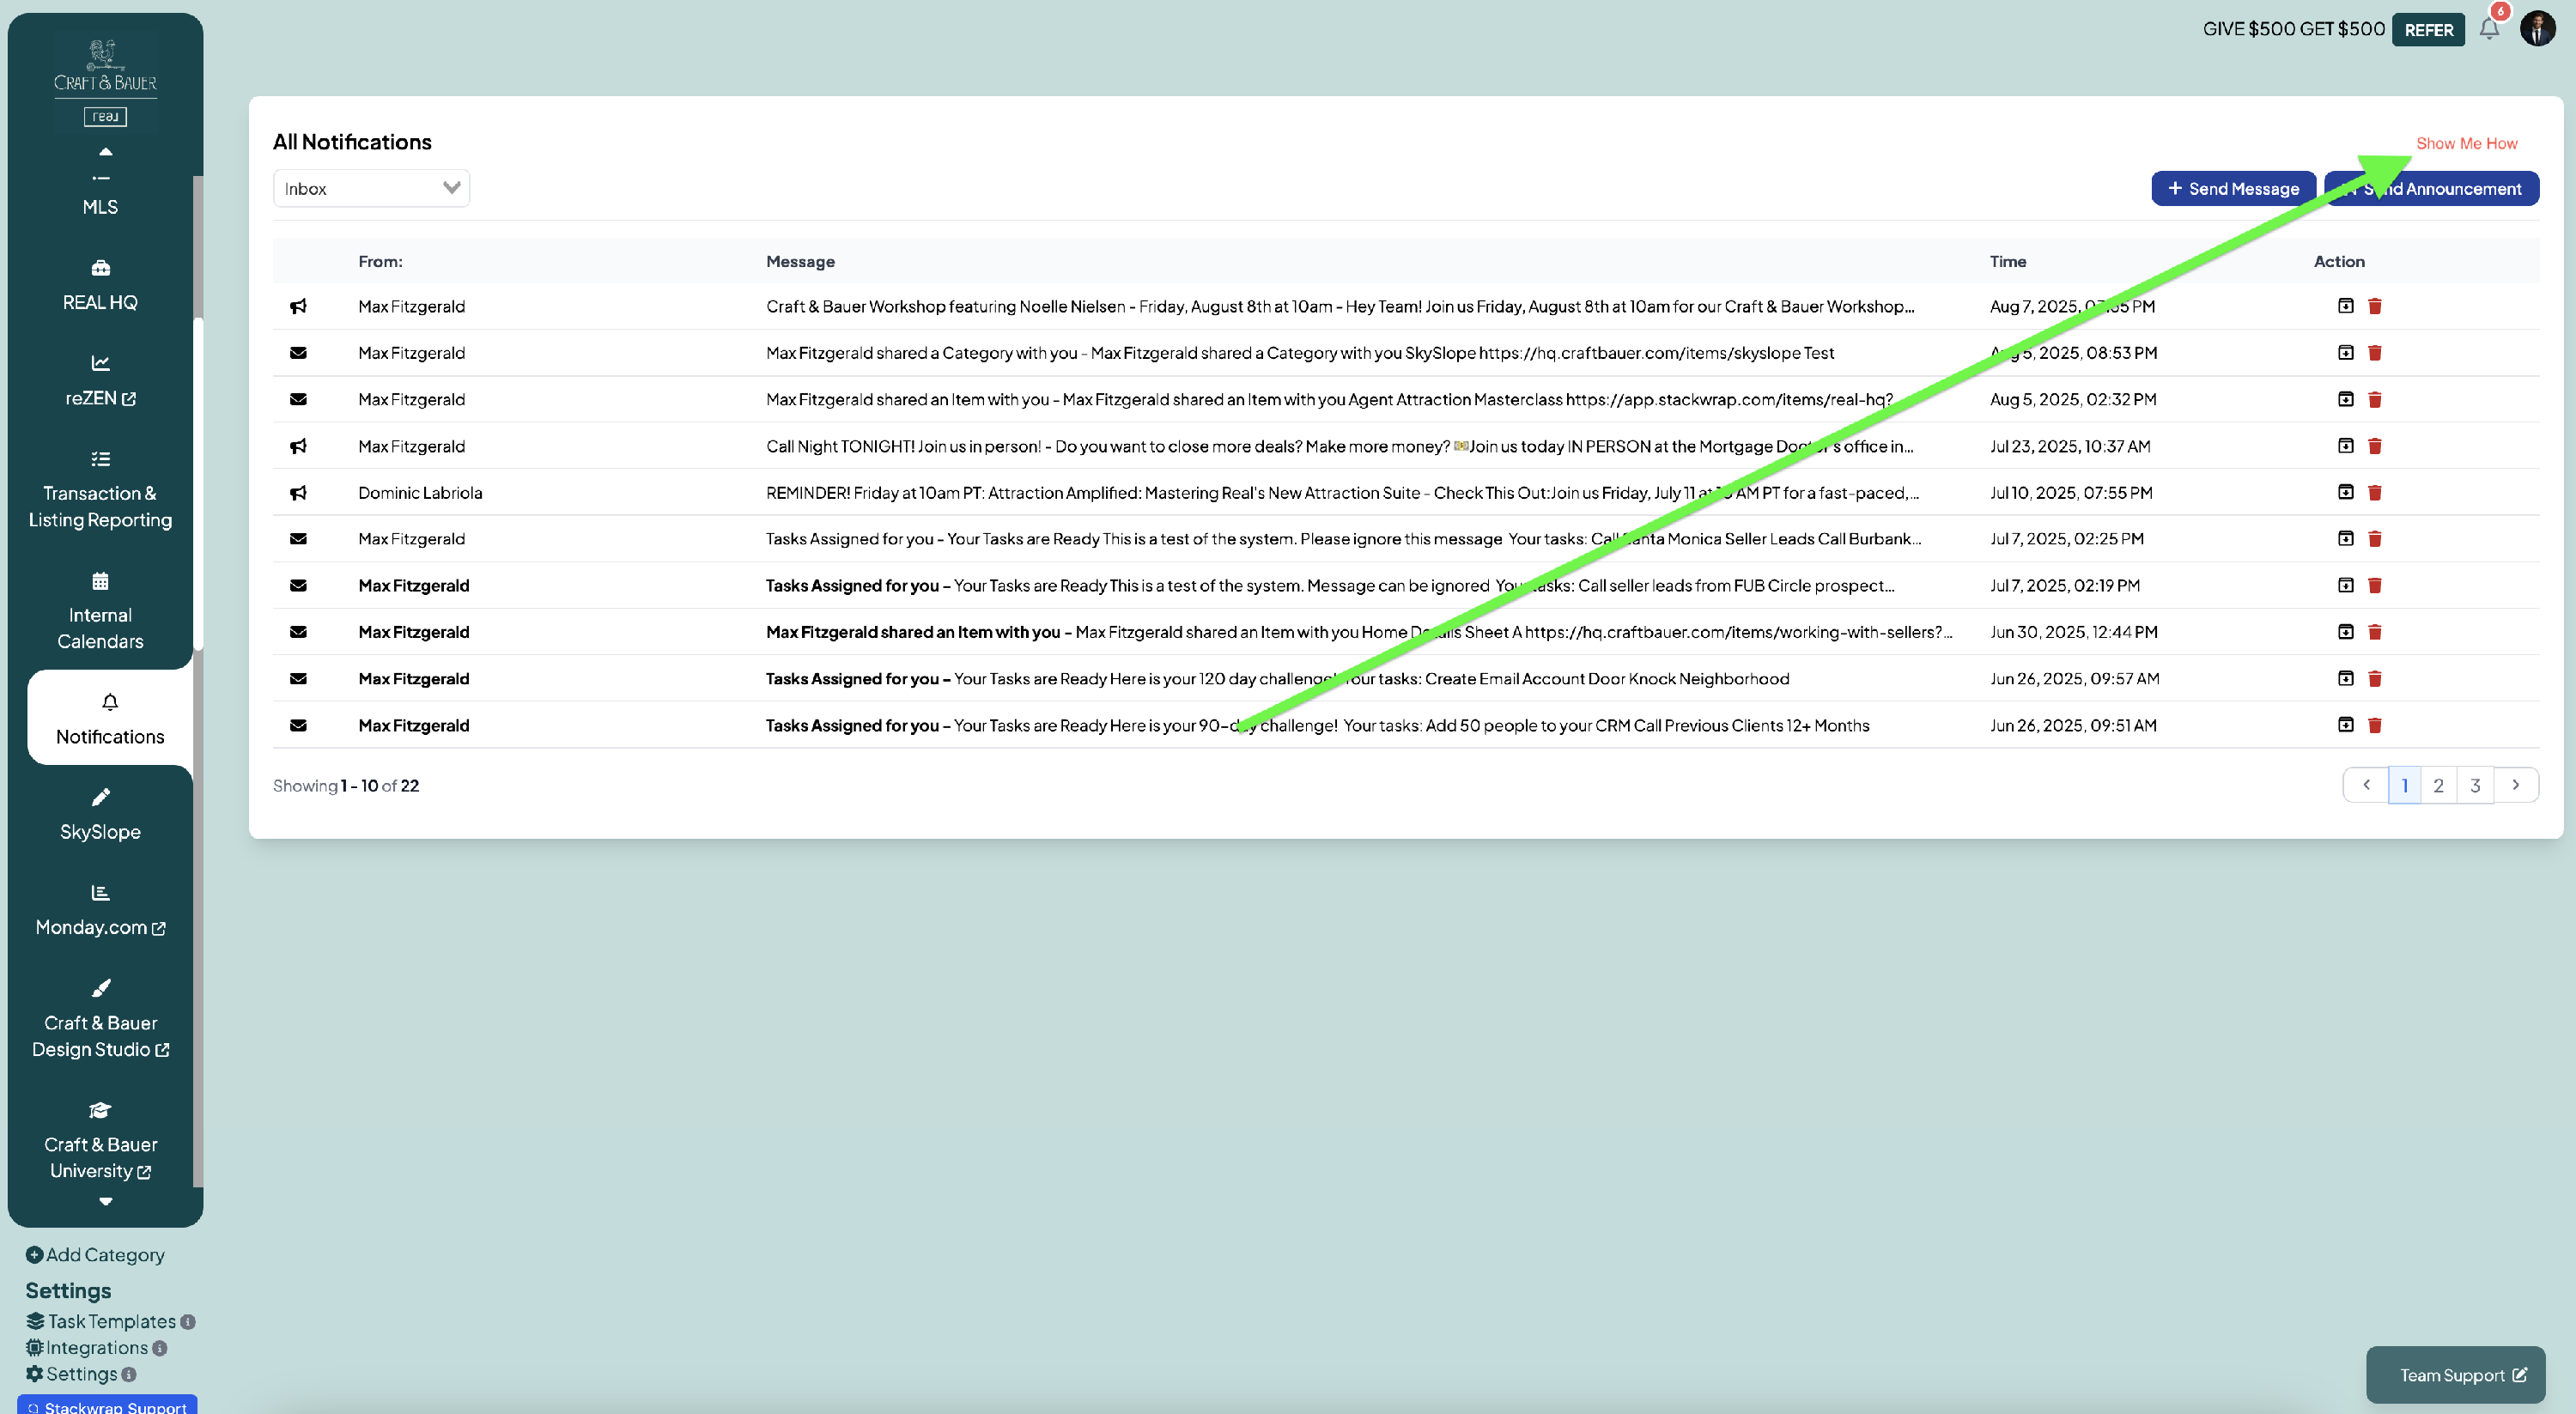
Prompt: Managing Notifications
(Add "Show Me How" button here:)
Body Text:
StackWrap's Notifications feature allows you to keep your team informed with timely updates, reminders, and action items directly within the platform.
(click Next)
There are two types of Notifications that you can send to your team:
- (Spotlight "Send Message") Clicking "Send Message" creates an in-app notification that can also be sent to users via email (think of it as your StackWrap-to-StackWrap messaging system).
- Spotlight "Announcement") Announcements allows you to create a pop up message that your users will see upon their next login. This is especially useful if you want to drive attention to an upcoming company meeting, a lender partner, or a relationship with an ancillary service.
For a full tutorial on Notifications, click here
(click "Complete")
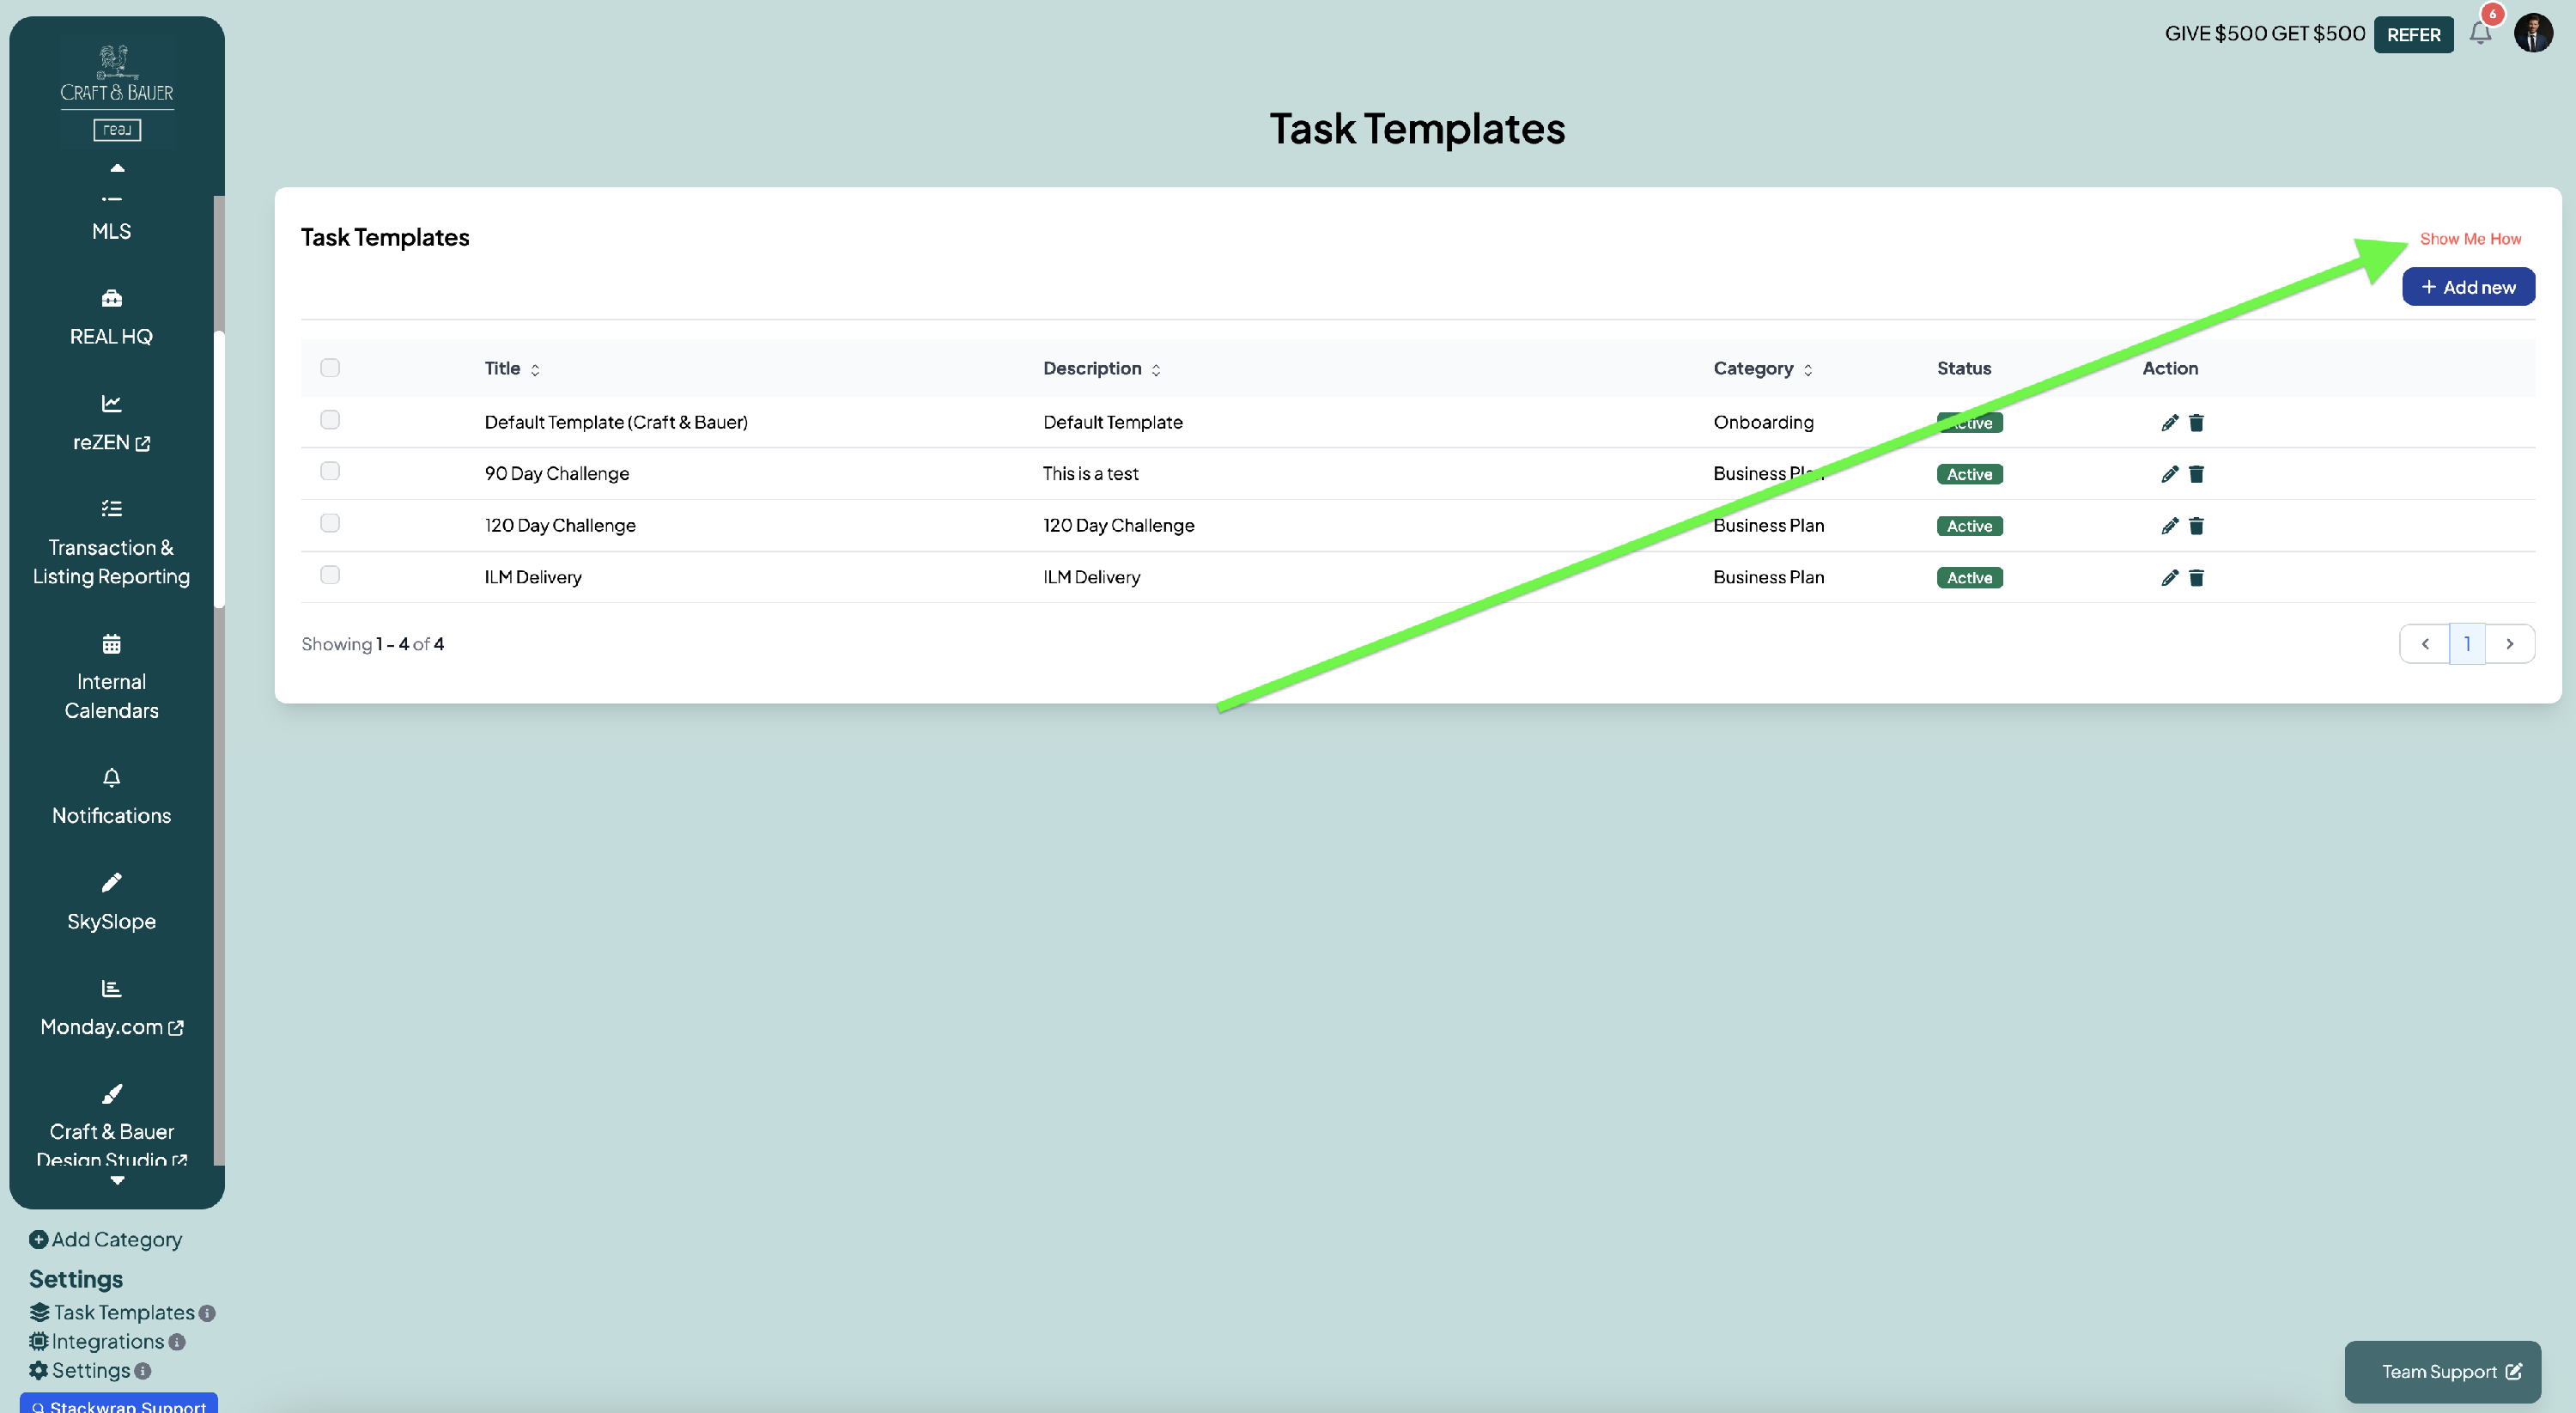
Prompt 7 - Managing Onboarding Tasks and Task Templates
(Add "Show Me How" button here)
Body Text:
With StackWrap Tasks, you can create and publish tasks to your team directly from within the platform.
(click Next)
You can create two different types of Tasks:
- Onboarding tasks
- General tasks and task templates
(click Next)
(spotlight "Add New")
To create a task template, click "Add New"
(click Next)
(spotlight the Add Template page below)
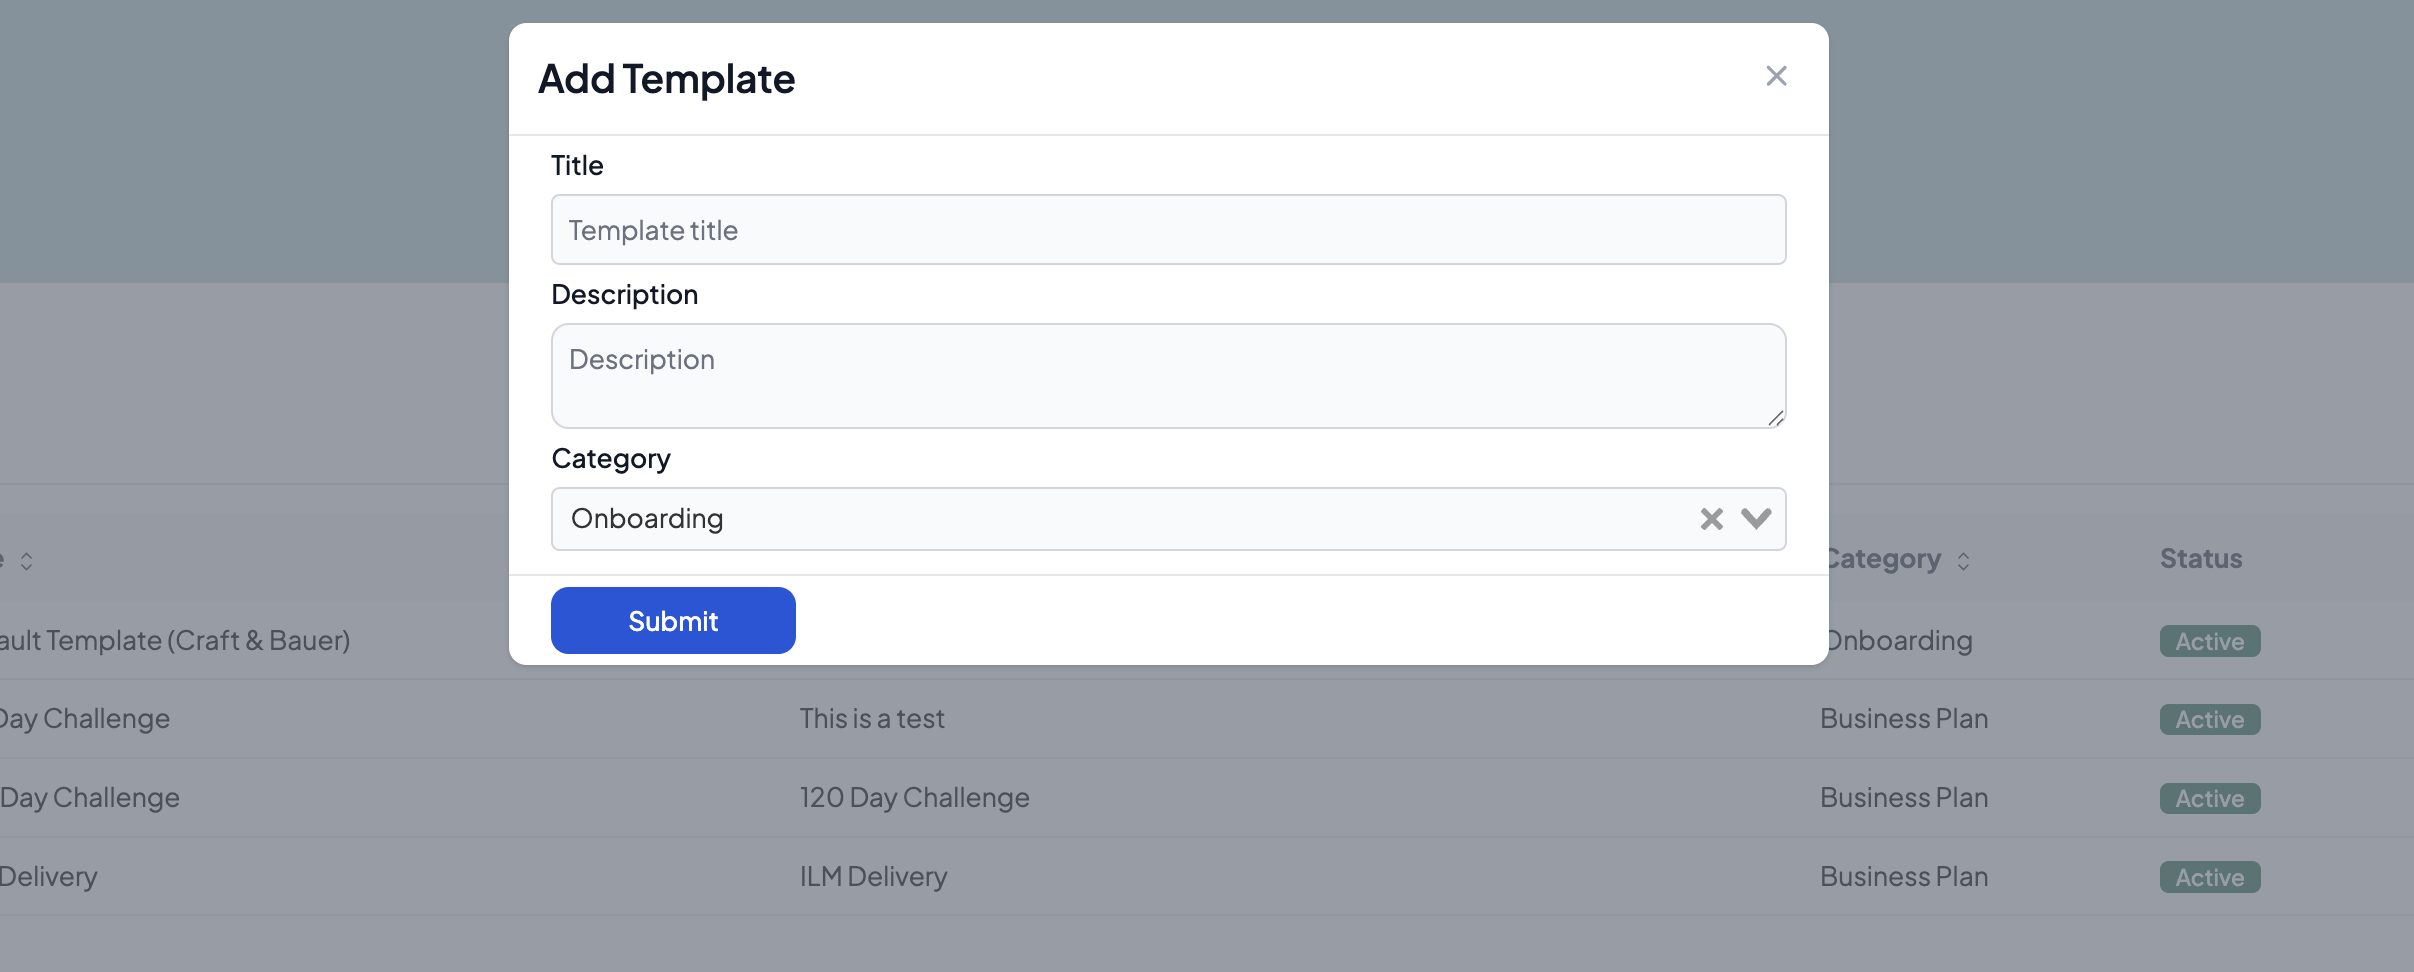
Text: Add the Title and Description of your template. Then select either "Onboarding" to create onboarding tasks for your new agents joining your team to complete, or select "Business Plan" to create any other type of task template.
(click Next)
For a full tutorial on creating and managing tasks, click on the links below:
Creating and Managing General Tasks
(Click Complete)
Prompt 8 - Create Your Users
(Add "Show Me How" button below)
You have a few different options to create your users' StackWrap accounts.
(click Next)
Before you add users, remember this - once a user has been added to your StackWrap account, the system will automatically send them their login credentials. Therefore, please make sure to create your users once you are ready to invite them into StackWrap.
(click Next)
(spotlight this page below, and highlight Roles)
Text: When adding a user, remember this - people with an Admin Role have the ability to edit your StackWrap account. All other Roles can only interact with the data within their account. Therefore, please make sure to assign Admin roles to anyone needing to manage your account.
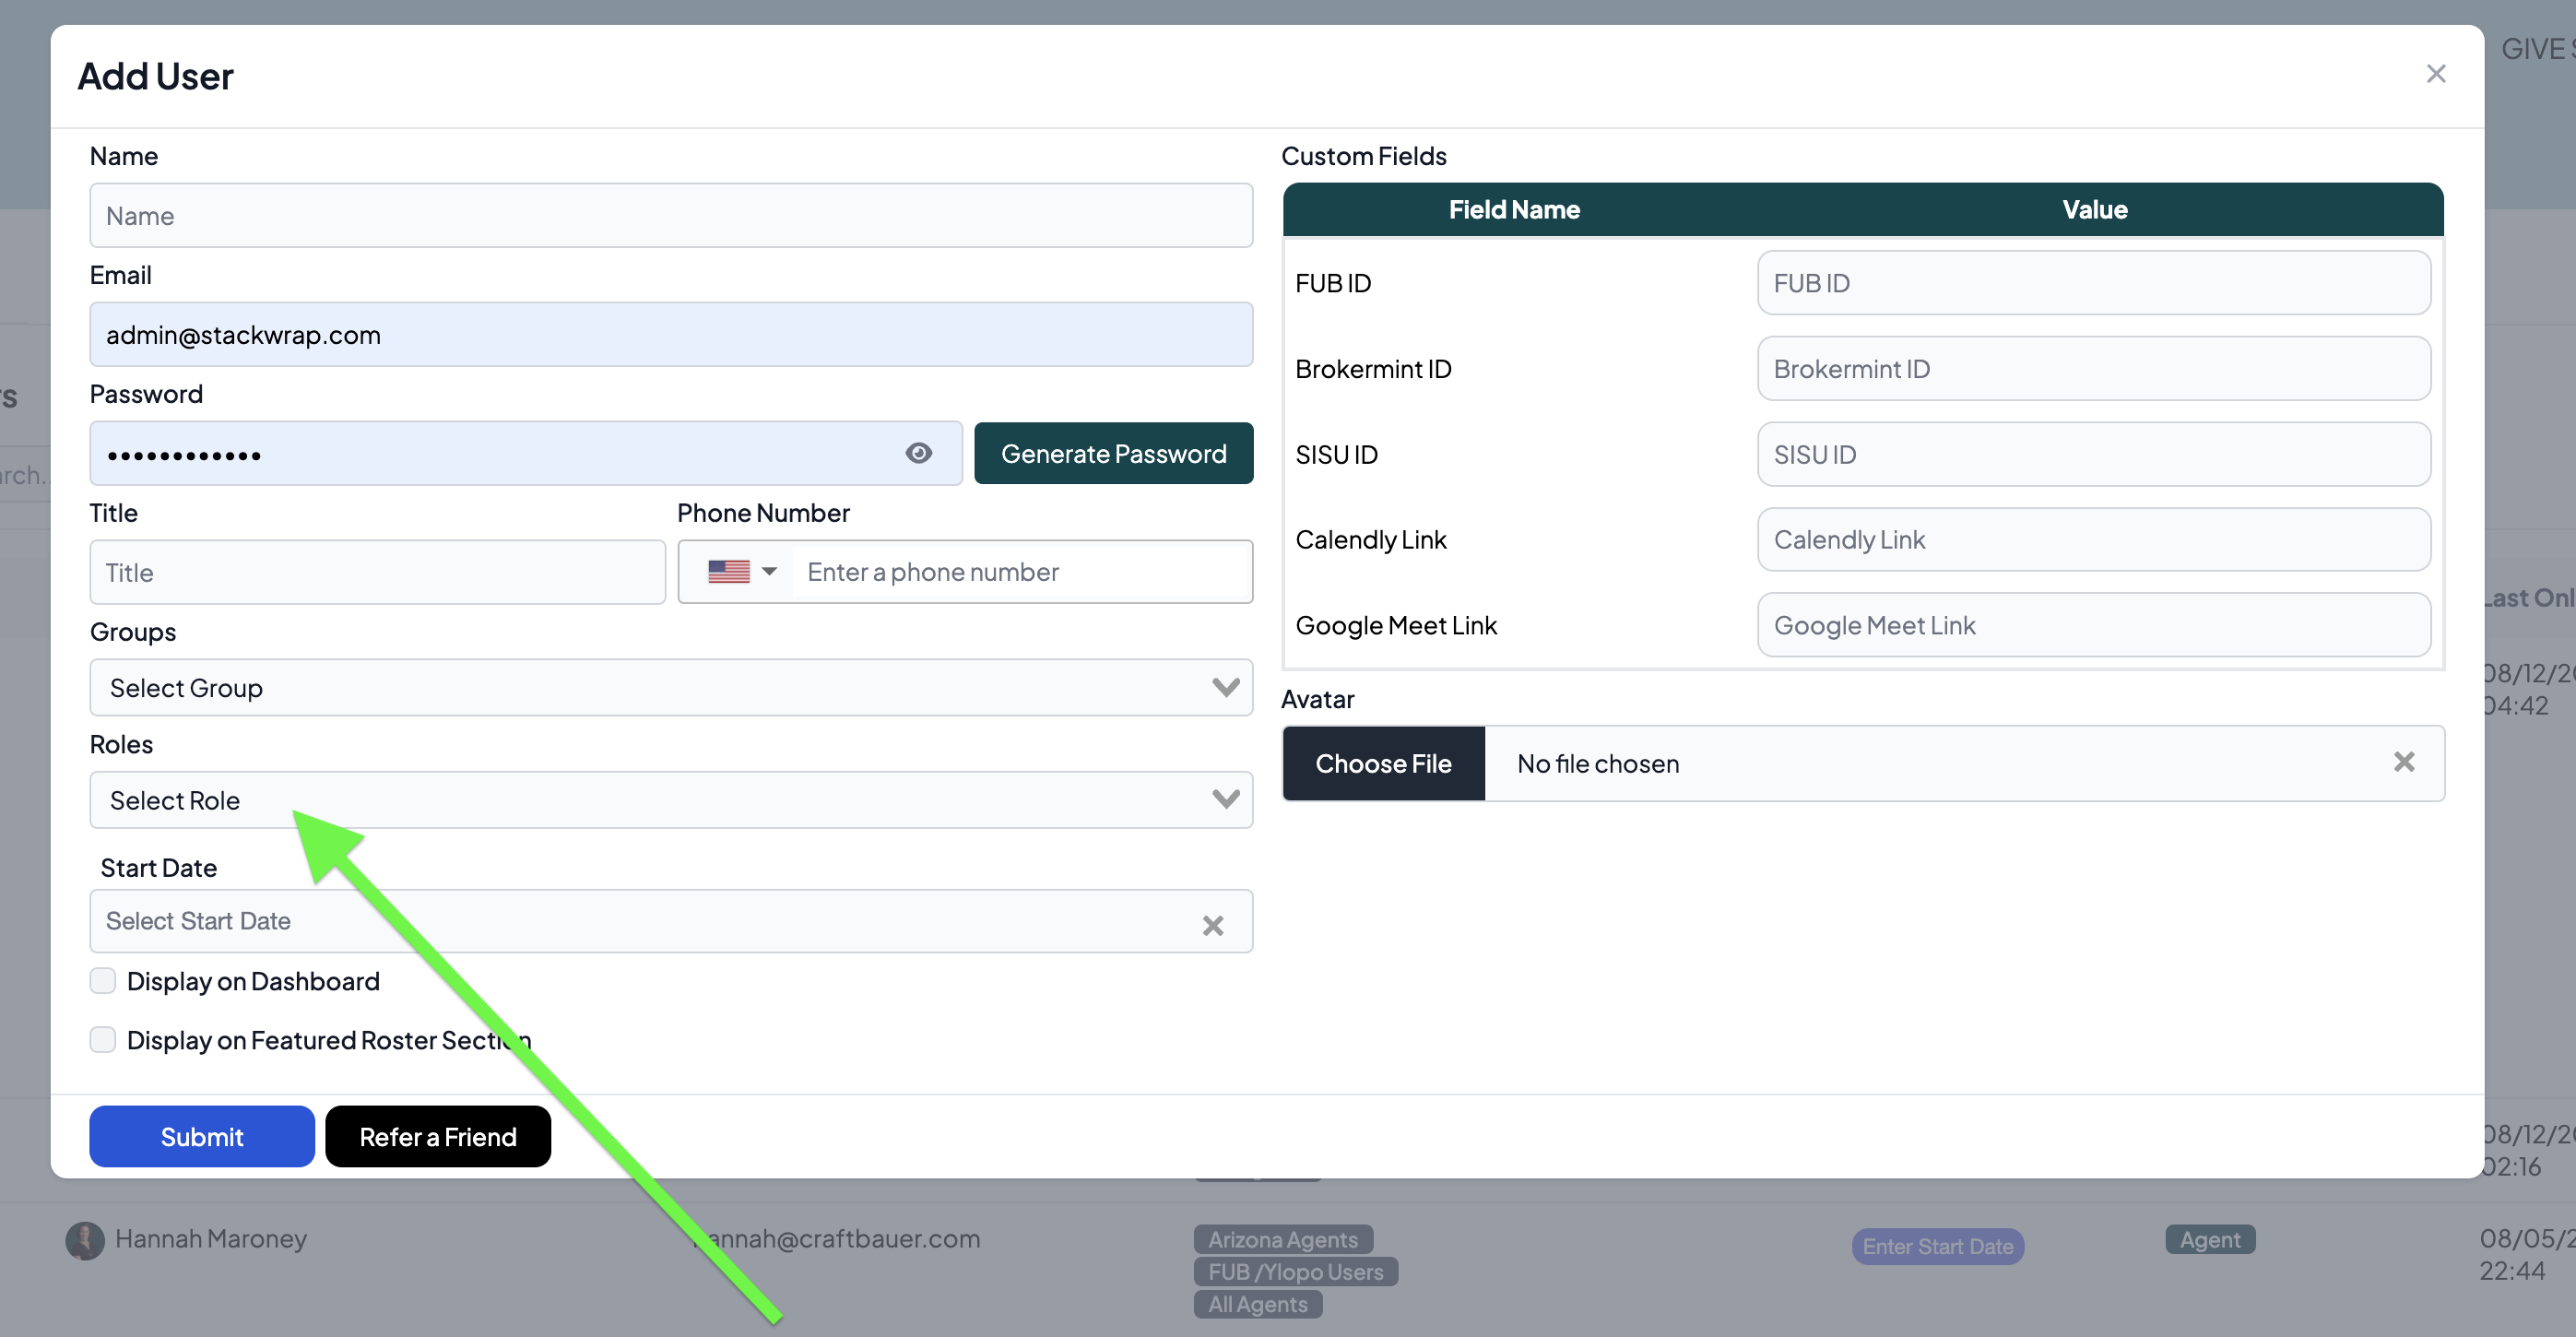
(click Next)
For a tutorial on a adding your users, click below
(click Done)